Italian Cream Stuffed Cannoncini
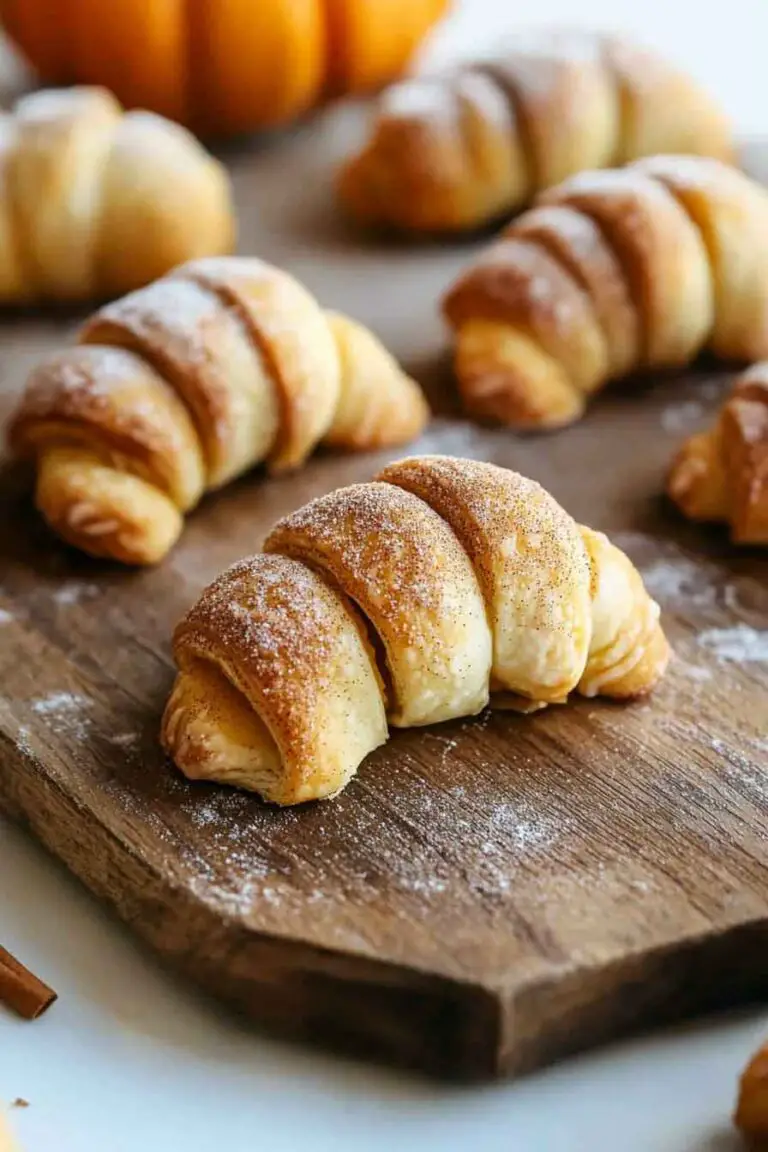
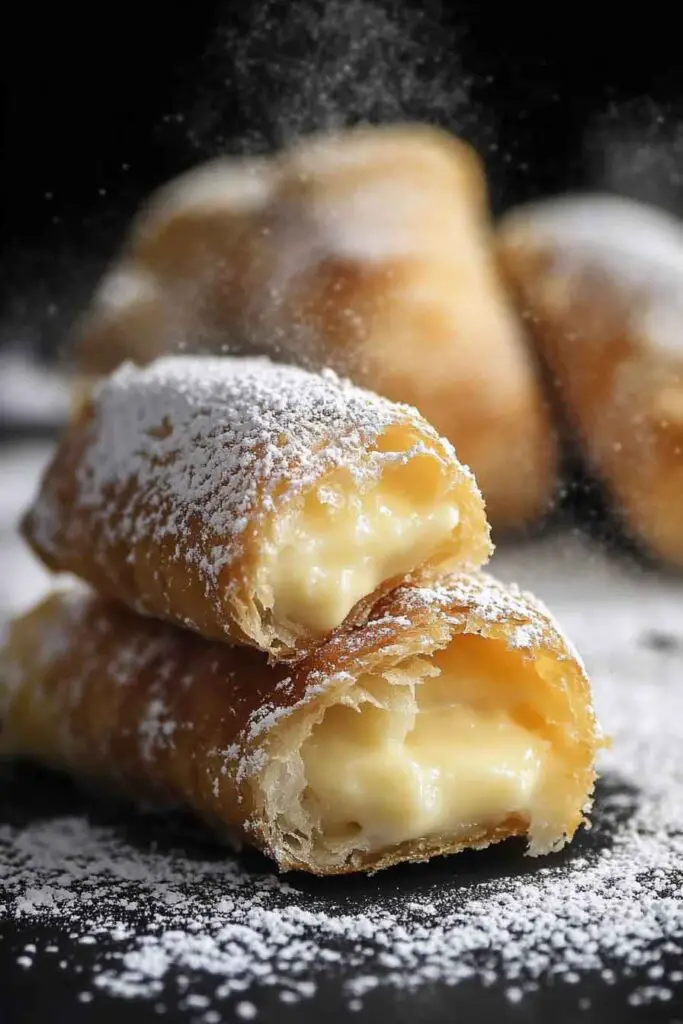
Alright, these Italian Cream Stuffed Cannoncini? They’re crispy, flaky, and filled with sweet, silky cream that melts in your mouth. Golden pastry on the outside, rich Italian filling on the inside—so dreamy.
I made them for a weekend treat, and they looked fancy but were super fun to make. That first crunchy bite with the creamy center? Total bliss.
Don’t worry, they’re easier than they look. Just bake, fill, and enjoy. Let’s make a batch together—you’re gonna feel like you’re in a little Italian bakery!

Why You’ll Love This Recipe
- Bakery-Quality at Home: These look just like the ones behind the glass at Italian pastry shops, but you can make them in your own kitchen without special training.
- A Perfect Contrast of Textures: The crisp puff pastry contrasts beautifully with the creamy filling for a balanced dessert.
- Simple Ingredients, Big Flavor: Nothing complicated—just eggs, milk, sugar, flour, and vanilla come together to create a smooth, rich cream.
- Kid-Friendly & Crowd-Pleasing: These are fun to eat and make for great finger desserts at parties or gatherings.
- Flexible for Flavors: You can easily switch up the cream by adding lemon zest, almond extract, or even cocoa powder to make your own version.
What You Need to Know Before You Start
Prep Time & Cook Time
- Prep Time: 25 minutes
- Cook Time: 20 minutes
- Chill Time for Cream: 30 minutes
- Total Time: Approximately 1 hour and 15 minutes
Servings
This recipe makes 10 to 12 cannoncini, depending on how wide you roll the pastry and how tightly you wrap them around the molds. Each one is about the size of a hand-held treat, making it ideal for sharing.
Difficulty
This is a great beginner recipe if you’ve never worked with puff pastry before. The hardest part is shaping the cones and filling them neatly—but even that gets easier with practice. If you’ve used a piping bag before, you’re already halfway there.
Required Kitchen Tools
Before you begin, gather these tools so everything goes smoothly:
- Baking Sheet: For baking the puff pastry cones.
- Parchment Paper: Prevents sticking and makes clean-up easy.
- Pastry Brush: Used to apply the egg wash, giving the cones a shiny, golden look.
- Medium Saucepan: For cooking the pastry cream.
- Whisk: Helps prevent lumps in the cream.
- Mixing Bowl: To cool the pastry cream before piping.
- Cannoncini Molds: These are small, cone-shaped metal molds available online or at kitchen stores.
No molds? You can make your own by rolling thick strips of aluminum foil into cones and wrapping them in parchment. - Piping Bag: Essential for filling the cones. A zip-top bag with the tip cut off can also work in a pinch.
- Cooling Rack (Optional): Lets the pastry cool without getting soggy on the bottom.
Ingredients for Italian Pastry Cream
The cream is a stovetop-cooked custard that’s smooth, lightly sweet, and deeply comforting. Here’s what you’ll need:
- 3 large egg yolks: They give the cream a rich texture and help thicken it naturally.
- 3 tablespoons (30g) all-purpose flour: For thickening. Sift if lumpy.
- ½ cup (100g) granulated sugar: Adds sweetness without being overpowering.
- 1 teaspoon vanilla extract: For warm, aromatic flavor. Pure vanilla works best.
- 8 oz (235ml) whole milk: Creaminess matters here—whole milk creates the right texture.
Tip: Be sure the milk is warmed slightly before adding it to the egg mixture to avoid curdling. You’ll stir constantly, which helps prevent lumps.
Ingredients for the Cannoncini Shells
These form the flaky, crisp cone that holds the cream. The sugar caramelizes during baking to add crunch and a light gloss.
- 1 sheet puff pastry (about 8 oz / 225g): Thawed in the fridge if frozen. Puff pastry sheets usually come folded—just unfold gently and roll if needed.
- ¼ cup (50g) granulated sugar: For sprinkling onto the pastry strips before rolling. It adds crunch and a touch of caramel flavor.
- 1 egg (for egg wash): Beat it in a small bowl and use it to brush over the pastry so it bakes golden.
- Powdered sugar, for dusting: Gives the final touch of sweetness and makes them look beautiful when served.
Variations for Italian Cream Stuffed Cannoncini
Here are some simple ways to adjust the flavor and presentation based on your preferences:
- Chocolate-Lovers’ Version: Add 2 tablespoons of cocoa powder to the pastry cream while cooking. You can also dip the tips of the baked cones in melted chocolate before filling them.
- Citrus Twist: Add 1 teaspoon of lemon or orange zest to the cream for a light, refreshing flavor. Pairs beautifully with spring or summer menus.
- Almond Cream Filling: Replace vanilla with almond extract (start with ½ teaspoon—it’s strong!) and top the cones with slivered almonds after baking.
- Nutella-Filled Cannoncini: Instead of pastry cream, use a piping bag to fill with chocolate hazelnut spread. No cooking required, just assemble and serve.
- Savory Option: Skip the sugar and use plain pastry shells filled with ricotta and herbs for a unique appetizer version.

How to Make Italian Cream Stuffed Cannoncini – Step-by-Step Instructions
Step 1: Make the Pastry Cream
- Whisk the Egg Yolks, Sugar, and Flour
In a medium bowl, whisk together the 3 egg yolks, ½ cup sugar, and 3 tablespoons flour until smooth and pale yellow. This step ensures your cream is silky and lump-free. - Warm the Milk
In a saucepan, gently heat the 8 oz milk over low heat just until it starts to steam—don’t let it boil. Slowly pour about ⅓ of the warm milk into the egg mixture, whisking constantly to temper the eggs. - Cook the Mixture
Pour the tempered egg mixture back into the saucepan with the rest of the milk. Place it over medium heat and whisk continuously. In about 5–8 minutes, it will thicken to a pudding-like consistency. - Add Vanilla & Cool
Remove from heat and stir in 1 teaspoon vanilla extract. Pour into a bowl, press plastic wrap directly on the surface (to prevent a skin from forming), and let it chill in the fridge for at least 30 minutes.
Step 2: Prepare the Puff Pastry Shells
- Preheat the Oven & Line the Tray
Set your oven to 400°F (200°C). Line a baking sheet with parchment paper to keep the cones from sticking. - Cut the Pastry into Strips
On a lightly floured surface, unroll the thawed puff pastry. Use a sharp knife or pizza cutter to slice it into long strips about ¾ inch (2 cm) wide. - Wrap Around Molds
Lightly grease the metal cannoncini molds. Starting at the tip of the mold, wrap one pastry strip around each cone, overlapping slightly as you go. Don’t wrap too tightly—leave a little room for the pastry to expand. - Brush and Sprinkle
Beat the egg in a small bowl. Brush each wrapped cone lightly with egg wash using a pastry brush. Then sprinkle each cone with a bit of granulated sugar—this adds sweetness and helps it crisp in the oven. - Bake the Cones
Place the cones seam-side down on the prepared tray. Bake for 15–20 minutes, or until puffed and golden brown. Remove from oven and let cool for 5–10 minutes before gently sliding them off the molds.
Step 3: Assemble the Cannoncini
- Fill the Piping Bag
Once the pastry cream is chilled, transfer it to a piping bag fitted with a round or star-shaped tip. - Pipe the Cream
Gently pipe the cream into the cooled pastry shells. Start from one end and fill until it reaches the other side. - Dust with Powdered Sugar
For the final touch, dust each filled cannoncino with a light sprinkle of powdered sugar. Serve immediately or refrigerate until ready to eat.
Serving and Decoration
Italian Cream Stuffed Cannoncini are best served chilled or at room temperature. Their elegant appearance and handheld size make them ideal for:
- Dessert platters at parties or special dinners
- Tea-time snacks, paired with coffee or espresso
- Holiday trays alongside cookies, biscotti, or fruit
- Birthday and baby showers, as part of a delicate dessert table
To enhance presentation:
- Lightly dust with powdered sugar just before serving
- Add a fresh berry or mint leaf near the cream tip for color
- Dip the cone ends in melted chocolate or crushed nuts for texture
How to Store Italian Cream Stuffed Cannoncini
- Filled Cannoncini: Store in an airtight container in the fridge for up to 2 days. For best texture, enjoy within 24 hours.
- Pastry Shells Only: Can be made ahead and stored unfilled for up to 3 days in an airtight container at room temperature.
- Pastry Cream: Keep covered in the refrigerator for up to 3 days. Stir well before using.
Tip: Don’t freeze filled cannoncini—they’ll become soggy. However, the pastry shells can be frozen unfilled and crisped up in the oven before serving.
Tips and Tricks for Success
- Don’t overfill the molds with pastry; overlapping too much can make them tough to remove after baking.
- Seal the end of the pastry strip well when wrapping the cone to prevent unrolling in the oven.
- Keep your pastry cold. If it becomes too soft, pop it in the fridge for 10 minutes before shaping.
- Use a smooth piping motion to avoid air pockets inside the cones.
- If the cones won’t release easily, gently twist them off while still slightly warm.
Nutrition
Here is an approximate nutritional breakdown per filled cannoncino:
| Nutrient | Amount (1 Cannoncino) |
|---|---|
| Calories | 185 |
| Total Fat | 10g |
| Saturated Fat | 3g |
| Cholesterol | 65mg |
| Sodium | 85mg |
| Total Carbohydrate | 20g |
| Dietary Fiber | 1g |
| Sugars | 8g |
| Protein | 3g |
Note: Values are approximate and may vary depending on brands used.
Italian Cream Stuffed Cannoncini
Course: Easy Homemade Desserts10–12
cannoncini25
minutes20
minutes185
kcal30
miniutesIngredients
For the Pastry Cream:
3 large egg yolks
3 tablespoons (30g) all-purpose flour
½ cup (100g) granulated sugar
1 teaspoon vanilla extract
8 oz (235ml) whole milkFor the Cannoncini Shells:
1 sheet puff pastry (about 8 oz / 225g), thawed
¼ cup (50g) granulated sugar
1 egg, beaten (for egg wash)
Powdered sugar, for dusting
Directions
- Make the Pastry Cream
Whisk egg yolks, sugar, and flour in a bowl until smooth.
In a saucepan, heat milk until steaming. Slowly whisk into the egg mixture to temper, then return everything to the pot.
Cook over medium heat, whisking constantly, until thickened (about 5–8 minutes).
Stir in vanilla. Transfer to a bowl, cover with plastic wrap touching the surface, and chill for 30 minutes. - Prepare the Shells
Preheat oven to 400°F (200°C). Line a baking sheet with parchment.
Cut puff pastry into ¾-inch strips. Wrap around greased cannoncini molds, overlapping slightly.
Brush with egg wash and sprinkle with sugar.
Bake 15–20 minutes or until golden brown. Let cool slightly, then carefully slide off molds. - Assemble
Fill a piping bag with chilled cream. Pipe into each cooled pastry shell.
Dust with powdered sugar before serving.
Italian Cream Stuffed Cannoncini FAQs
Can I make this recipe without cannoncini molds?
Yes. You can form cones using rolled aluminum foil wrapped in parchment paper. Just make sure they’re firm enough to hold shape while baking.
Can I use store-bought custard instead of making pastry cream?
You can, though homemade pastry cream offers better texture and flavor. If short on time, a thick vanilla pudding can substitute.
How do I keep the pastry crisp?
Assemble just before serving for best results. If you’re preparing ahead, store the cream and shells separately and fill when ready to serve.
Is there a gluten-free option?
Use gluten-free puff pastry and substitute a gluten-free flour blend for thickening the pastry cream.
Conclusion
Italian Cream Stuffed Cannoncini combine the flaky magic of puff pastry with the velvety richness of pastry cream in one elegant, bite-sized dessert. Whether you’re serving them at a celebration or just treating yourself, they’re a lovely way to bring a bit of Italian sweetness to your table.
Enjoy them fresh for the perfect balance of crisp and creamy, or fill them just before serving to keep the texture just right. With a simple list of ingredients and approachable steps, this recipe is one you’ll return to again and again.