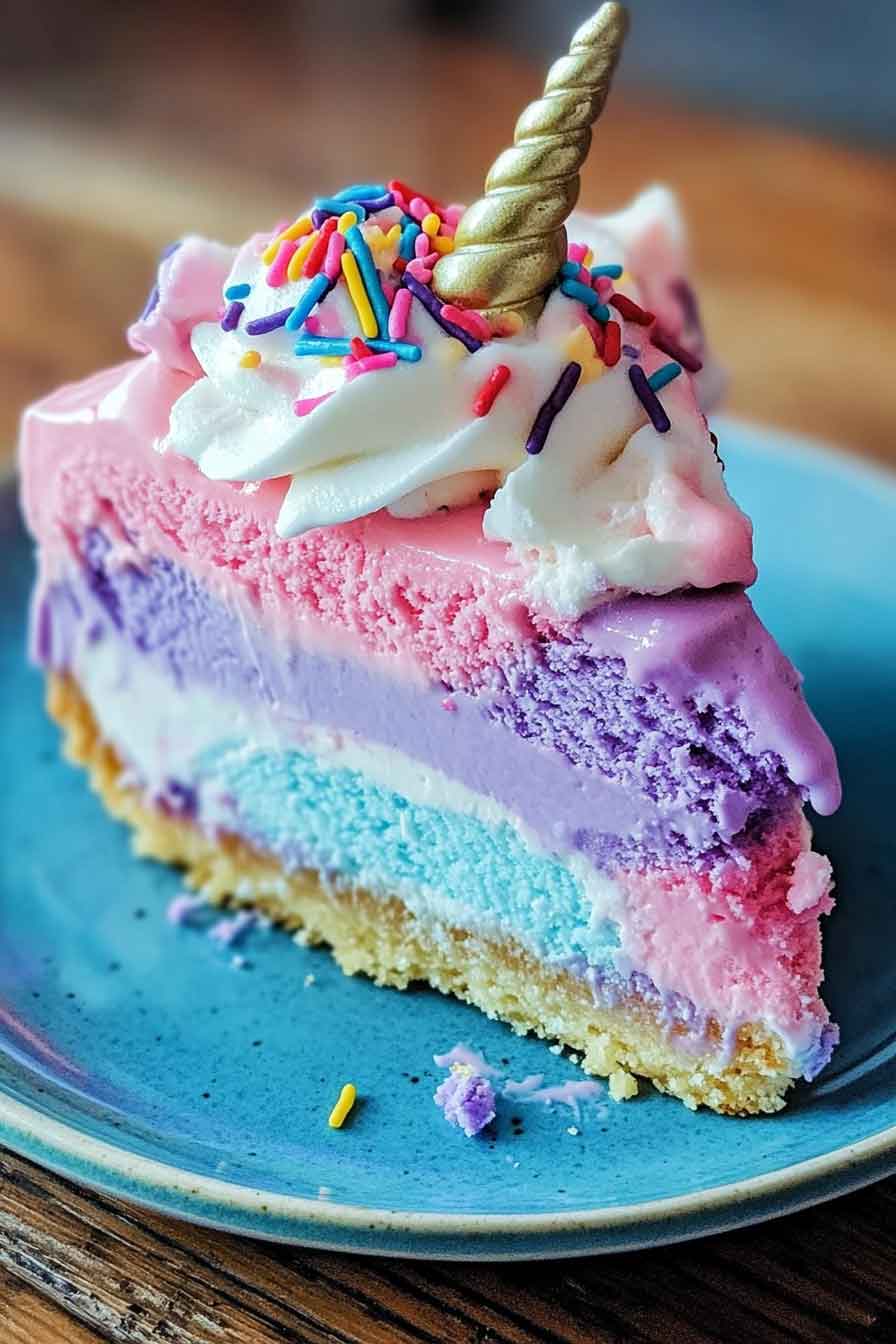
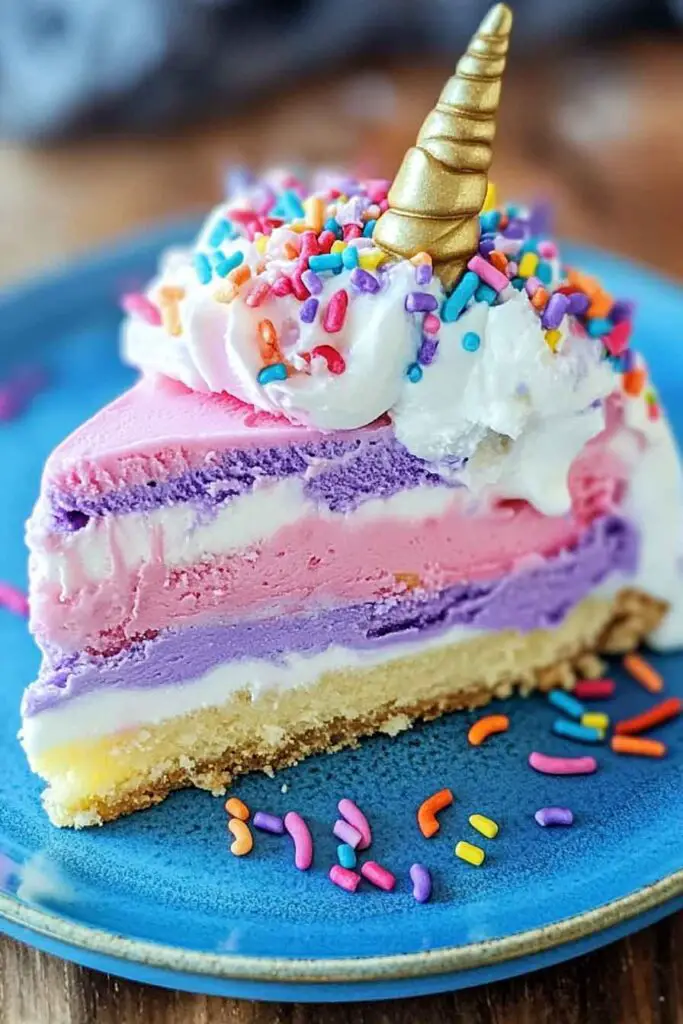
Ultimate Unicorn Ice Cream Cake
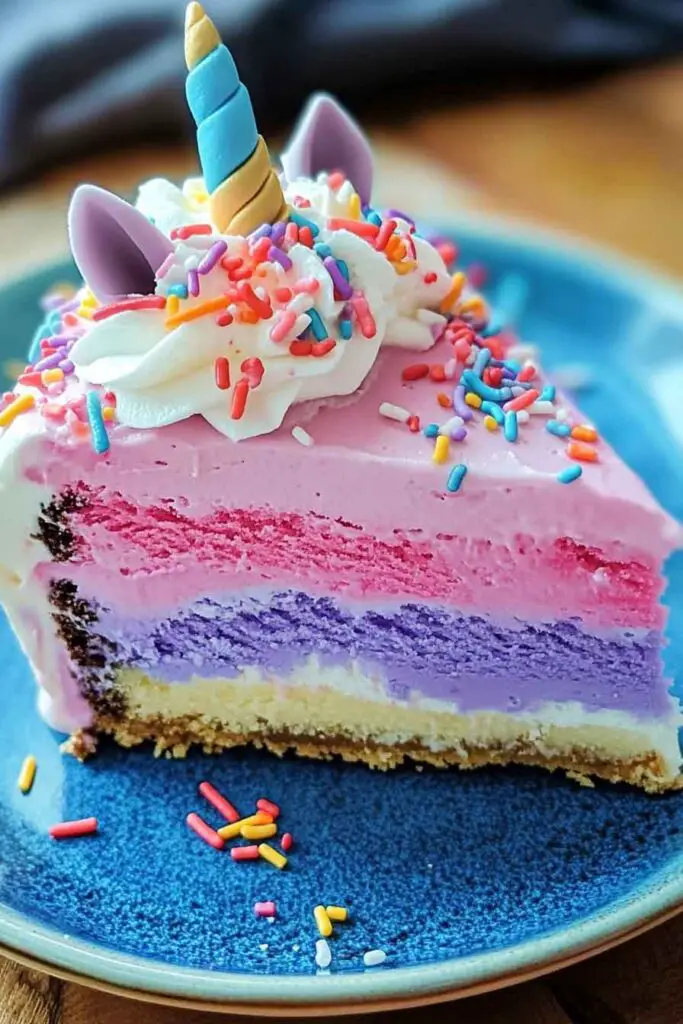
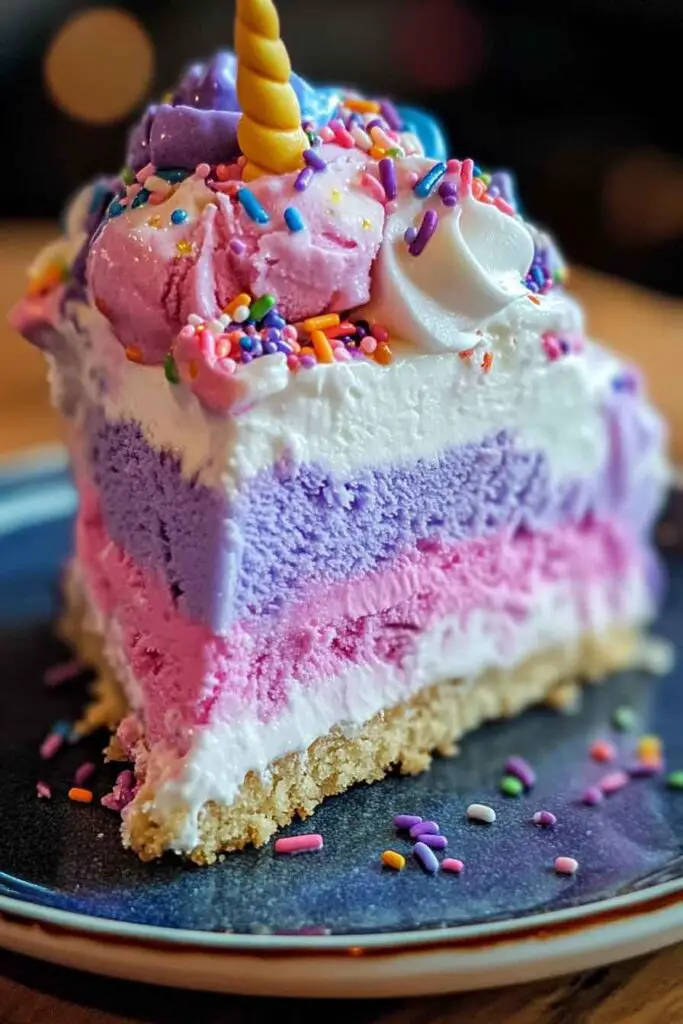
Okay, so this Ultimate Unicorn Ice Cream Cake? It’s pure magic. Bright colors, creamy layers, and sprinkles everywhere—it’s like a party on a plate.
I made it for my niece’s birthday, and oh my gosh… she couldn’t stop smiling. Every slice had pinks, blues, and all the fun stuff. And yep, it tastes as good as it looks.
It’s super easy, no oven needed. Just layer, freeze, and decorate. Let’s make it together—it’s gonna be so much fun!

Why You’ll Love This Recipe
- A Showstopper Dessert: It looks impressive with vibrant layers and glittery toppings, but it’s surprisingly simple to make using cake mix and softened ice cream.
- No Fancy Skills Required: You don’t need to be a cake artist. If you can spread ice cream and stack layers, you can make this cake.
- Custom-Friendly: Choose your favorite ice cream flavors or match the colors to a party theme—this recipe is flexible.
- Perfect for All Ages: Kids love the fun colors and sprinkles. Adults appreciate the nostalgic flavor combo and cool, refreshing texture.
What You Need to Know Before You Start
Prep Time & Chill Time:
- Prep Time: 25–30 minutes to bake and build
- Bake Time: 30 minutes for the vanilla cake
- Freeze Time: 4 to 6 hours minimum (overnight preferred)
- Total Time: About 5–6 hours (most of this is freezing time)
You’ll need to bake and cool the cake first. Then you’ll layer the softened ice cream and freeze it solid before topping it with whipped cream. Give yourself enough time—this isn’t a last-minute dessert, but most of it is hands-off.
Servings:
This cake serves 12 people. Each slice is rich and satisfying, so it goes a long way. You can easily double the recipe and make a two-layer cake for larger groups.
Difficulty Level:
Easy to moderate. There’s no baking from scratch, and the layering process is very beginner-friendly. If you’ve made a sandwich or spread frosting before, you can do this!
Required Kitchen Tools
Before you begin, gather everything you need:
- Two 9-inch round cake pans (for the cake and ice cream layers)
- Mixing bowls (one for cake mix, one for whipped cream)
- Electric mixer or whisk (to beat the cream and mix the cake batter)
- Rubber spatula (to spread the ice cream and whipped cream)
- Serrated knife (for leveling the cake if needed)
- Offset spatula (optional, helps with smoother layers)
- Parchment paper or plastic wrap (for easy pan lining and removal)
- Freezer space (make sure there’s a flat spot to hold the cake pan)
- Cake stand or large plate (for serving and decorating)
Ingredients for the Unicorn Ice Cream Cake
Let’s walk through what you’ll need for each part of the cake.
Cake Base
We’ll start with a simple vanilla cake using a boxed mix. It keeps things easy, and it holds up well under the frozen layers.
- 1 box vanilla cake mix
- 3 large eggs
- 1 cup water
- ½ cup vegetable oil
You’ll bake this in one 9-inch round pan. If you prefer a taller cake, you can split the batter between two pans and use both as separate cake layers with ice cream in between.
Ice Cream Layers
Use good-quality ice cream for flavor and structure. Let each pint soften at room temperature for 10–15 minutes before spreading.
- 1 pint strawberry ice cream (pink)
- 1 pint mint chocolate chip ice cream (green with chocolate flecks)
- 1 pint blueberry ice cream (blue or purple tone)
You can substitute any flavors that match your theme. Vanilla, cotton candy, or bubblegum flavors also work great.
Whipped Cream Frosting
This light, fluffy topping balances the sweetness of the cake and ice cream.
- 2 cups heavy whipping cream (cold)
- ½ cup powdered sugar (adds sweetness without grit)
- 1 teaspoon vanilla extract
- Gel food coloring (optional: pink, blue, purple for tinting the cream)
You can divide the whipped cream into small bowls and tint each with food coloring to swirl pastel colors over the top of the cake. This creates a cloud-like, unicorn-inspired look.
Decorations
Add your finishing touches. These fun extras turn your cake into a unicorn fantasy.
- Rainbow sprinkles
- Edible glitter
- Mini marshmallows (optional)
- Candy stars or pearls (optional)
- Unicorn cake topper (optional but great for parties)
Variations for Unicorn Ice Cream Cake
The fun part about this cake is how flexible it is. Here are a few ways to customize it based on your preferences or occasion:
- Change the Ice Cream Flavors: Instead of strawberry, mint, and blueberry, try vanilla, cotton candy, or raspberry ripple. Choose any flavors that match your color scheme.
- Use a Different Cake Base: You can swap the vanilla cake mix for funfetti, strawberry, or even chocolate if you want a bolder flavor.
- No Cake Version: Skip the cake layer and stack only ice cream layers. Add crushed cookies or graham crackers between layers for texture.
- Add a Crunch Layer: Crushed Oreos, frosted cereal, or shortbread crumbs can go between ice cream layers to add a surprise crunch.
- Make it Vegan: Use a plant-based cake mix, dairy-free ice cream, and coconut cream whipped topping.
How to Make the Unicorn Ice Cream Cake: Step-by-Step Instructions
1. Bake the Cake
- Preheat the oven to 350°F (175°C). Grease and line a 9-inch round cake pan with parchment paper.
- In a large mixing bowl, combine the cake mix, eggs, water, and oil. Mix until smooth, about 2–3 minutes.
- Pour the batter into the pan and bake for 28–30 minutes, or until a toothpick comes out clean.
- Let the cake cool completely in the pan for 10 minutes. Then turn it out onto a wire rack to cool fully.
- Once cooled, level the cake top with a serrated knife if it’s domed. This will help create flat layers for stacking.
2. Prepare Ice Cream Layers
- Line a clean 9-inch cake pan with plastic wrap or parchment so you can lift out the frozen layer later.
- Let your first pint of ice cream (e.g., strawberry) soften at room temperature for 10–15 minutes until spreadable but not melted.
- Spread the ice cream evenly into the lined cake pan using a spatula.
- Smooth the surface, cover with plastic wrap, and freeze for 30–45 minutes or until firm.
- Repeat the process with the second (mint chip) and third (blueberry) pints, each in its own layer, refreezing between each one.
- Once all layers are firm, you’ll have three separate ice cream disks, ready to stack.
3. Assemble the Cake
- Place your cooled vanilla cake layer on a serving plate or cake board.
- Remove the first ice cream layer (strawberry) from the pan and place it on top of the cake.
- Add the second ice cream layer (mint chocolate chip), then the third (blueberry), aligning as neatly as possible.
- If needed, trim the sides to make the layers even.
- Cover the entire cake with plastic wrap and freeze for at least 2 hours, or until very firm.
4. Make the Whipped Cream
- In a chilled bowl, whip the heavy cream using a hand mixer or stand mixer on high speed until soft peaks form.
- Add powdered sugar and vanilla extract. Continue whipping until stiff peaks form.
- If using food coloring, divide the cream into separate bowls and tint each a different color. Swirl together gently for a pastel rainbow effect.
5. Frost and Decorate
- Take the frozen cake out of the freezer. Quickly frost the top and sides with the whipped cream using an offset spatula.
- Add sprinkles, edible glitter, and candies before the whipped cream sets.
- Return the decorated cake to the freezer for another 30 minutes before serving.
Serving and Decoration
This cake is best served right out of the freezer, especially if you’re in a warm environment. Let it sit at room temperature for 5–10 minutes before slicing to soften just enough for a clean cut.
How to Serve Unicorn Ice Cream Cake
- Use a sharp knife dipped in warm water to slice through the frozen layers more easily. Wipe the blade clean between cuts for neat slices.
- Add a dollop of whipped cream or a scoop of extra ice cream on the side for presentation.
- Top each slice with a few extra sprinkles or glitter right before serving to refresh the color and sparkle.
This cake is perfect for:
- Birthday parties
- Sleepovers
- Summer celebrations
- Themed events like rainbow or fairy-tale parties
Storing Unicorn Ice Cream Cake
Proper storage keeps your cake fresh and prevents freezer burn.
- Wrapped Storage: Cover the entire cake in plastic wrap, then aluminum foil. This seals in moisture and keeps odors out.
- Container Option: If space allows, store the cake in an airtight cake carrier that fits in the freezer.
- Shelf Life: Best enjoyed within 5–7 days. After that, the texture of the whipped cream and ice cream may change.
Tip: If you’re making the cake ahead of time, decorate it the day you plan to serve it. Sprinkles and toppings hold up better when added fresh.
Tips and Tricks for Success
- Soften, Don’t Melt: Ice cream should be soft enough to spread, but not runny. Too soft, and it won’t hold its shape; too hard, and it won’t spread easily.
- Freeze Between Layers: Be patient—freezing between each layer keeps everything from slipping or melting.
- Use Gel Food Coloring: Gel or paste color gives vibrant pastel shades without thinning the whipped cream.
- Make Ahead: You can bake the cake and build the ice cream layers a day or two in advance. Just frost and decorate the day of your event for the freshest look.
Nutrition
| Nutrient | Per Slice (1 of 12) |
|---|---|
| Calories | ~390 |
| Total Fat | 21g |
| Saturated Fat | 12g |
| Cholesterol | 75mg |
| Sodium | 240mg |
| Carbohydrates | 44g |
| Sugars | 32g |
| Protein | 4g |
| Calcium | 8% DV |
| Iron | 4% DV |
Nutrition is approximate and varies based on ice cream brand and decoration choices.
Ultimate Unicorn Ice Cream Cake
Course: Uncategorized25
minutes30
minutes390
kcal4–6
hourIngredients
For the Cake:
1 box vanilla cake mix
3 large eggs
1 cup water
½ cup vegetable oilFor the Ice Cream Layers:
1 pint strawberry ice cream
1 pint mint chocolate chip ice cream
1 pint blueberry ice creamFor Whipped Cream:
2 cups heavy whipping cream
½ cup powdered sugar
1 tsp vanilla extract
Food coloring (optional: pink, blue, purple)For Decorating:
Rainbow sprinkles
Edible glitter
Unicorn cake topper (optional)
Directions
- Bake Cake: Preheat oven to 350°F (175°C). Mix cake ingredients, bake in greased 9-inch pan for 28–30 mins. Cool completely and level top if needed.
- Prepare Ice Cream Layers: Line a 9-inch pan with parchment. Soften ice cream, spread into pan, and freeze 30–45 mins each. Repeat for all 3 flavors.
- Assemble Cake: Place cake layer on serving plate. Stack frozen ice cream layers on top. Freeze the full cake at least 2 hours.
- Whip Cream: Beat cream, sugar, and vanilla until stiff peaks form. Tint if desired.
- Decorate: Frost cake with whipped cream. Add sprinkles, glitter, and topper. Freeze 30 mins more before serving.
FAQs
Q: Can I make this without a cake layer?
Yes. You can layer just the ice cream flavors and use crushed cookies or cereal between layers for structure.
Q: How far in advance can I make this cake?
You can make the whole cake 2–3 days in advance. Decorate on the day you plan to serve it for best results.
Q: Can I use store-bought whipped topping instead?
Absolutely. It won’t be quite as fluffy, but it works in a pinch.
Q: Can I use a square pan or loaf pan?
Yes. You can adjust the size or shape, just make sure each layer fits snugly for clean stacking.
Conclusion
This Ultimate Unicorn Ice Cream Cake combines the fun of ice cream with the soft texture of cake and the wow-factor of rainbow colors and glitter. It’s simple enough to make with kids but pretty enough to impress at a party. Whether it’s a birthday, celebration, or just a weekend treat, this cake is pure joy in every layer.
Give it a try, and don’t be afraid to get creative. Mix and match flavors, decorate your own way, and most of all—enjoy the process as much as the result.