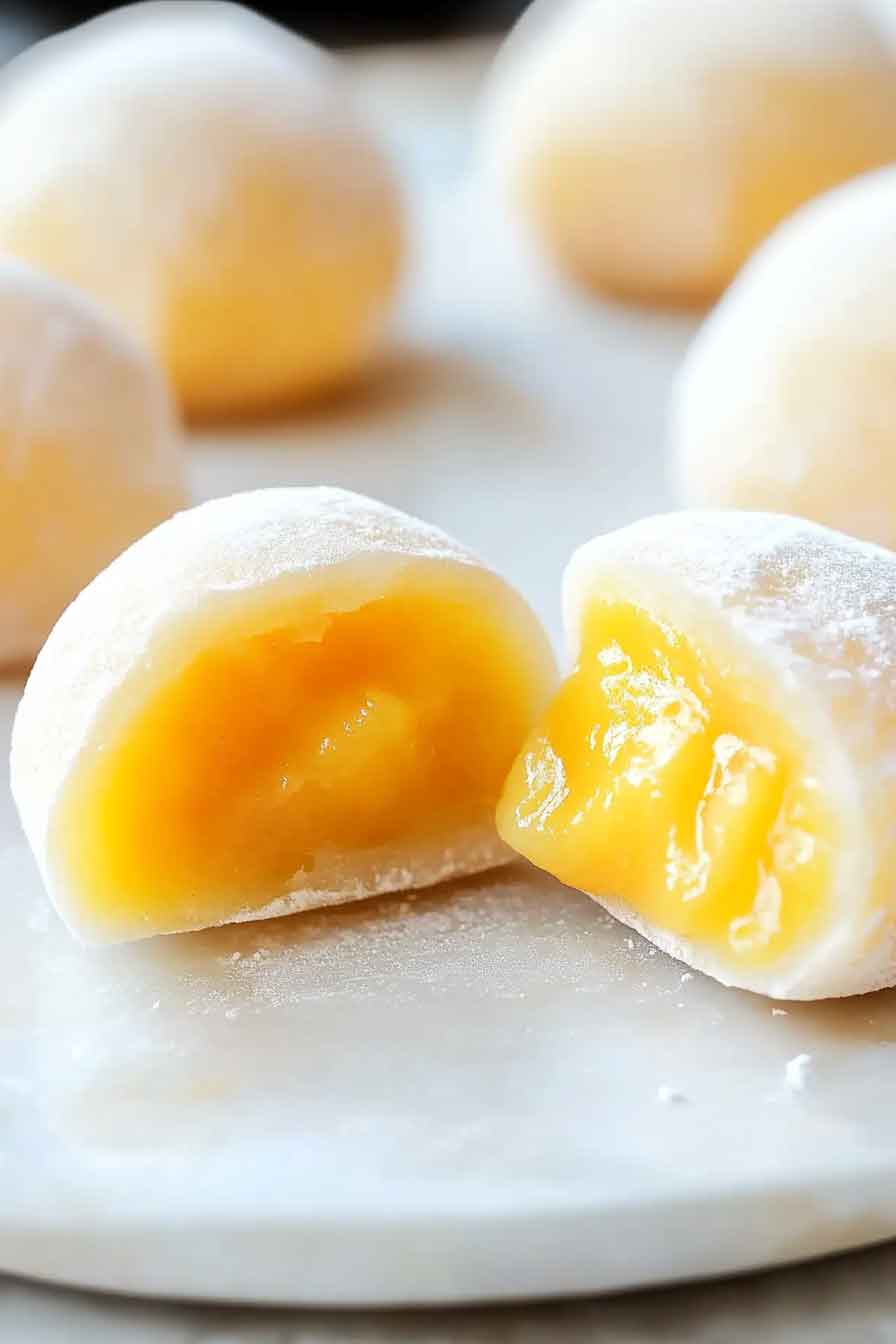
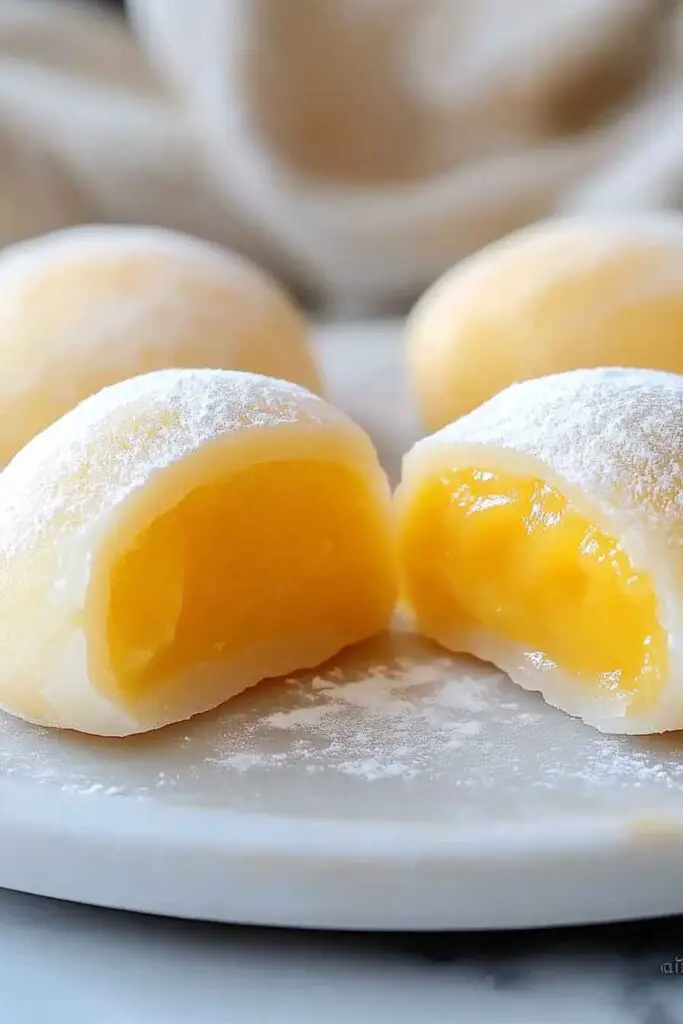
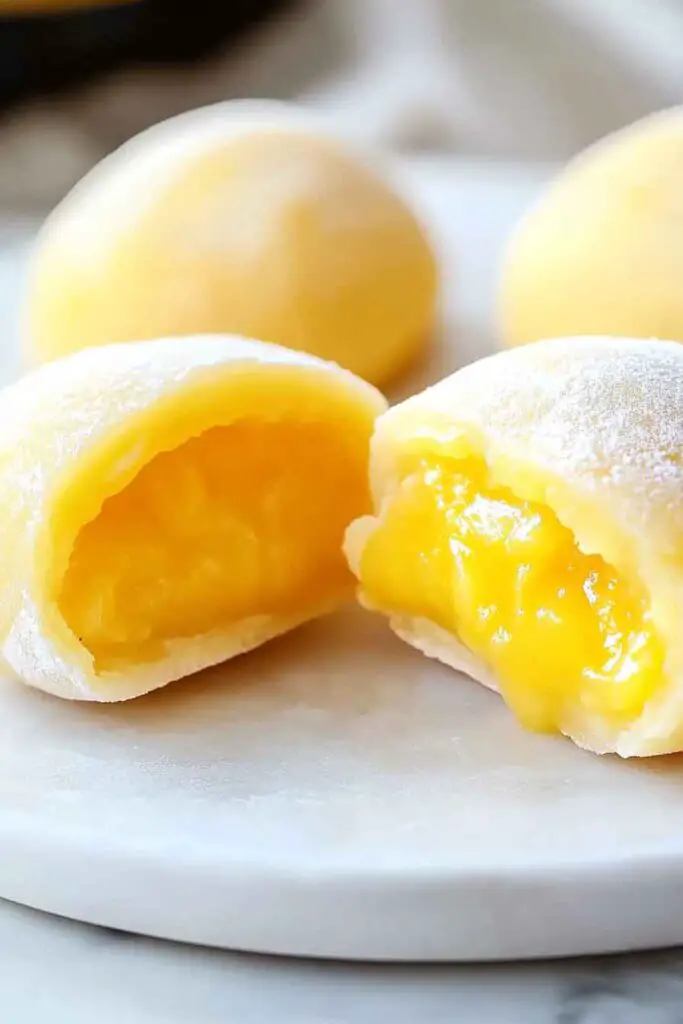
Simple 3-Ingredient Mango Mochi
Craving a sweet, chewy, and tropical treat that’s super easy to make? These 3-Ingredient Mango Mochi are the perfect combination of simplicity, flavor, and fun!
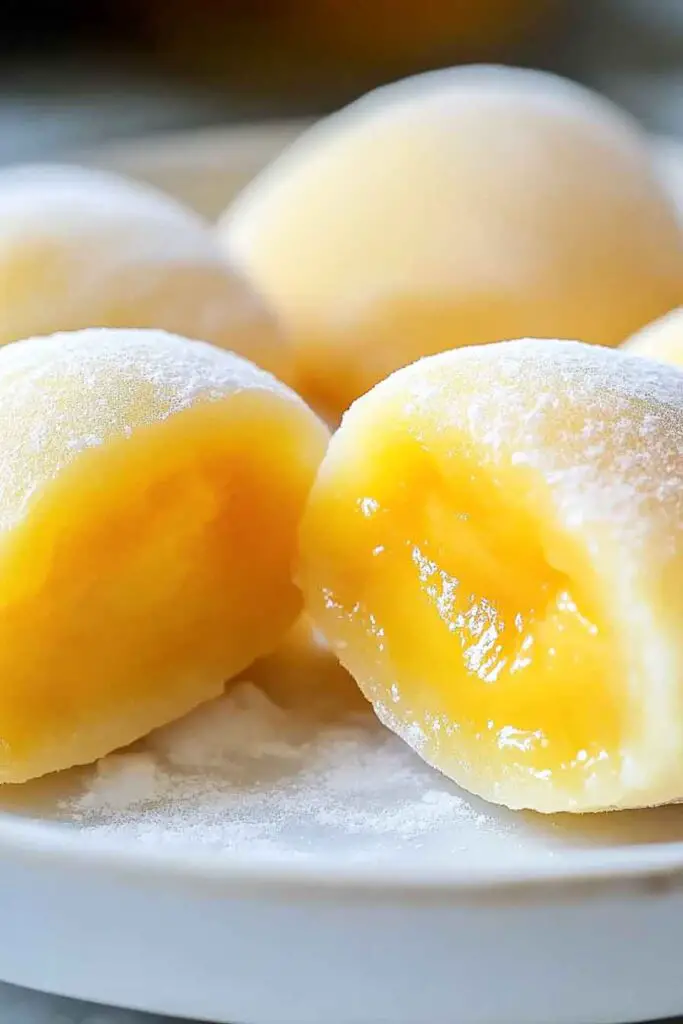
Imagine soft, chewy mochi filled with the refreshing sweetness of ripe mango, all made with just three simple ingredients. It’s the perfect dessert or snack when you want something light, fruity, and satisfying!
These mango mochi are perfect for anyone who loves the tropical taste of mango and the chewy texture of mochi. They’re quick to make, naturally sweet, and completely customizable to your taste!

Ready to make this easy, delicious treat? Let’s whip up these Simple 3-Ingredient Mango Mochi and enjoy a refreshing, chewy snack in no time!
Why You’ll Love This Recipe
- Just 3 Ingredients: You likely have them in your kitchen already. No long grocery list here.
- Fruity and Soft: The mango gives it a naturally sweet, tropical taste with a chewy mochi bite.
- Quick to Make: No steaming or oven needed. Microwave-ready in minutes.
- Kid-Friendly: Safe and fun to make with kids—easy cleanup too.
- Gluten-Free & Vegan: Naturally gluten-free and dairy-free—great for many diets.
What You Need to Know Before You Start
Prep Time & Cook Time:
Prep Time: 5 minutes
Cook Time: 4–6 minutes
Total Time: Under 10 minutes
Servings:
This recipe makes 6 to 8 mini mango mochi pieces—perfect for a small batch or quick snack. You can double or triple the recipe if you want more.
Difficulty:
Very easy—beginner-friendly and microwave-based. You don’t need special skills or tools.
Required Kitchen Tools
Here’s what I use each time:
- Microwave-safe bowl
- Silicone spatula or spoon
- Measuring cups
- Fine mesh strainer (optional, for smoother mango purée)
- Small rolling pin or your hands (for shaping)
- Cornstarch or potato starch (for dusting – optional but helpful)
Ingredients for Simple 3 Ingredient Mango Mochi
These three ingredients form the chewy, fruity magic:
- 1 cup glutinous rice flour (sweet rice flour): This is what makes the mochi chewy. Don’t use regular rice flour—it won’t work.
- 1/2 cup mango purée: Use ripe, fresh mangoes and blend until smooth. You can strain for an extra silky texture.
- 1/4 cup sugar: Granulated sugar helps sweeten and balance the mango’s tartness.
Optional: Cornstarch or potato starch for dusting so the mochi doesn’t stick to your hands or counter.
Variations for Mango Mochi
Want to mix it up? These ideas keep it fun and fresh:
- Use Coconut Milk: Swap out part of the mango puree with coconut milk for a creamier texture and tropical flavor.
- Add Fruit Bits: Stir in small pieces of fresh mango before microwaving for extra bites of juicy mango inside.
- Flavor Twist: Add a splash of vanilla or a pinch of salt to bring out the flavor more.
- Natural Color Boost: Add a tiny bit of turmeric or carrot juice to deepen the golden hue—just for looks, not taste.
- Stuff It: Fill with a small scoop of ice cream, red bean paste, or a mango chunk after it cools for a fun surprise center.
How to Make Mango Mochi – Step-by-Step Instructions
1. Make the Batter
In a microwave-safe bowl, combine glutinous rice flour, mango puree, and sugar. Stir well until there are no lumps. The texture should be smooth and a little thick—like pancake batter.
Tip: If your mango puree is a bit fibrous, strain it through a fine mesh sieve first for a smoother finish.
2. Microwave the Mochi
Cover the bowl loosely with a microwave-safe plate or lid.
Microwave on high for 1 minute. Take it out and stir well. Return it to the microwave and heat in 30-second bursts, stirring in between, until the mixture turns slightly translucent and very sticky—this usually takes 2 to 3 more minutes total.
The mochi is done when it no longer looks wet or floury and pulls away from the sides like a sticky dough.
3. Cool and Dust
Let it cool for about 5–10 minutes—it will still be warm but easier to handle.
Meanwhile, dust your countertop or parchment paper with cornstarch or potato starch. This prevents sticking.
4. Shape and Serve
Turn the mochi out onto the dusted surface. Dust your hands too. Gently flatten the dough, then cut or tear into 6 to 8 pieces. Shape each into a ball or flatten into discs.
Optional: Roll in more starch to keep them from sticking together when storing.
Serving and Decoration
Mango mochi is best enjoyed fresh and slightly warm—but there are a few fun ways to dress it up:
- Dust with Powdered Sugar or Coconut Flakes for extra sweetness and a soft finish.
- Serve with Fresh Mango Cubes on the side for a simple fruity platter.
- Drizzle with Coconut Cream or sweetened condensed coconut milk for added richness.
- Add Edible Flowers or Mint if serving to guests or for photos—pretty and elegant.
These small touches make it feel extra special, even though it’s so simple to make.
How to Serve Mango Mochi
Here’s how I love enjoying this chewy treat:
- As a Snack: Soft, sweet, and easy to pack.
- For Dessert: Serve with green tea or coconut ice cream.
- In Lunchboxes: Slice into smaller bites for little hands.
- On a Dessert Board: Pair with fruits, nuts, and chocolate pieces.
Storing Mango Mochi
- Room Temperature: Store leftovers in an airtight container at room temp for up to 1 day.
- Refrigerator: You can refrigerate for up to 3 days, but they will firm up. Microwave for 10–15 seconds to soften before eating.
- Freezer: Wrap pieces individually and freeze for up to 2 months. Thaw at room temp for a chewy texture.
Avoid stacking mochi pieces without starch or parchment—they’ll stick!
Tips and Tricks for Success
- Use Ripe Mangoes: Sweet, soft mangoes give the best puree and flavor.
- Microwave Time May Vary: Start slow and stir often so it cooks evenly.
- Dust Generously: This helps with shaping and storing—mochi loves to stick.
- Let It Cool Slightly: Handling it while hot can be tricky; warm is perfect.
- Shape Quickly: Once cooled, it gets tougher to mold—work while it’s still flexible.
Nutrition
| Serving Size | 1 piece (approx.) |
|---|---|
| Calories | 95 kcal |
| Carbohydrates | 22 g |
| Sugar | 8 g |
| Protein | 1 g |
| Fat | 0 g |
| Fiber | 1 g |
Note: Values are approximate and may vary based on mango type and brand of flour used.
Simple 3-Ingredient Mango Mochi
Course: Easy Homemade Desserts6-8
pieces5
minutes6
minutes95
kcalIngredients
1 cup glutinous rice flour (sweet rice flour)
1/2 cup fresh mango purée (blended ripe mango)
1/4 cup sugar
Optional for dusting: Cornstarch or potato starch
Directions
- Mix Ingredients: In a microwave-safe bowl, whisk glutinous rice flour, mango purée, and sugar until smooth.
- Microwave: Cover loosely and microwave on high for 1 minute. Stir well. Microwave in 30-second intervals, stirring between, until the mixture is sticky, glossy, and no longer white—about 2–3 more minutes.
- Cool: Let the mixture cool for 5–10 minutes.
- Shape: Dust a surface with cornstarch or potato starch. Turn out the mochi and cut into 6–8 pieces. Dust hands and shape into small balls or discs.
- Serve: Enjoy immediately or store as noted below.
Mango Mochi FAQs
Can I use frozen mango?
Yes. Thaw fully and blend until smooth. You may need to adjust for moisture.
Can I make this without a microwave?
Yes, steam the batter in a heatproof bowl for 15–20 minutes instead.
Why is my mochi too sticky or runny?
It likely needs more cooking. Keep microwaving in 30-second intervals until it thickens.
Can I double the recipe?
Absolutely—just microwave a bit longer and stir often for even cooking.
Conclusion
Mango mochi is one of those desserts that feels special—but takes almost no effort. I love how chewy, fruity, and soft it is with just three ingredients. It’s great for when I want something sweet but simple. And the best part? It’s done in minutes, no fancy tools or long prep needed.
Whether you’re making this for yourself or sharing with friends, this little bite of sunshine always brings a smile. Try it once, and I bet it’ll become a favorite in your snack rotation too.