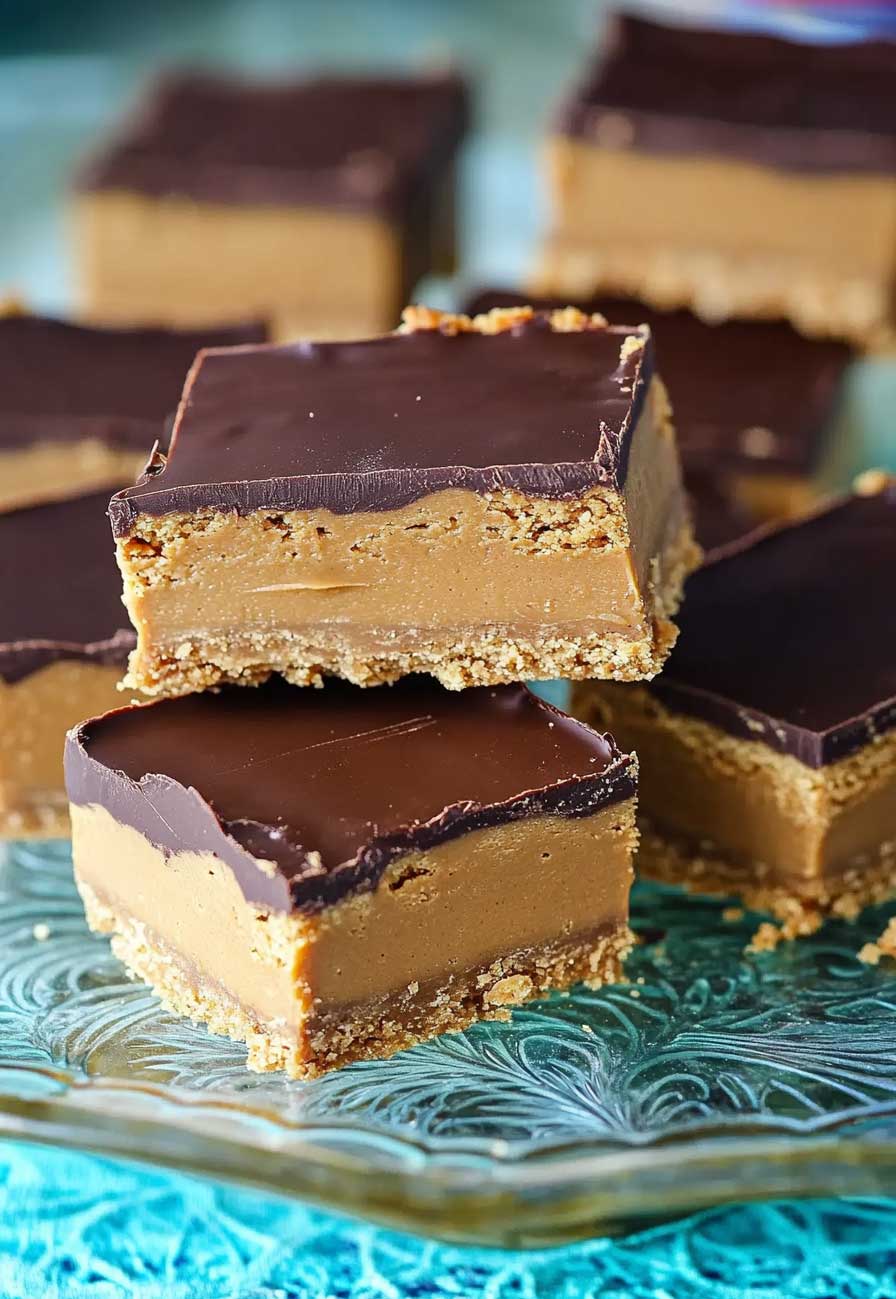
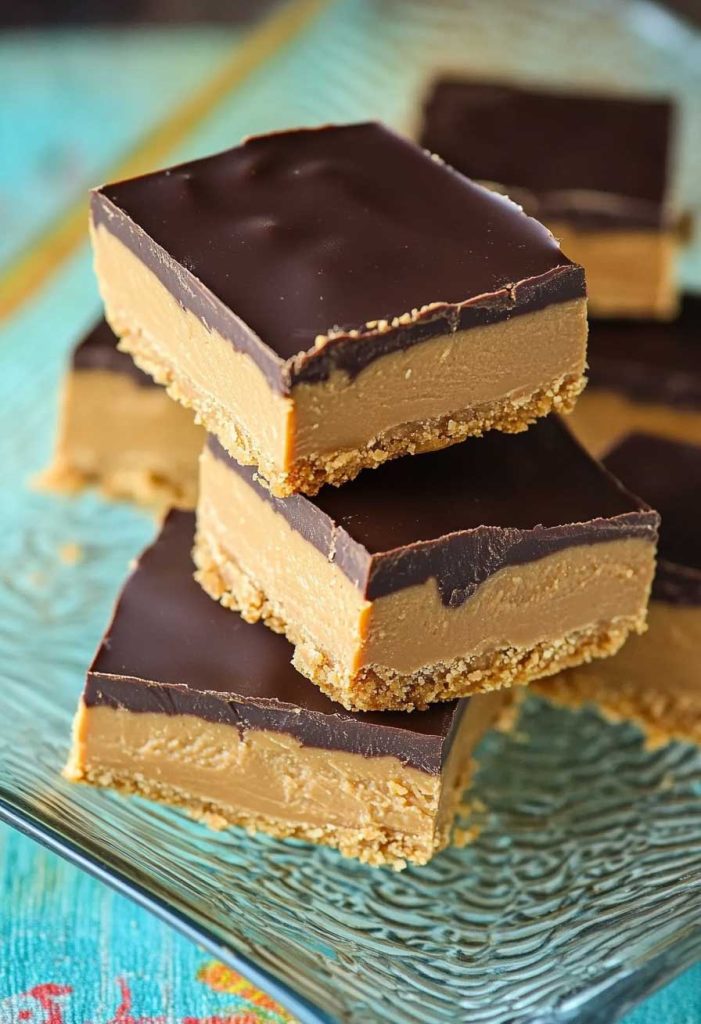
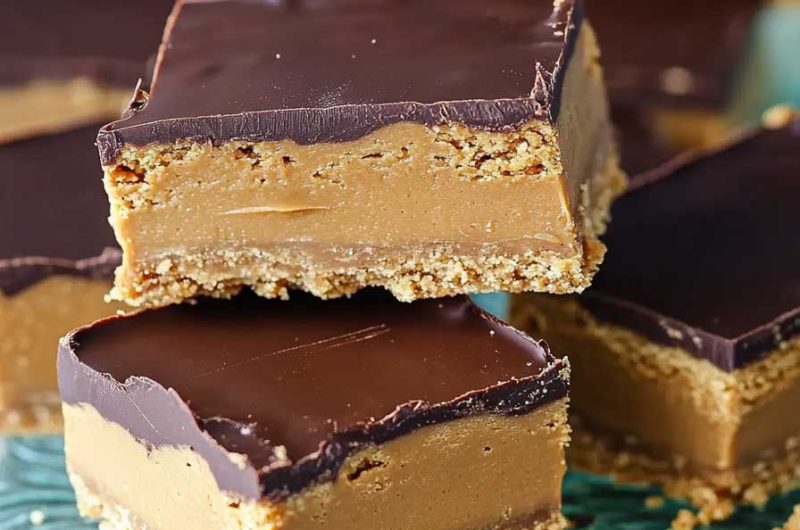
Reese’s Peanut Butter No Bake Bars
Craving a sweet and creamy dessert that’s super easy to make? These Reese’s Peanut Butter No Bake Bars are the ultimate treat for peanut butter lovers, with no baking required!
Imagine a crunchy base made of graham crackers, topped with a rich, smooth peanut butter layer, and finished with a sweet chocolate topping. These bars are like eating a peanut butter cup in bar form, and they come together in no time!
With the perfect balance of chocolate and peanut butter, these bars are a must-try for any dessert fan. They’re the perfect treat for when you’re craving something sweet, but don’t want to spend time baking!

Ready to indulge in this irresistible treat? Let’s whip up these Reese’s Peanut Butter No Bake Bars and enjoy a sweet, satisfying snack today!
Why You’ll Love This Recipe
- Peanut Butter Lover’s Dream: These bars have a thick, rich peanut butter layer that’s sweet, salty, and smooth.
- Easy and No-Bake: Just melt, mix, layer, and chill. No oven needed.
- Perfect for Sharing: One batch makes a whole tray—great for family, school snacks, or small gatherings.
- Tastes Like a Candy Bar: The flavor mimics Reese’s, but fresher and creamier.
- Make Ahead Friendly: Store them in the fridge or freezer and enjoy whenever the craving hits.
What You Need to Know Before You Start
Prep Time & Chill Time:
Prep Time: 15 minutes
Chill Time: 1 hour
Total Time: 1 hour 15 minutes
Servings:
This recipe makes 16 bars. You can cut them smaller for bite-size squares or larger for indulgent portions.
Difficulty:
Very easy—perfect for beginner bakers, kids in the kitchen, or anyone without access to an oven.
Required Kitchen Tools
- 8×8 inch square baking pan
- Mixing bowls
- Rubber spatula or spoon
- Microwave-safe bowl (or a saucepan)
- Parchment paper (optional, for easier lifting)
Ingredients for Reese’s Peanut Butter No Bake Bars
Here’s everything you’ll need to build these sweet and salty layered bars (full measurements are listed in the recipe card below):
- Salted Butter: Adds richness and helps bind the base. Salted works best to balance the sweetness.
- Graham Cracker Crumbs: Gives structure to the peanut butter layer and adds a gentle crunch.
- Powdered Sugar: Sweetens and firms up the base without making it grainy.
- Creamy Peanut Butter: Smooth and rich, this is the star of the recipe. Use full-fat, shelf-stable peanut butter for best results.
- Chocolate Chips (Semi-sweet or Milk): Melted and poured over the peanut butter layer for that classic Reese’s taste.
Variations for Reese’s Peanut Butter No Bake Bars
- Crunchy Twist: Use crunchy peanut butter or mix in crushed peanuts for added texture.
- Oreo Crust Option: Swap graham crackers for crushed Oreos to create a chocolate cookie base.
- Dark Chocolate Lovers: Substitute semi-sweet chips with dark chocolate for a deeper flavor.
- Peanut Butter Swirl Topping: Reserve 2 tablespoons of peanut butter and swirl it into the melted chocolate layer before chilling.
- Add a Layer of Fun: Sprinkle mini Reese’s pieces, crushed pretzels, or sea salt flakes over the chocolate layer before setting.
How to Make Reese’s Peanut Butter No Bake Bars: Step-by-Step Instructions
1. Prepare the Pan
Line an 8×8 inch baking pan with parchment paper or lightly grease it. This helps you lift the bars out easily once they’ve set.
2. Make the Peanut Butter Base
In a large bowl, mix the melted salted butter, graham cracker crumbs, powdered sugar, and peanut butter. Stir until fully combined and a thick dough forms.
3. Press into the Pan
Transfer the peanut butter mixture to your prepared pan. Use a spatula or the back of a spoon to press the mixture into an even layer. Make sure it’s packed firmly and evenly across the bottom.
4. Melt the Chocolate
In a microwave-safe bowl, melt the chocolate chips in 20-second intervals, stirring in between, until smooth. You can also use a double boiler if you prefer.
5. Add the Chocolate Layer
Pour the melted chocolate over the peanut butter base. Use a spatula to spread it into an even layer, reaching all corners.
6. Chill and Set
Place the pan in the refrigerator for at least 1 hour, or until the chocolate is completely firm.
7. Slice and Serve
Once fully set, remove from the pan and slice into bars using a sharp knife. For cleaner cuts, run the knife under warm water and wipe between slices.
Serving and Presentation
These bars are rich and satisfying, so small squares go a long way. For serving:
- Cut into clean squares and serve chilled on a dessert platter or tray.
- Add a visual pop by drizzling melted white chocolate or extra peanut butter on top before chilling.
- Make them bite-sized for party platters or kids’ lunchboxes.
They’re great on their own or served with a glass of milk, coffee, or hot cocoa for a sweet finish to any meal.
How to Store Reese’s Peanut Butter No Bake Bars
- Refrigerator: Store in an airtight container in the fridge for up to 7 days. Keep them chilled so the chocolate doesn’t melt.
- Freezer: For longer storage, freeze bars between layers of parchment paper in an airtight container for up to 2 months. Let thaw at room temp for about 10 minutes before serving.
Tips and Tricks for Success
- Use regular, shelf-stable peanut butter (like Jif or Skippy). Natural peanut butter may be too oily or separate during setting.
- Pack the base firmly using the bottom of a glass or measuring cup to get clean, compact layers.
- Slice after chilling fully to avoid cracked or uneven chocolate topping.
- Wipe your knife between cuts for sharp, neat edges—especially if your chocolate layer is thick.
- Don’t overheat the chocolate—stir frequently and melt gently to avoid seizing.
Nutrition
| Serving Size | 1 bar (based on 16 servings) |
|---|---|
| Calories | ~310 |
| Total Fat | 20g |
| Saturated Fat | 7g |
| Carbohydrates | 28g |
| Sugars | 21g |
| Protein | 5g |
| Fiber | 2g |
| Sodium | 120mg |
Note: Nutrition may vary depending on the brands used.
Reese’s Peanut Butter No Bake Bars
Course: Uncategorized15
minutes310
kcal1
hourIngredients
1 cup (226g) salted butter, melted
2 cups (240g) graham cracker crumbs
2 cups (240g) powdered sugar
1 ¼ cups (310g) creamy peanut butter, divided
1 ½ cups (270g) semi-sweet or milk chocolate chips
Directions
- Line an 8×8-inch baking pan with parchment paper or lightly grease it.
- In a large bowl, mix together the melted butter, graham cracker crumbs, powdered sugar, and 1 cup of peanut butter until fully combined and thick.
- Press the mixture firmly and evenly into the prepared pan.
- In a microwave-safe bowl, melt the chocolate chips with the remaining ¼ cup peanut butter in 20-second intervals, stirring until smooth.
- Spread the melted chocolate mixture evenly over the peanut butter base.
- Refrigerate for at least 1 hour, or until the chocolate is completely set.
- Slice into 16 bars and serve chilled. Store in the fridge or freezer as noted.
Reese’s No Bake Bars FAQs
Can I use natural peanut butter?
You can, but the texture may be looser and slightly oily. Stick to processed creamy peanut butter for best results.
What can I use instead of graham cracker crumbs?
You can use crushed digestive biscuits, vanilla wafers, or Oreo cookie crumbs (without the filling) as a substitute.
Can I double the recipe?
Yes, simply use a 9×13 inch pan. The bars will be slightly thinner unless you increase each ingredient proportionally.
How do I make the chocolate layer softer?
Add 1–2 tablespoons of heavy cream or coconut oil to the melted chocolate for a slightly softer topping that doesn’t crack when sliced.
Conclusion
These Reese’s Peanut Butter No Bake Bars are everything I want in a homemade dessert—easy, rich, and loaded with peanut butter and chocolate. Whether you’re making them for a party, a bake sale, or just for yourself on a rainy night, they always hit the spot.
They’re no-fuss, freezer-friendly, and a guaranteed hit for any peanut butter lover. Keep a batch in the fridge and you’ll always have something sweet within reach.