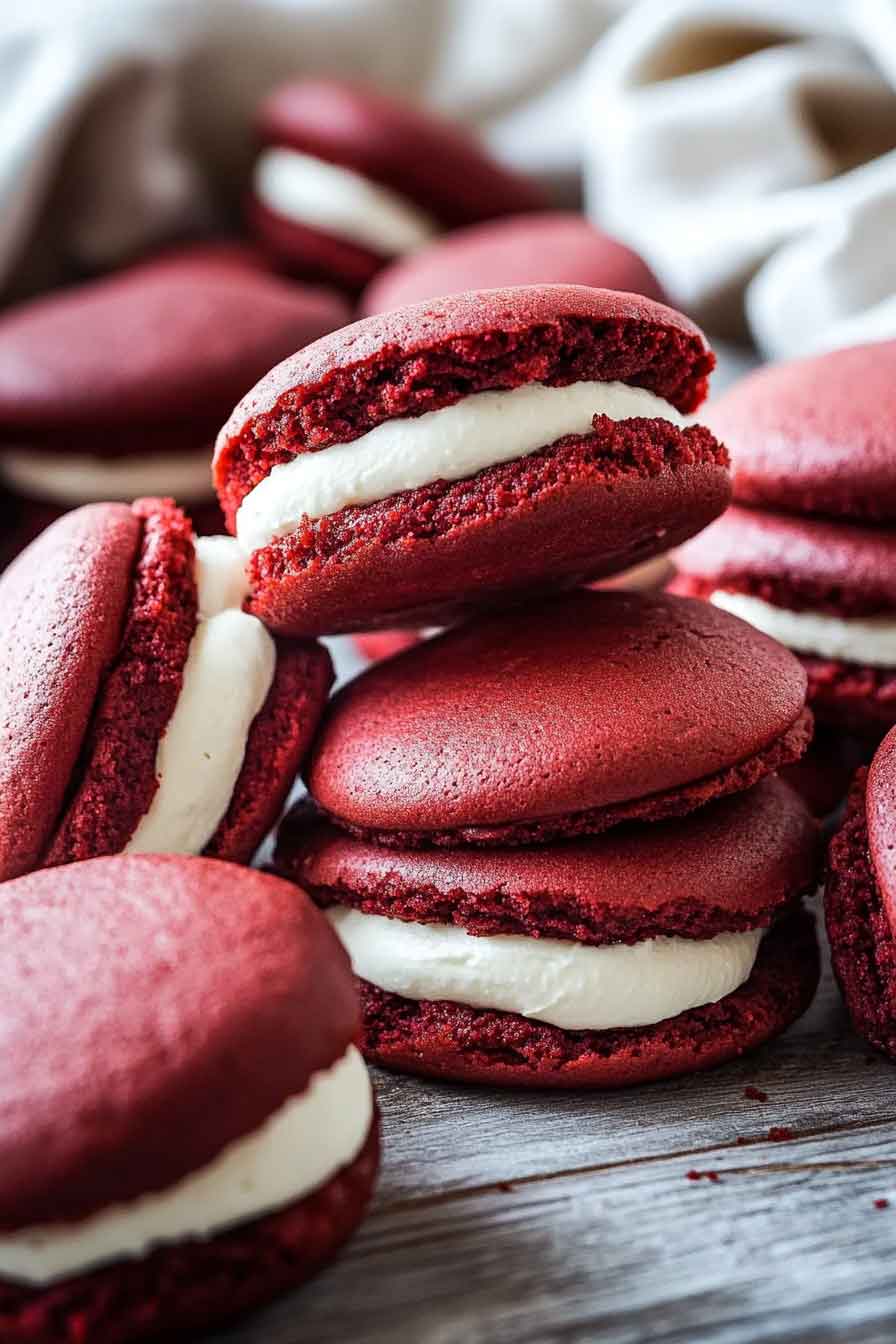
Red Velvet Whoopie Pies
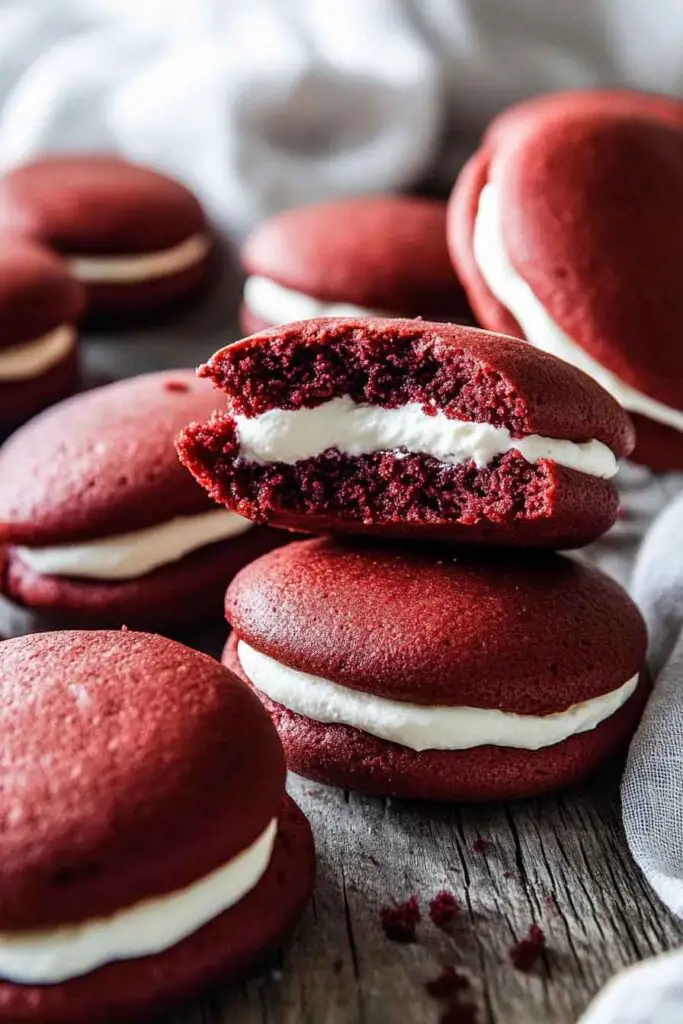
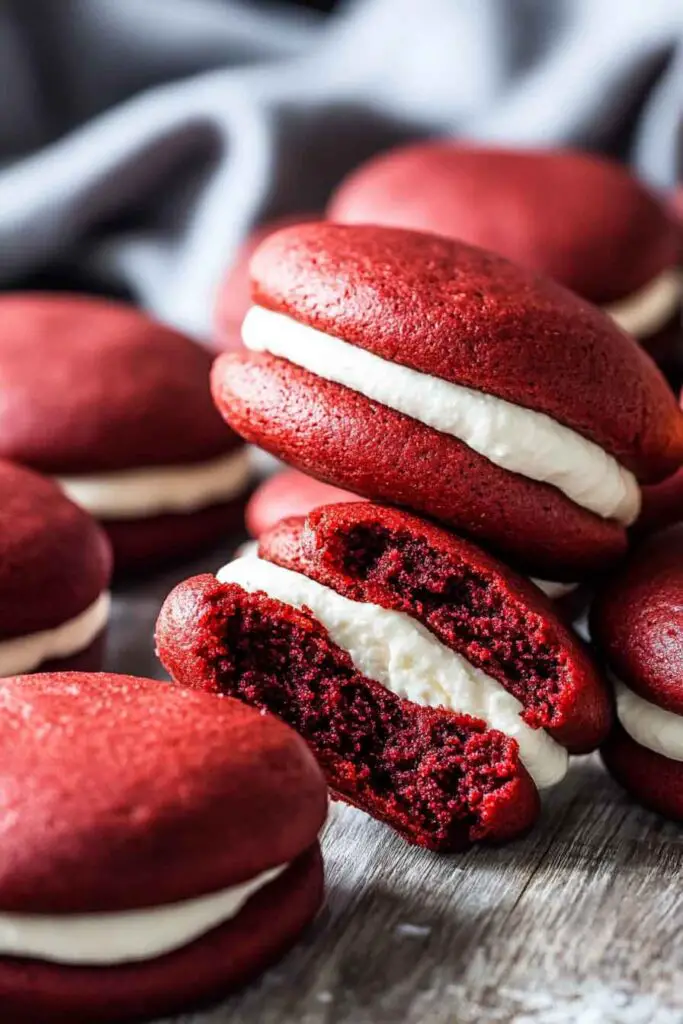
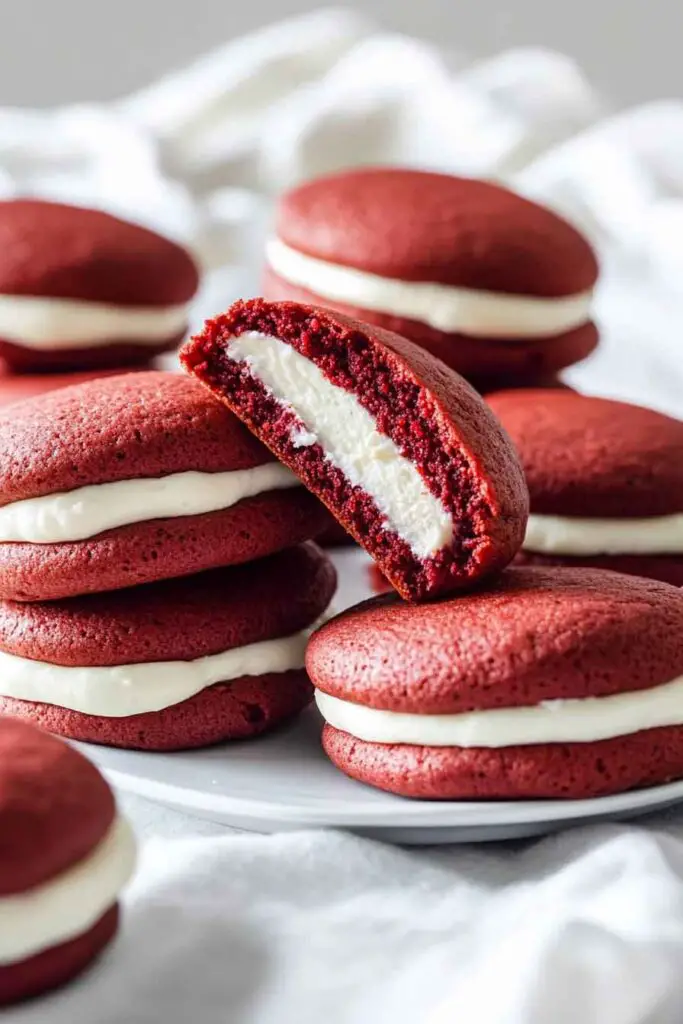
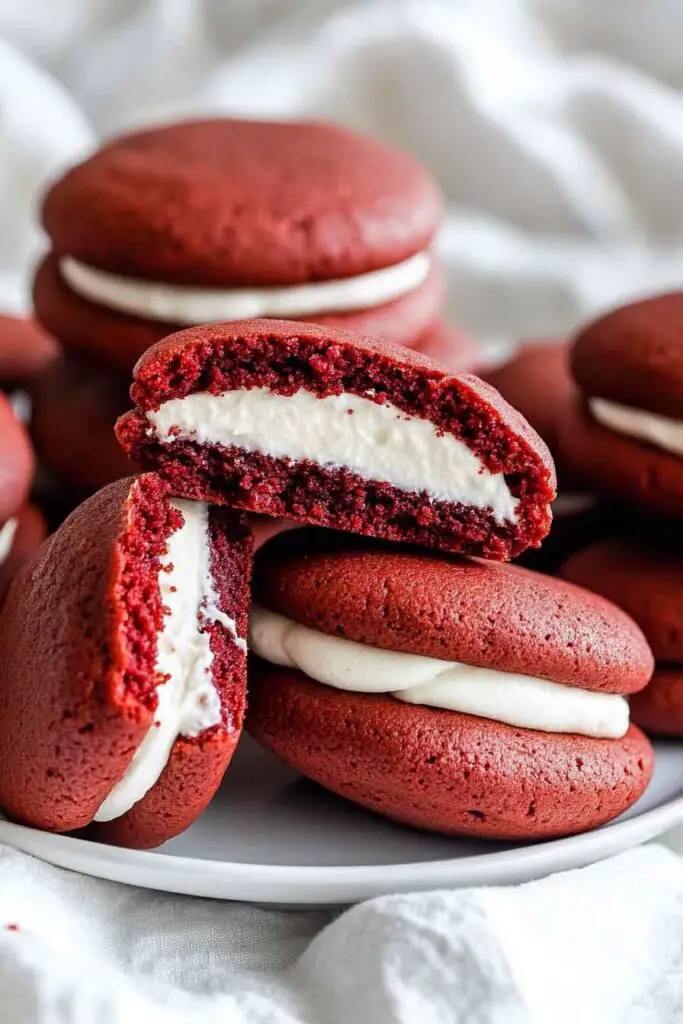
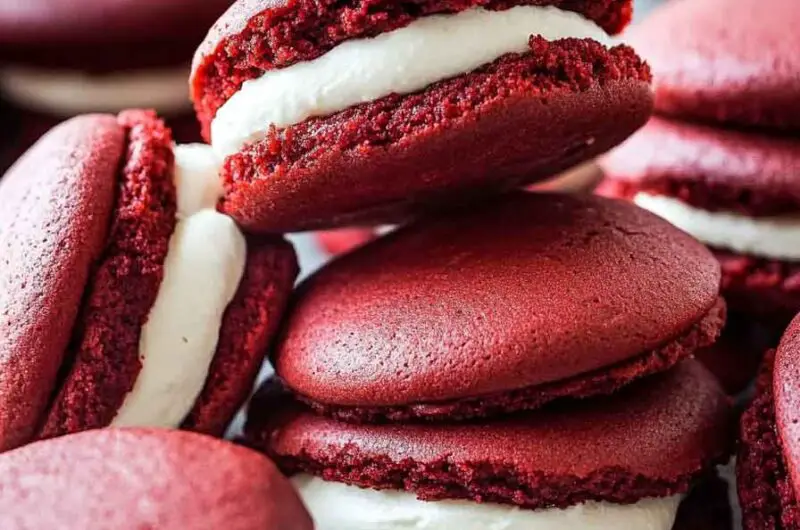
Alright, these Red Velvet Whoopie Pies? They’re soft, fluffy, and filled with a rich, creamy center that melts in your mouth. Picture two pillowy red velvet cake cookies sandwiching a sweet vanilla or cream cheese frosting—every bite is pure joy.
I made them for Valentine’s Day, and they were gone before I could even plate them all. That deep cocoa flavor with the tangy-sweet filling? It’s the perfect balance of rich and light, and they look just as good as they taste.
And don’t worry—they’re easier than they look. Just bake, cool, and fill. Let’s make a batch together—you’re gonna love how soft, sweet, and totally irresistible they turn out!

Why You’ll Love This Recipe
- Soft and Tender Texture: The cake-like cookies have a fine crumb, achieved through the creaming method and a well-balanced dry-to-wet ratio.
- Delicately Flavored: A small amount of cocoa powder gives depth without overpowering the vanilla and tangy buttermilk base.
- Beautiful Presentation: Their deep red color and smooth, pale filling make them a standout addition to any dessert table.
- Customizable: You can easily swap the filling or tint the batter differently for seasonal themes.
- Do-Ahead Friendly: The cookie rounds can be baked ahead, and the assembled pies hold well for up to 3 days.
What You Need to Know Before You Start
Prep Time & Cook Time:
- Prep Time: 25 minutes
(includes measuring, mixing, and piping or scooping dough) - Bake Time: 10–12 minutes per sheet
- Cooling Time: 20–30 minutes (essential before adding the filling)
- Assembly Time: 10 minutes
- Total Time: Around 1 hour 15 minutes
Servings:
This recipe makes about 12 full-size whoopie pies (24 individual cake rounds). You can halve or double the recipe as needed.
Skill Level:
This recipe is beginner-friendly, especially if you’ve made cookies or cupcakes before. There’s no dough chilling required, and both the batter and frosting come together quickly. The main tips to success lie in accurate measuring and watching the bake time.
Required Kitchen Tools
Make sure to gather everything before you begin for smooth workflow:
- Mixing Bowls: One for dry ingredients, one for wet
- Electric Mixer: Hand mixer or stand mixer with paddle attachment
- Rubber Spatula: For folding and scraping
- Measuring Cups and Spoons or a digital scale
- Cookie Scoop or Tablespoon: For evenly sized rounds
- 2 Baking Sheets: Lined with parchment paper or silicone mats
- Cooling Rack: To cool the cakes thoroughly before filling
- Offset Spatula or Piping Bag: For neat frosting application
Ingredients for Red Velvet Whoopie Pies
For the Cake Rounds:
Each ingredient plays an essential role in structure and flavor:
- 2 cups (250g) all-purpose flour – Provides the base structure. Spoon and level to avoid excess flour, which can make the cakes dry.
- 3 tablespoons (15g) unsweetened natural cocoa powder – Adds depth without turning the flavor fully chocolate.
- 1 teaspoon baking soda – Leavens the cakes, making them light and puffy.
- ½ teaspoon salt – Enhances flavor and balances sweetness.
- ½ cup (113g) unsalted butter, softened – Creams well with sugar for a tender, moist texture.
- 1 cup (200g) packed light brown sugar – Adds moisture and a mild molasses flavor.
- 1 large egg, at room temperature – Binds the batter and helps with lift.
- ½ cup (120ml) buttermilk, at room temperature – Reacts with baking soda and balances sweetness with a mild tang.
- 1 teaspoon pure vanilla extract – Rounds out the flavor.
- 1 tablespoon red gel food coloring – Gel gives strong color without thinning the batter. Avoid liquid dye if possible.
- ½ cup (120ml) hot water – Loosens the batter slightly, allowing the cakes to spread just enough in the oven for a soft, rounded shape.
For the Cream Cheese Filling:
Smooth, pipeable, and not overly sweet:
- 6 ounces (170g) full-fat brick cream cheese, softened – Not whipped or spreadable types, which have added water.
- 4 tablespoons (56g) unsalted butter, softened – Adds richness and stability to the frosting.
- 1¾ cups (210g) powdered sugar, sifted – Gives body and smooth texture. Sifting prevents lumps.
- 1 teaspoon pure vanilla extract – Adds classic flavor to the frosting.
- Pinch of salt – Balances sweetness and deepens the cream cheese flavor.
Variations for Red Velvet Whoopie Pies
These whoopie pies are classic, but they adapt well to your creativity:
- Chocolate Ganache Filling: Use a thick ganache or whipped chocolate ganache instead of cream cheese for a richer sandwich.
- Mini Whoopie Pies: Use a 1-teaspoon scoop for bite-sized versions—perfect for parties or kids’ treats.
- Add Texture: Roll the frosting edges in mini chocolate chips, finely chopped pecans, or shredded coconut.
- Festive Flavors: Add a drop of peppermint extract to the filling during the holidays.
- Natural Dye Option: Use beet powder in place of red food coloring, though the hue will be more muted.
How to Make Red Velvet Whoopie Pies: Step-by-Step Instructions
Step 1: Preheat and Prep
Preheat your oven to 350°F (177°C). Line two large baking sheets with parchment paper or silicone baking mats. This prevents sticking and helps the cakes bake evenly.
Step 2: Mix Dry Ingredients
In a medium bowl, whisk together the flour, cocoa powder, baking soda, and salt until well combined. Set aside.
Why this matters: Properly blending dry ingredients ensures the leavening agent (baking soda) is evenly distributed, which prevents uneven rising.
Step 3: Cream Butter and Sugar
In a large mixing bowl, use a hand mixer or stand mixer to beat the softened butter and brown sugar on medium-high speed for about 2–3 minutes, or until light, creamy, and fluffy.
Tip: Scrape down the sides of the bowl as needed. This step traps air in the batter, giving you a light, tender result.
Step 4: Add Egg, Vanilla, and Food Coloring
Crack in the egg, then beat until fully combined. Add the vanilla extract and red food coloring, and beat again until the batter is uniformly red.
Note: Gel food coloring gives a rich red tone without altering the batter’s consistency.
Step 5: Add Buttermilk
Pour in the buttermilk and mix on low speed just until incorporated. Don’t worry if the mixture looks slightly curdled—it will come together when the flour is added.
Step 6: Add Dry Ingredients and Hot Water
With the mixer on low speed, gradually add the dry ingredients to the wet mixture in two additions. Mix until just combined—do not overmix.
Lastly, stir in the hot water using a spatula. The batter will be slightly loose, like thick cupcake batter.
Why hot water? It thins the batter for a smoother texture and helps “bloom” the cocoa, enhancing its flavor.
Step 7: Portion and Bake
Use a medium cookie scoop (about 1½ tablespoons) to drop equal-sized rounds of batter onto your lined baking sheets. Leave about 2 inches of space between each to allow spreading.
Bake in the preheated oven for 10–12 minutes, or until the tops spring back gently when pressed and a toothpick inserted in the center comes out clean.
Watch the bake time closely. Overbaking leads to dry cakes; underbaking makes them sticky and hard to fill.
Step 8: Cool Completely
Allow the baked cakes to cool on the baking sheet for 5 minutes, then transfer to a wire rack to cool completely before adding the filling.
Step 9: Make the Cream Cheese Filling
In a clean bowl, beat the softened cream cheese and butter together until smooth and creamy (about 2 minutes). Gradually add the sifted powdered sugar, vanilla, and a pinch of salt. Beat until light, fluffy, and well combined.
Tip: If your frosting is too soft, chill it for 10–15 minutes before assembling the pies.
Step 10: Assemble the Whoopie Pies
Once the cake rounds are completely cool, pair them by size. Using a piping bag or spoon, dollop or pipe about 1½ tablespoons of cream cheese filling onto the flat side of one cake. Gently press another cake on top to create a sandwich.
Optional: For a clean bakery-style finish, use a star tip when piping the frosting.
Serving and Presentation
These whoopie pies are best enjoyed at room temperature, which allows the cakes to soften slightly and the cream cheese filling to reach its smooth, creamy texture.
How to Serve Red Velvet Whoopie Pies:
- Dessert Platters: Their eye-catching red color makes them ideal for holiday dessert trays, bake sales, or birthday spreads.
- Special Occasions: Great for Valentine’s Day, Christmas cookie boxes, or bridal showers.
- Casual Treats: Serve with milk, coffee, or a hot cup of tea for an afternoon pick-me-up.
- Decorate the Edges (Optional): Roll filled edges in mini chocolate chips, sprinkles, or crushed freeze-dried raspberries for texture and flair.
Storing Red Velvet Whoopie Pies
Proper storage keeps your pies soft and the filling fresh:
- Room Temperature (1 Day Max): Store in a single layer in an airtight container if you’re serving within a day.
- Refrigerator (3–4 Days): Store layered between parchment in an airtight container. Bring to room temp before serving for best texture.
- Freezer (Up to 2 Months): Wrap individually in plastic wrap, then place in a zip-top freezer bag. Thaw overnight in the fridge before serving.
Tips and Tricks for Success
- Even Sizing: Use a cookie scoop or tablespoon to portion batter for uniform cookies that sandwich well.
- Don’t Overmix: After combining wet and dry ingredients, mix just until no flour streaks remain. Overmixing can toughen the cake.
- Cool Completely: Never assemble while cakes are warm—this will melt the filling.
- Chill Filling if Needed: If your cream cheese frosting feels too soft, place it in the refrigerator for 10–15 minutes before piping.
🧾 Nutrition Information (Per Whoopie Pie)
| Nutrient | Amount |
|---|---|
| Calories | ~320 kcal |
| Total Fat | 15g |
| Saturated Fat | 9g |
| Cholesterol | 55mg |
| Sodium | 190mg |
| Total Carbohydrate | 43g |
| Dietary Fiber | 1g |
| Sugars | 28g |
| Protein | 3g |
| Calcium | ~40mg |
| Iron | ~1.4mg |
Note: Nutrition values are estimates based on typical ingredient brands and standard portions.
Red Velvet Whoopie Pies
Course: Breakfast u0026amp; Brunch12
whoopie pies25
minutes10
minutes320
kcal30–40
miniutesIngredients
For the Red Velvet Cakes:
2 cups (250g) all-purpose flour, spooned and leveled
3 tablespoons (15g) unsweetened natural cocoa powder
1 teaspoon baking soda
½ teaspoon salt
½ cup (113g) unsalted butter, softened
1 cup (200g) packed light brown sugar
1 large egg, at room temperature
½ cup (120ml) buttermilk, at room temperature
1 teaspoon pure vanilla extract
1 tablespoon red gel food coloring
½ cup (120ml) hot waterFor the Cream Cheese Filling:
6 oz (170g) cream cheese, softened
4 tablespoons (56g) unsalted butter, softened
1¾ cups (210g) powdered sugar, sifted
1 teaspoon pure vanilla extract
Pinch of salt
Directions
- Preheat oven to 350°F (177°C). Line 2 baking sheets with parchment paper.
- Mix dry ingredients: In a bowl, whisk flour, cocoa powder, baking soda, and salt.Cream butter and sugar: Beat softened butter and brown sugar until light and fluffy, about 2–3 minutes.
- Cream butter and sugar: Beat softened butter and brown sugar until light and fluffy, about 2–3 minutes.
- Add egg, vanilla, and food coloring: Mix until fully combined.
- Add buttermilk: Beat until the mixture is smooth.
- Combine wet and dry: Add flour mixture in two additions, mixing just until combined.
- Stir in hot water by hand until batter is smooth.
- Scoop batter: Drop rounded tablespoons (or use a scoop) onto baking sheets, spacing 2 inches apart.
- Bake 10–12 minutes or until tops spring back when lightly touched.
- Cool completely on wire racks before filling.
- Make filling: Beat cream cheese and butter until smooth. Add powdered sugar, vanilla, and salt. Beat until fluffy.
- Assemble pies: Pair up cakes by size. Pipe or spoon filling on one half, then top with the other.
- Serve or chill. Best enjoyed at room temperature. Store leftovers in the fridge.
FAQs
Can I make them ahead of time?
Yes. You can bake the cakes a day ahead and store them in an airtight container. Fill them just before serving or up to a day ahead.
Can I use Dutch-process cocoa powder?
Natural cocoa is best for this recipe because it reacts with the baking soda. If you only have Dutch-process, replace the baking soda with baking powder.
Why add hot water?
Hot water helps the cocoa flavor develop and creates a looser batter, which results in soft, slightly domed cakes.
Can I skip the food coloring?
Yes, but the pies will turn out more brown than red. You could also use beet powder for a natural alternative.
Do they need to be refrigerated?
If storing for more than a day, yes. The cream cheese filling is perishable.