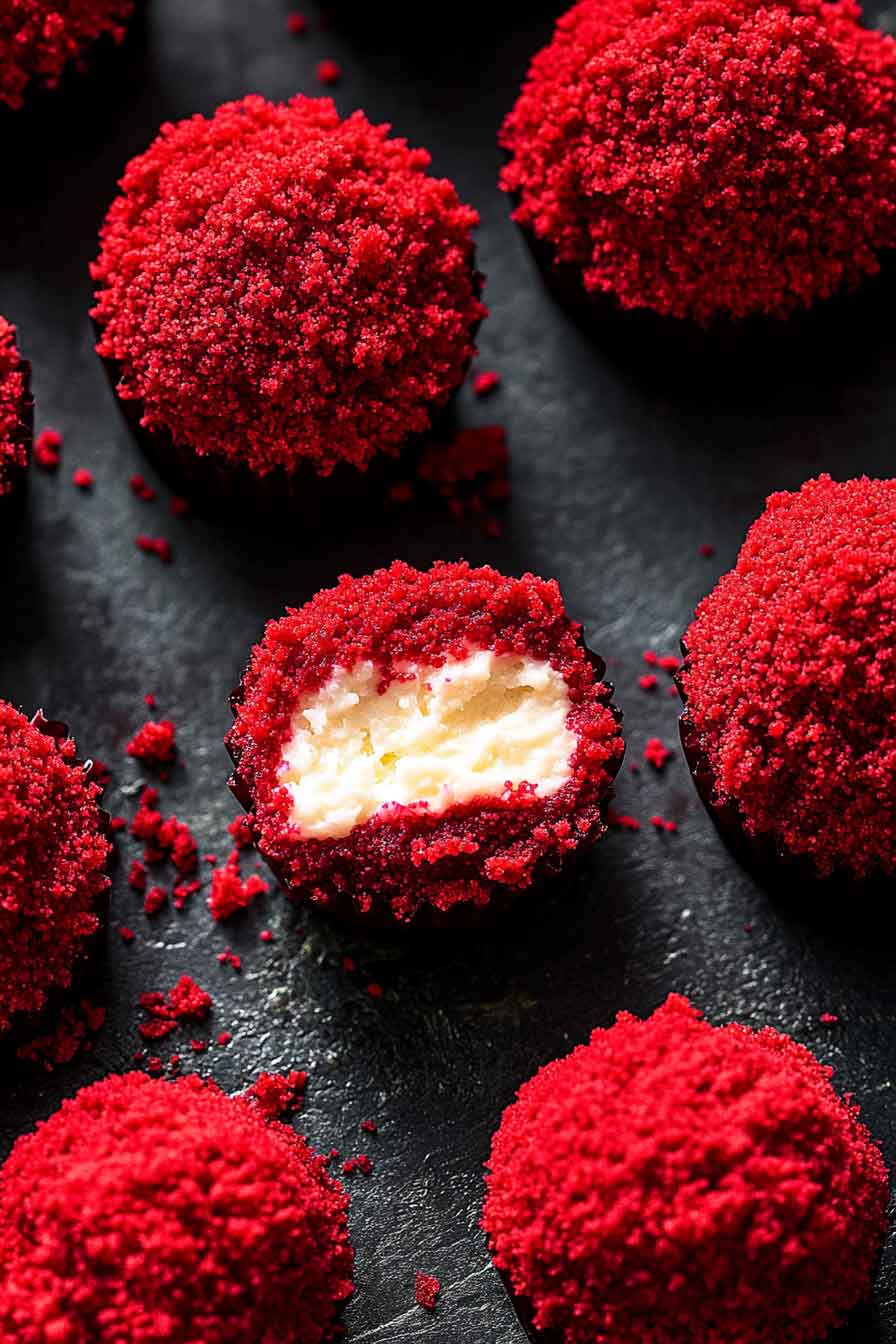
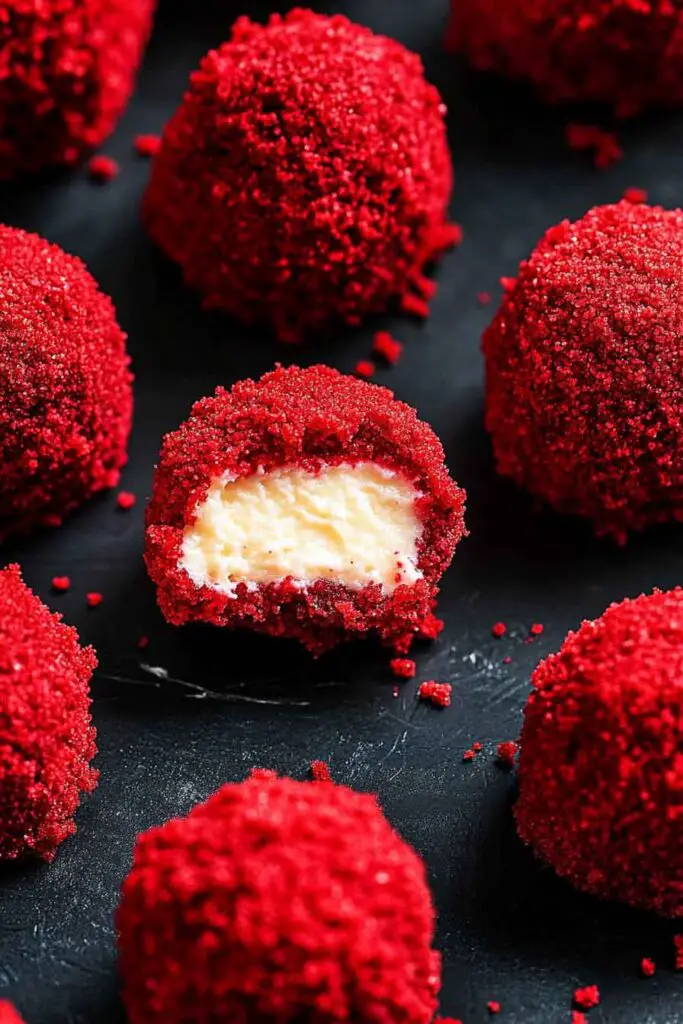
Red Velvet Cheesecake Bites
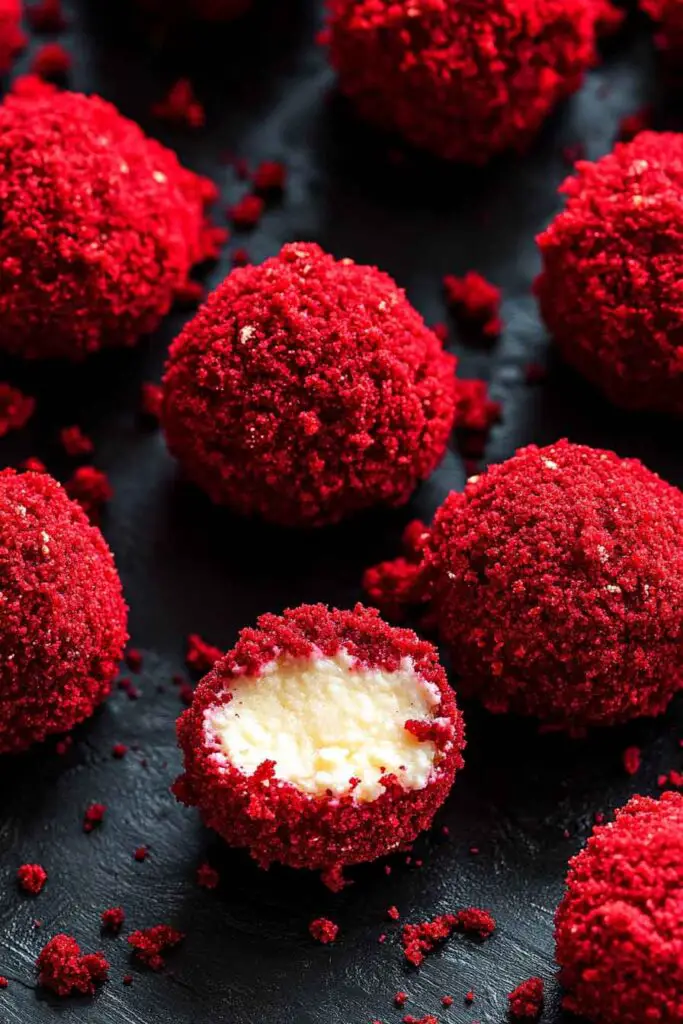
Alright, these Red Velvet Cheesecake Bites? They’re rich, creamy, and totally poppable. Think soft red velvet cake wrapped around smooth cheesecake—bite-sized and super cute.
I made them for a party, and they disappeared so fast. That mix of chocolatey cake and sweet cream cheese? Total win.
No stress, no fancy steps. Just roll, chill, and enjoy. Let’s make a batch together—you’re gonna love how fun (and tasty) they are!

Why You’ll Love This Recipe
- Perfectly Portioned: These cheesecake bites are easy to grab and eat—no need for forks, knives, or serving dishes. Great for kids, guests, or when you’re on the go.
- Rich Yet Balanced: The gentle cocoa notes in the red velvet batter pair beautifully with the creamy, slightly tangy cheesecake swirl, offering just the right contrast in flavor and texture.
- Visually Appealing: That signature red velvet hue topped with a pale cheesecake center makes these bites stand out on any dessert table.
- Versatile: Serve them chilled for a firmer texture or slightly warm for a more tender bite. They’re also easy to dress up with whipped cream or white chocolate curls.
- Make-Ahead & Freezer-Friendly: You can bake them the day before and refrigerate, or freeze them for later use—making them ideal for prep-ahead entertaining.
What You Need to Know Before You Start
Prep Time & Cook Time
- Preparation: 20 minutes
- Baking: 25 minutes
- Total Time: About 45 minutes
Servings
This recipe yields around 24 cheesecake bites when using a standard mini muffin tin. If you use a regular muffin pan, expect about 12 larger bites.
Skill Level
Beginner to Intermediate. No need to worry about special techniques like folding egg whites or using a water bath. Just mix, layer, and bake. Still, attention to detail—especially not overbaking—is key for a tender crumb and smooth cheesecake texture.
Required Kitchen Tools
To make the process smooth and ensure the best results, here are the tools you’ll need:
- Two mixing bowls: One for the red velvet batter and one for the cheesecake filling.
- Hand mixer or stand mixer: Makes blending the cream cheese mixture smooth and lump-free.
- Measuring cups and spoons: Accuracy matters, especially with baking.
- Rubber spatula: For folding ingredients and scraping every bit of batter from your bowls.
- Mini muffin pan (or standard): A non-stick pan or one lined with paper cups makes clean-up easier.
- Wire cooling rack: Helps prevent soggy bottoms and lets your bites cool evenly.
- Small cookie scoop or spoon: Ensures even portions of batter in each cavity.
Ingredients for Red Velvet Cheesecake Bites
These ingredients are pantry staples, but the combination is anything but ordinary. Here’s what you’ll need to create the two main components: the red velvet base and the cheesecake swirl.
For the Red Velvet Base:
- 2 large eggs: Room temperature eggs mix more evenly into the batter and help with structure.
- 1/2 cup (113g) butter, melted: Use unsalted butter for better control over the salt level. The melted butter adds moisture and richness.
- 1 cup (200g) granulated sugar: Balances the cocoa’s bitterness and brings out the red velvet’s signature sweetness.
- 2 teaspoons vanilla extract: Enhances the overall flavor.
- 1/4 cup (21g) unsweetened cocoa powder: Use natural cocoa, not Dutch-processed, to maintain the right acidity balance with vinegar.
- 1/8 teaspoon salt: A small pinch brings all the flavors into balance.
- 1 tablespoon red food coloring: Liquid or gel-based color gives red velvet its classic hue. You can adjust to preference or leave it out for a natural look.
- 3/4 teaspoon white vinegar: Essential in red velvet—it reacts with the baking soda (already in flour blends) and enhances the tang.
- 3/4 cup (95g) all-purpose flour: Spoon and level your flour to avoid dry, dense bites.
For the Cheesecake Swirl:
- 8 ounces (226g) cream cheese, softened: Full-fat cream cheese gives the best texture. Make sure it’s soft to avoid lumps.
- 1/3 cup (67g) sugar: Sweetens the cream cheese without overpowering it.
- 1/2 teaspoon vanilla extract: Rounds out the tangy cream cheese with a hint of warmth.
- 1 large egg yolk: Adds richness and helps the swirl set into a creamy layer during baking.
Optional Toppings:
- Whipped cream: A dollop on top adds a light, airy contrast.
- White chocolate shavings: Great for both flavor and presentation.
- Festive sprinkles: Customize for holidays or celebrations.
Variations for Red Velvet Cheesecake Bites
While this base recipe is delicious on its own, here are a few ways to adjust it depending on your needs:
- Mini Chocolate Chip Version: Fold 1/4 cup mini chocolate chips into the red velvet batter for bursts of chocolate in every bite.
- Swirl in Jam or Fruit Puree: Add a small spoonful of raspberry or strawberry jam on top of the cheesecake swirl before baking for a fruity twist.
- Use Cookie Crust Base: Press a thin layer of crushed chocolate sandwich cookies mixed with melted butter into the bottom of each muffin cup before adding the batter.
- Dairy-Free Option: Use dairy-free cream cheese and butter substitutes, and check your food coloring for dairy-free certification.
- Holiday Colors: Substitute green food coloring during the winter holidays or use pastel pink for Valentine’s Day.
How to Make Red Velvet Cheesecake Bites – Step-by-Step Instructions
Let’s walk through the entire process so you feel confident before you even preheat the oven. These steps are simple and approachable, even for beginner bakers.
Step 1: Preheat and Prepare Your Muffin Pan
- Preheat your oven to 350°F (177°C).
- Line a mini muffin tin with paper liners or lightly grease each cavity with butter or nonstick spray. If using a standard muffin tin, do the same—just note that the baking time may increase slightly.
Step 2: Make the Cheesecake Swirl
- In a medium bowl, add the softened cream cheese and beat until smooth using a hand or stand mixer (about 1 minute).
- Add in the sugar, vanilla extract, and egg yolk. Mix until fully incorporated and creamy. Set aside.
Tip: Let the cream cheese sit at room temperature for at least 30 minutes before using. Cold cream cheese leads to a lumpy swirl.
Step 3: Prepare the Red Velvet Batter
- In a large mixing bowl, whisk together the melted butter and sugar until smooth and glossy.
- Add in the eggs and vanilla extract. Mix until fully combined.
- Stir in the cocoa powder, salt, and red food coloring. Mix well.
- Pour in the vinegar, then gently fold in the flour until just combined. Be careful not to overmix—you want the batter to stay tender.
Step 4: Assemble the Cheesecake Bites
- Spoon about 1 tablespoon of the red velvet batter into each muffin cup, filling them about 2/3 full.
- Next, add 1 teaspoon of the cheesecake mixture on top of each.
- Using a toothpick or skewer, gently swirl the cheesecake into the red velvet batter with a few circular motions.
Tip: Don’t over-swirl. A few gentle turns are enough to create that classic marbled look.
Step 5: Bake
- Place the muffin tin in the preheated oven and bake for 20–25 minutes, or until the edges are set and a toothpick inserted near the center comes out with only a few moist crumbs.
- Let the bites cool in the pan for 10 minutes, then transfer them to a wire rack to cool completely.
Serving and Decoration
Red Velvet Cheesecake Bites are best enjoyed once fully cooled. Here are a few easy ways to serve or dress them up:
- Chilled: Place the bites in the fridge for at least 1 hour before serving for a firmer, more cheesecake-like texture.
- With Whipped Cream: Top each bite with a small dollop of lightly sweetened whipped cream.
- Decorative Toppings: Add a sprinkle of white chocolate shavings, a pinch of powdered sugar, or colored sprinkles to match the season or celebration.
- On a Dessert Tray: Pair with mini brownies, cookies, or fruit for a festive dessert spread.
These are perfect for:
- School bake sales
- Holiday parties
- Baby showers
- Valentine’s Day treats
- Afternoon tea
Storing Red Velvet Cheesecake Bites
Because of the cream cheese, these bites should be stored properly to maintain freshness and food safety.
- Refrigerate: Store cooled bites in an airtight container in the fridge for up to 5 days.
- Freeze: Place them on a baking sheet in a single layer and freeze for 1 hour. Once frozen, transfer to a freezer-safe bag or container. They’ll keep well for up to 2 months. Thaw in the refrigerator overnight before serving.
Tip: For the best texture, avoid storing them at room temperature for long periods.

Tips and Tricks for Success
- Use Room Temperature Ingredients: This helps everything blend smoothly, especially the cheesecake layer.
- Don’t Overfill: Fill muffin cups only about 2/3 of the way to avoid overflow during baking.
- Let Them Cool Completely: These bites continue to set as they cool, and refrigeration helps firm up the cheesecake center.
- Use Quality Cocoa Powder: It makes a noticeable difference in the depth of flavor.
- Clean Swirl Tool: Wipe your toothpick or skewer between swirls to keep the patterns clean and defined.
Nutrition (Per Bite)
Here’s a general estimate for one mini cheesecake bite:
| Nutrient | Amount |
|---|---|
| Calories | ~130 |
| Fat | 8g |
| Saturated Fat | 5g |
| Carbohydrates | 14g |
| Sugar | 10g |
| Protein | 2g |
| Fiber | <1g |
| Sodium | 65mg |
Note: Nutrition may vary based on brands and portion size.
Red Velvet Cheesecake Bites
Course: Cake Recipes24
mini bites2
minutes2
minutes130
kcalIngredients
Red Velvet Layer:
2 large eggs
1/2 cup (113g) unsalted butter, melted
1 cup (200g) granulated sugar
2 teaspoons vanilla extract
1/4 cup (21g) unsweetened cocoa powder
1/8 teaspoon salt
1 tablespoon red food coloring
3/4 teaspoon white vinegar
3/4 cup (95g) all-purpose flourCheesecake Swirl:
8 oz (226g) cream cheese, softened
1/3 cup (67g) granulated sugar
1/2 teaspoon vanilla extract
1 large egg yolkOptional Toppings:
Whipped cream
White chocolate shavings
Sprinkles or crushed cookies
Directions
- Preheat oven to 350°F (177°C). Line a mini muffin tin with paper liners or grease well.
- Make the cheesecake swirl: In a medium bowl, beat softened cream cheese until smooth. Add sugar, vanilla, and egg yolk. Beat until creamy. Set aside.
- Make the red velvet batter: In a large bowl, whisk melted butter and sugar. Add eggs and vanilla. Stir in cocoa powder, salt, and food coloring. Mix in vinegar, then fold in flour until just combined.
- Assemble: Spoon about 1 tablespoon of red velvet batter into each cup. Add 1 teaspoon of cheesecake mixture on top. Swirl with a toothpick.
- Bake for 20–25 minutes, or until edges are set and centers just barely jiggle.
- Cool completely in the pan, then transfer to a wire rack. Chill before serving if desired.
- Top and serve. Add whipped cream or chocolate curls for a festive finish.
Frequently Asked Questions (FAQs)
Can I use a boxed red velvet cake mix?
You can, but the texture will be more like cupcakes than dense, fudgy bites. This homemade batter is designed to stay chewy and rich.
How do I keep the cheesecake swirl from sinking?
If the batter is too thin, the swirl might sink. Make sure your red velvet batter is thick enough to hold the swirl on top and don’t overmix.
Can I make these in a standard muffin tin?
Yes. You’ll get about 12 larger bites. Increase the baking time by 5–7 minutes and watch carefully for doneness.
What can I use instead of food coloring?
For a natural red tone, try beet powder or simply leave it out. The cocoa flavor will still shine.
Do these freeze well?
Yes. Cool completely, freeze in a single layer, then store in freezer-safe bags for up to 2 months. Thaw in the fridge overnight before serving.
Conclusion
Red Velvet Cheesecake Bites bring together the charm of a nostalgic red velvet cake with the richness of a classic cheesecake—packaged in a fun, portable form. Whether you’re baking for a birthday, a brunch, or just treating yourself on a quiet afternoon, these bites deliver indulgence in a manageable, mess-free size.
They’re a great project for novice bakers and a satisfying treat for seasoned dessert lovers. With a simple list of ingredients and a swirl of creativity, these bites are sure to become a favorite in your dessert rotation.