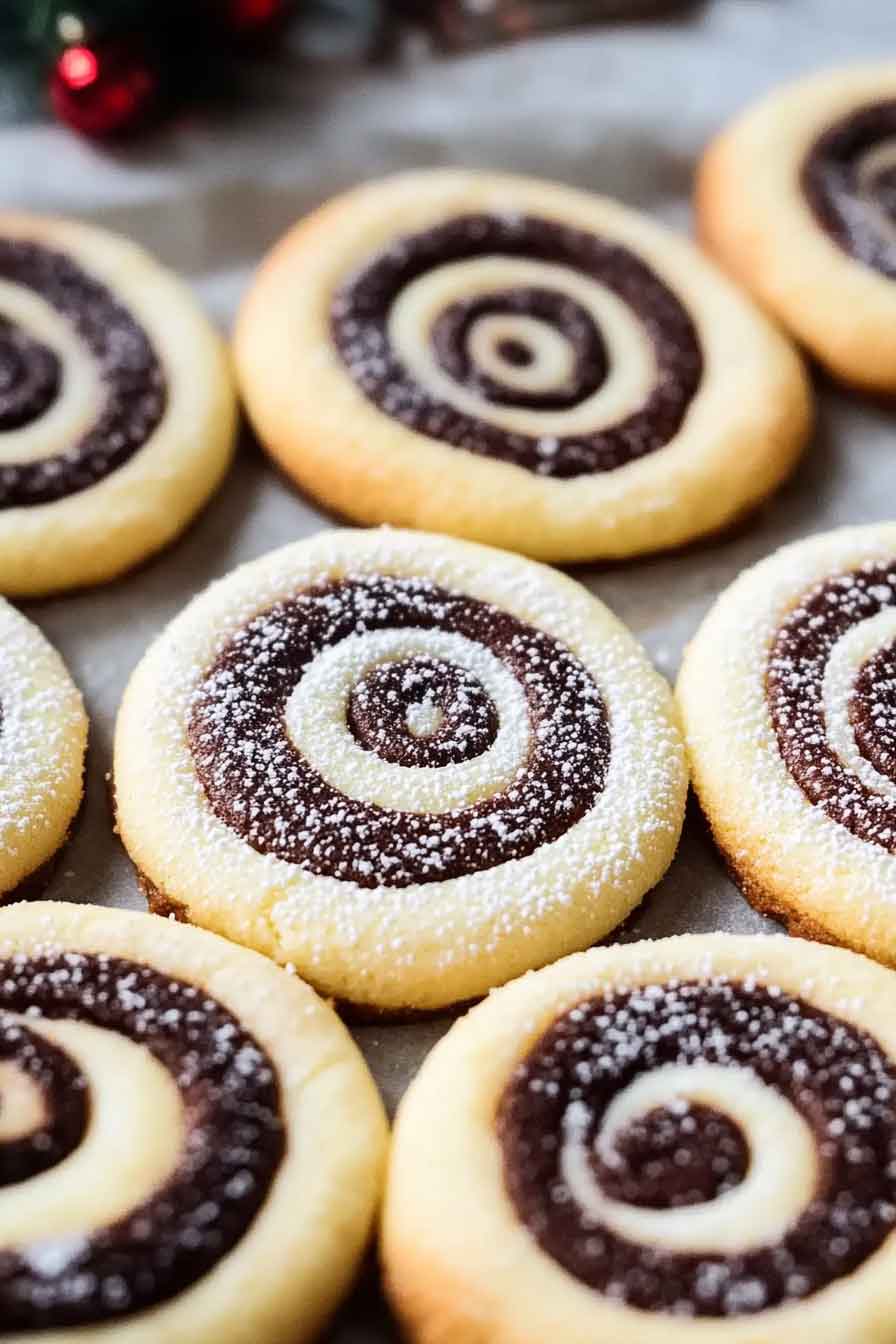
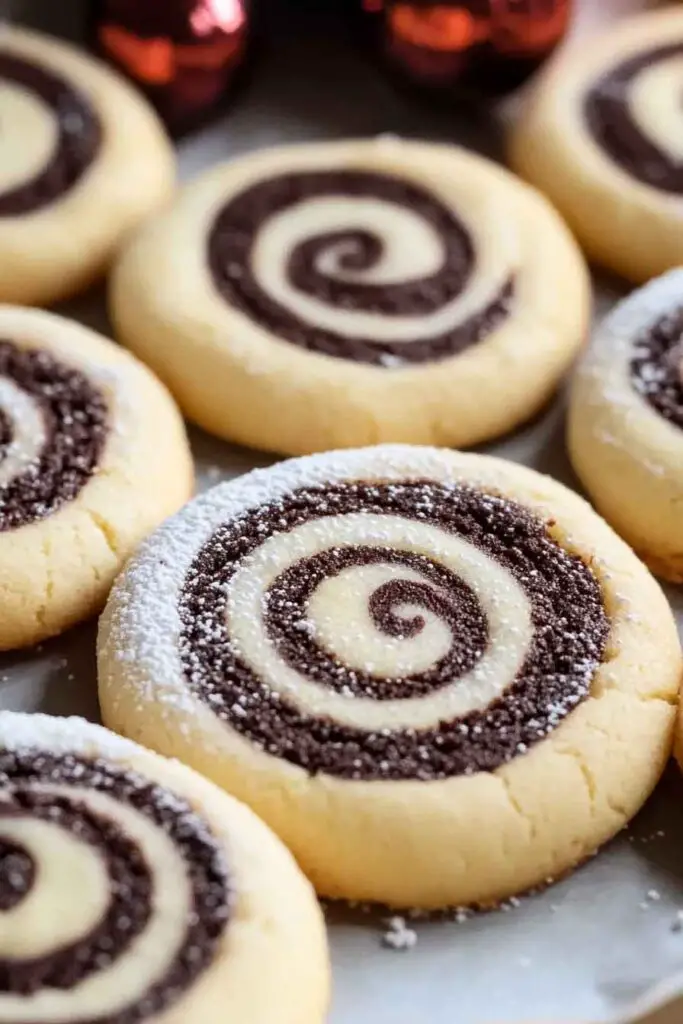
Christmas Butter Swirl Cookies
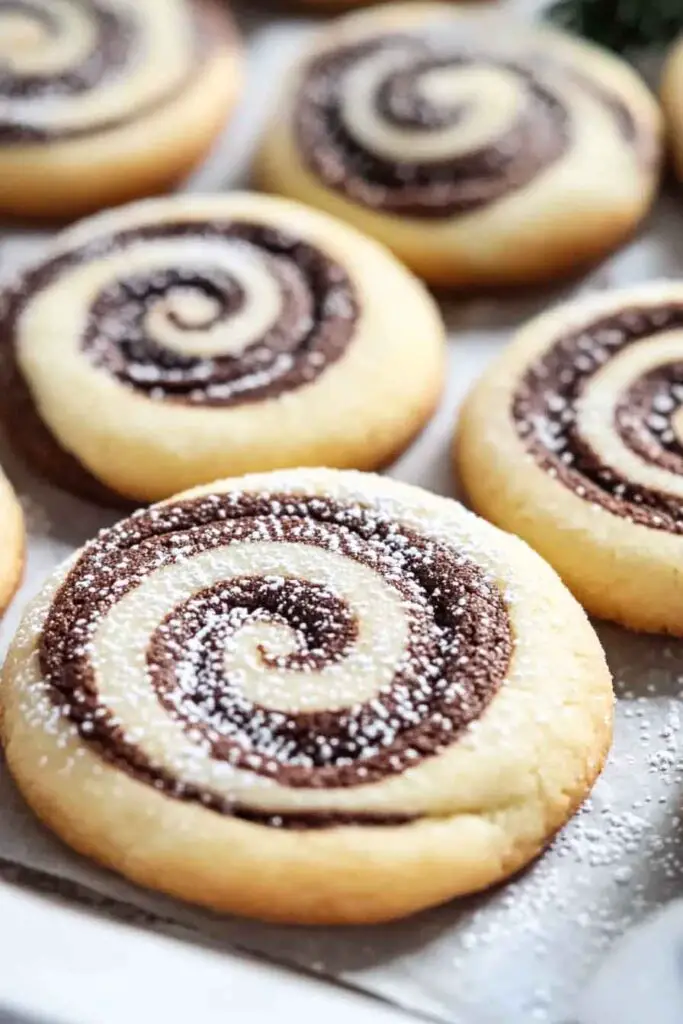
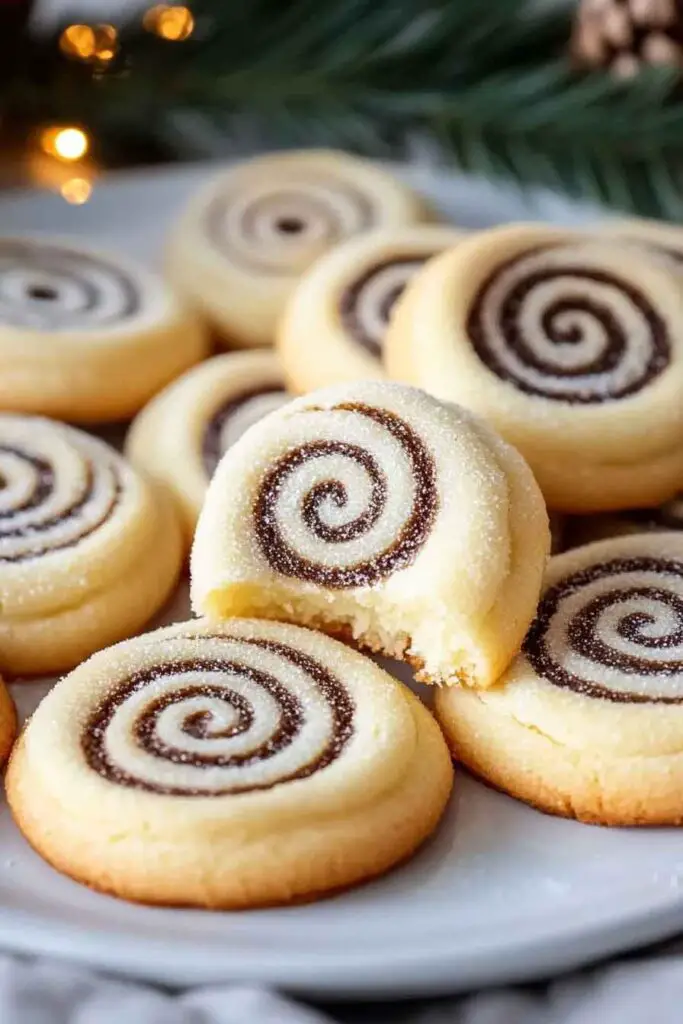
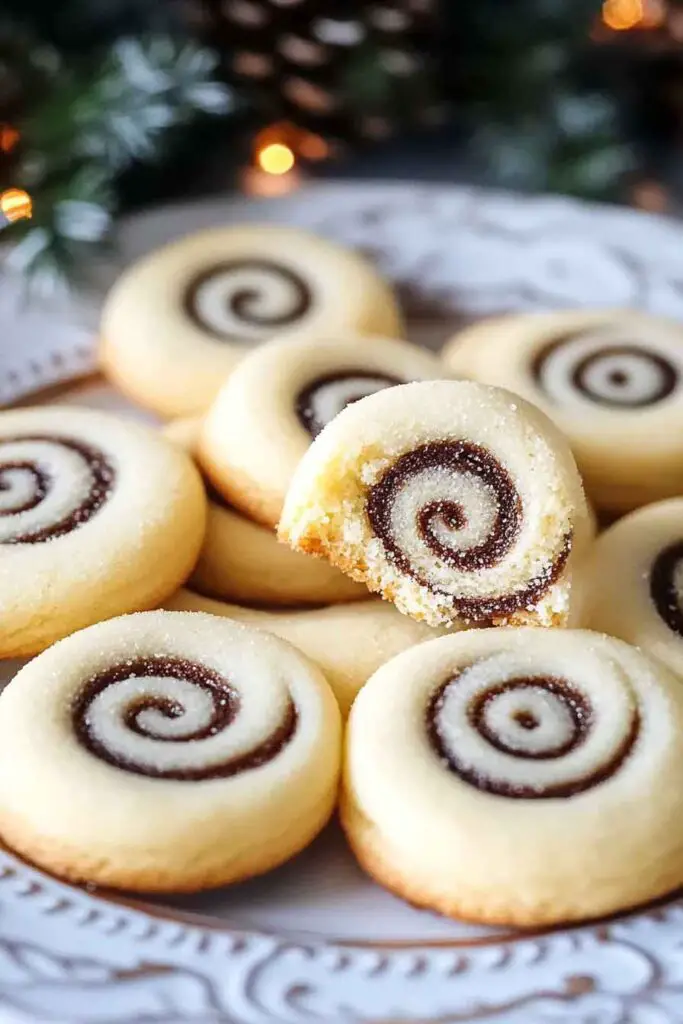
Alright, these Christmas Butter Swirl Cookies? They’re buttery, crisp, and absolutely stunning with their festive red and green swirls. Melt-in-your-mouth texture with just the right amount of sweetness—and they look like they came straight from a holiday bakery.
I made them last December for a cookie exchange, and they were the first to disappear. That classic buttery flavor with the fun, colorful swirl? So simple, but so eye-catching and delicious.
They’re easier than they look, too. Just whip up a buttery dough, tint it with holiday colors, roll, slice, and bake. Let’s make a batch together—you’ll love how beautiful (and tasty) these cookies turn out!

Why You’ll Love This Recipe
- Visually Stunning with Minimal Effort: The red and white swirl looks festive and cheerful without requiring icing, piping, or cookie cutters.
- Soft, Buttery Texture: Thanks to a generous amount of butter and powdered sugar, the dough bakes into a cookie that’s tender, crumbly, and rich in flavor.
- Flexible and Freezer-Friendly: You can prepare the dough logs in advance, wrap them tightly, and freeze them for weeks. When you’re ready to bake, simply slice and go.
- Customizable Colors and Flavors: While red is perfect for the holidays, you can easily substitute other colors or even flavors, such as adding peppermint or almond extract.
- Kid-Inclusive Baking Fun: Rolling, layering, and slicing the colorful dough is a hands-on experience that’s enjoyable for kids, making this recipe a great holiday activity for families.
What You Need to Know Before You Start
Time Breakdown:
- Prep Time: 25 minutes to mix, color, and assemble the dough
- Chill Time: 1 hour minimum (or overnight for best results)
- Bake Time: 10–12 minutes per batch
- Total Time: Approximately 1 hour 40 minutes, including chilling
Yield:
Makes about 36 cookies when sliced into ¼-inch rounds. The number may vary slightly depending on how tightly you roll the dough and how thick you slice each cookie.
Difficulty Level:
Beginner-friendly. The ingredients and steps are simple, but precision is key—especially during rolling and chilling to maintain the swirl design. Allow enough chill time so the dough slices cleanly and holds its shape.
Required Kitchen Tools
To prepare these cookies successfully, you’ll need the following tools:
- Mixing Bowls (Medium & Large): For combining the dough ingredients and dividing the dough for coloring.
- Hand or Stand Mixer: Helps achieve a smooth, creamy dough quickly. A stand mixer with a paddle attachment works best for even mixing.
- Rubber Spatula or Wooden Spoon: Useful for scraping down the bowl and folding ingredients gently.
- Measuring Cups & Spoons: For accurate ingredient portions, which is essential for cookie dough consistency.
- Plastic Wrap or Parchment Paper: For rolling and chilling the dough into logs.
- Rolling Pin: Used to flatten each colored dough evenly before stacking and rolling.
- Sharp Knife or Bench Scraper: Needed to slice clean rounds of the chilled dough log.
- Baking Sheets: Flat, rimmed trays are best for even heat distribution.
- Parchment Paper or Silicone Mats: Keeps cookies from sticking and ensures even browning.
- Wire Cooling Rack: Allows the cookies to cool evenly after baking without becoming soggy underneath.
Ingredients for Christmas Butter Swirl Cookies
These cookies rely on a classic shortbread dough base, using pantry staples and just a touch of food coloring for visual impact.
- 1 cup (226g) Unsalted Butter, at room temperature
The butter provides richness and the base flavor. Make sure it’s fully softened for smooth blending. - 1 cup (120g) Powdered Sugar
Powdered sugar (also known as confectioners’ sugar) creates a fine crumb and helps the dough stay soft and tender. - 2 Egg Yolks
Egg yolks add richness and structure. Using only yolks (no whites) keeps the texture delicate and less crisp. - 1 teaspoon (5g) Vanilla Extract
Adds warm, sweet flavor to balance the buttery dough. - ½ teaspoon (2g) Salt
Enhances the sweetness and intensifies flavor. - 2 ¼ cups (280g) All-Purpose Flour, spooned and leveled
Provides the structure for the cookies. Measure carefully to avoid a dry dough. - Red Gel Food Coloring
Just a small amount creates the vibrant red swirl. Gel works best here—it’s more concentrated and won’t change the dough’s texture like liquid dyes.
Variations for Butter Swirl Cookies
These cookies are easy to personalize for other occasions or flavor preferences:
- Alternative Colors: Try green and white for a different Christmas palette or pastel colors for spring-themed cookies.
- Peppermint Twist: Swap out vanilla extract for ½ teaspoon of peppermint extract for a cool, minty finish.
- Chocolate Swirl: Divide the dough and add 2 tablespoons of cocoa powder to one half instead of food coloring.
- Almond Version: Add a few drops of almond extract for a nutty twist.
- Sparkle Edges: Roll the dough log in coarse sanding sugar before slicing for a glittery, crisp edge.
How to Make Christmas Butter Swirl Cookies (Step-by-Step Instructions)
Step 1: Cream the Butter and Sugar
In a large mixing bowl, beat 1 cup (226g) of unsalted butter with 1 cup (120g) of powdered sugar until smooth and creamy. Use a hand mixer or stand mixer on medium speed. This takes about 2–3 minutes. The mixture should look pale and fluffy, with no lumps of butter remaining.
Tip: Scrape down the sides of the bowl as needed to make sure everything is evenly mixed.
Step 2: Add Egg Yolks, Vanilla, and Salt
Beat in 2 egg yolks, one at a time, mixing well after each addition. Add 1 teaspoon of vanilla extract and ½ teaspoon of salt. Continue mixing until the dough is smooth and glossy.
Why it matters: Egg yolks provide richness without making the dough too soft or cakey. Salt balances the sweetness and boosts flavor.
Step 3: Add the Flour
With the mixer on low speed, gradually add 2 ¼ cups (280g) of all-purpose flour. Mix just until a soft dough forms. Don’t overmix at this stage—stop as soon as no dry streaks of flour remain.
Consistency check: The dough should be soft but not sticky. If it’s very sticky, refrigerate for 10 minutes before handling.
Step 4: Divide and Color the Dough
Split the dough evenly into two portions. Leave one half plain. Place the other half back into the mixing bowl and add a small amount of red gel food coloring. Beat or knead it in until the color is fully incorporated and vibrant.
Tip: Start with a toothpick amount of food gel and add more as needed. Avoid liquid food coloring—it can change the dough’s texture.
Step 5: Roll Out Each Dough Separately
Lay down a sheet of parchment paper and lightly dust it with flour. Roll the plain dough into a rectangle about 9×12 inches. It should be about ¼ inch thick.
Repeat this step with the red dough on a separate sheet of parchment.
Evenness matters: The two rectangles should be as similar in size and thickness as possible so the swirl layers align when rolled.
Step 6: Stack and Roll into a Log
Carefully place the red dough on top of the plain dough, using the parchment to help flip and align them. Gently press to remove any air bubbles and ensure the layers stick together.
Starting from the long side, roll the dough up tightly into a log—like a jelly roll. Take your time and roll evenly to create a clean spiral.
Wrap the log in parchment paper or plastic wrap. Twist the ends to seal.
Optional: For neater edges, you can gently reshape the log into a more uniform cylinder before chilling.
Step 7: Chill the Dough
Refrigerate the log for at least 1 hour, or until very firm. This step is essential—it allows the butter to solidify, which helps the cookies hold their shape during baking.
Make-ahead tip: The dough can be chilled overnight or frozen for up to 1 month. Just thaw slightly before slicing.
Step 8: Slice and Bake
Preheat the oven to 350°F (177°C). Line baking sheets with parchment paper.
Remove the dough log from the fridge. Using a sharp knife or bench scraper, slice into ¼-inch rounds. Place the cookies about 1½ to 2 inches apart on the baking sheet.
Bake for 10–12 minutes, or until the edges are set and just barely golden. The centers may look slightly soft—that’s okay.
Let cookies cool on the baking sheet for 5 minutes, then transfer to a wire rack to cool completely.
Serving and Decoration
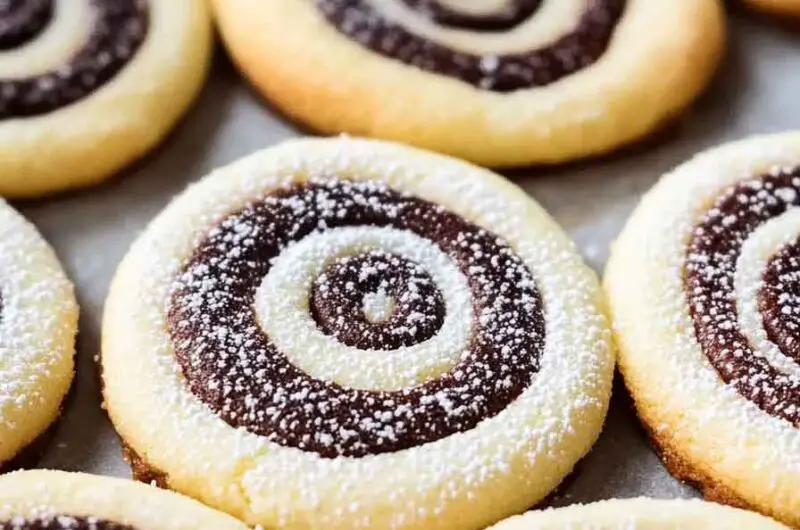
These cookies are beautiful straight from the oven, thanks to their natural swirl design—no icing or sprinkles required. However, if you’d like to enhance their festive look:
- Dust with powdered sugar: Once fully cooled, a light dusting of powdered sugar adds a snowy finish.
- Dip in white chocolate: Melt white chocolate and dip half of each cookie, then let set on parchment.
- Add sprinkles: Roll the dough log in red, green, or white sanding sugar before slicing for a sparkly edge.
These cookies pair nicely with hot chocolate, tea, or a glass of cold milk. They’re great for cookie exchanges, holiday gift boxes, or served on a decorative platter for gatherings.
How to Store Christmas Butter Swirl Cookies
These cookies keep well and maintain their texture for several days if stored properly.
- At Room Temperature: Store in an airtight container for up to 1 week. Place a piece of parchment between layers to prevent sticking.
- In the Freezer (Baked): Freeze baked cookies in a freezer-safe bag or container for up to 2 months. Thaw at room temperature before serving.
- In the Freezer (Unbaked): You can freeze the dough log wrapped tightly in plastic, then in foil. Slice and bake directly from frozen—just add 1–2 minutes to the baking time.
Tips and Tricks for Success
- Chill thoroughly: Chilling the dough log is key to sharp spirals. Don’t rush this step.
- Use gel coloring: It provides vibrant color without watering down the dough.
- Roll evenly: Uneven dough layers will make the swirl look off-center or lopsided.
- Sharp knife = clean slices: For best results, use a clean, sharp blade and wipe it between cuts.
- Don’t overbake: The cookies should be just set with pale edges. They’ll continue to firm up as they cool.
Nutrition
| Nutrient | Per Cookie (1 of 36) |
|---|---|
| Calories | ~100 |
| Total Fat | 6g |
| Saturated Fat | 4g |
| Cholesterol | 20mg |
| Sodium | 40mg |
| Total Carbohydrate | 10g |
| Sugars | 4g |
| Protein | 1g |
Nutrition values are estimates and can vary based on portion size and exact ingredients used.
Christmas Butter Swirl Cookies
Course: Cookie Recipes30
cookies25
minutes10
minutes100
kcal1
hourIngredients
1 cup (226g) unsalted butter, softened
1 cup (120g) powdered sugar
2 egg yolks
1 tsp (5g) vanilla extract
½ tsp (2g) salt
2 ¼ cups (280g) all-purpose flour
Red gel food coloring (as needed)
Directions
- Cream Butter and Sugar: In a large bowl, beat softened butter and powdered sugar until smooth and fluffy (2–3 minutes).
- Add Yolks and Flavor: Beat in egg yolks, vanilla, and salt until fully combined.
- Mix in Flour: Gradually add flour, mixing on low just until a soft dough forms.
- Divide and Tint: Divide dough into two equal parts. Leave one plain; tint the other red using gel coloring.
- Roll Each Dough: Roll each dough portion into a 9×12-inch rectangle, about ¼ inch thick.
- Layer and Roll: Stack the red dough over the plain dough. Roll into a tight log from the long edge.
- Chill: Wrap the dough log in parchment or plastic wrap and chill for at least 1 hour, until firm.
- Slice and Bake: Preheat oven to 350°F (177°C). Slice the log into ¼-inch rounds and place on lined baking sheets. Bake for 10–12 minutes.
- Cool: Let cool on the baking sheet for 5 minutes, then transfer to a rack to cool fully.
Christmas Butter Swirl Cookies FAQs
Can I freeze the dough?
Yes. Wrap the dough log tightly in plastic wrap and freeze for up to a month. Slice directly from frozen and add a minute or two to the baking time.
Why is my swirl uneven?
The layers may not have been rolled evenly or the dough wasn’t chilled enough before slicing. Try rolling both doughs to equal thickness and always chill thoroughly.
Can I use liquid food coloring?
It’s not recommended, as liquid dyes may change the dough’s texture. Gel food coloring is thicker and more concentrated, giving better color with less moisture.
Do these cookies spread in the oven?
Not much. Since this is a shortbread-style dough, they’ll hold their shape well—especially if the dough is chilled and not over-handled.
Conclusion
These Christmas Butter Swirl Cookies are a festive classic—simple to prepare, beautiful to serve, and full of buttery flavor. Whether you’re baking for a cookie exchange, holiday gift tins, or just a quiet night in with your favorite warm drink, these cookies bring joy with every bite.