Chocolate Ice Cream Sandwiches
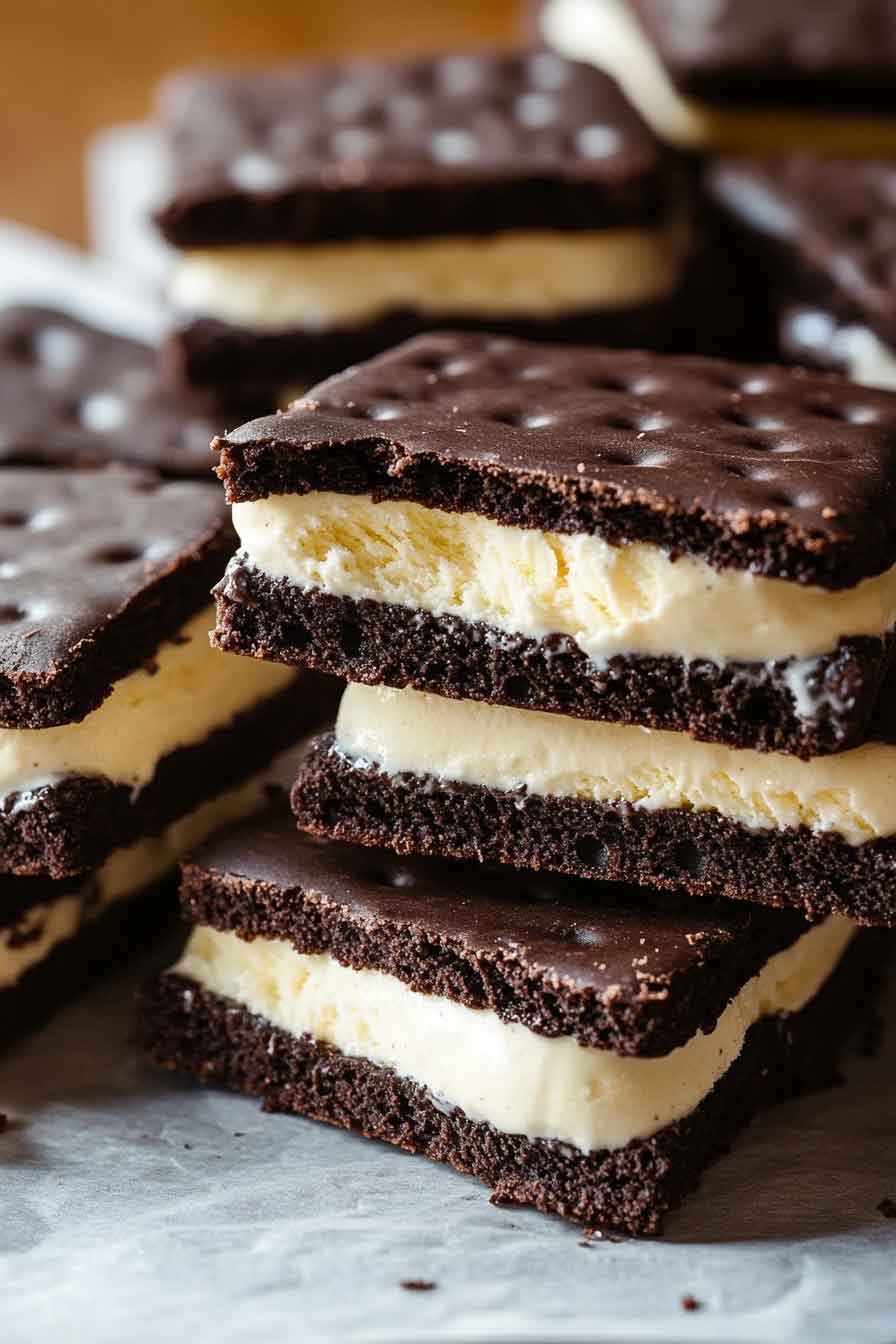
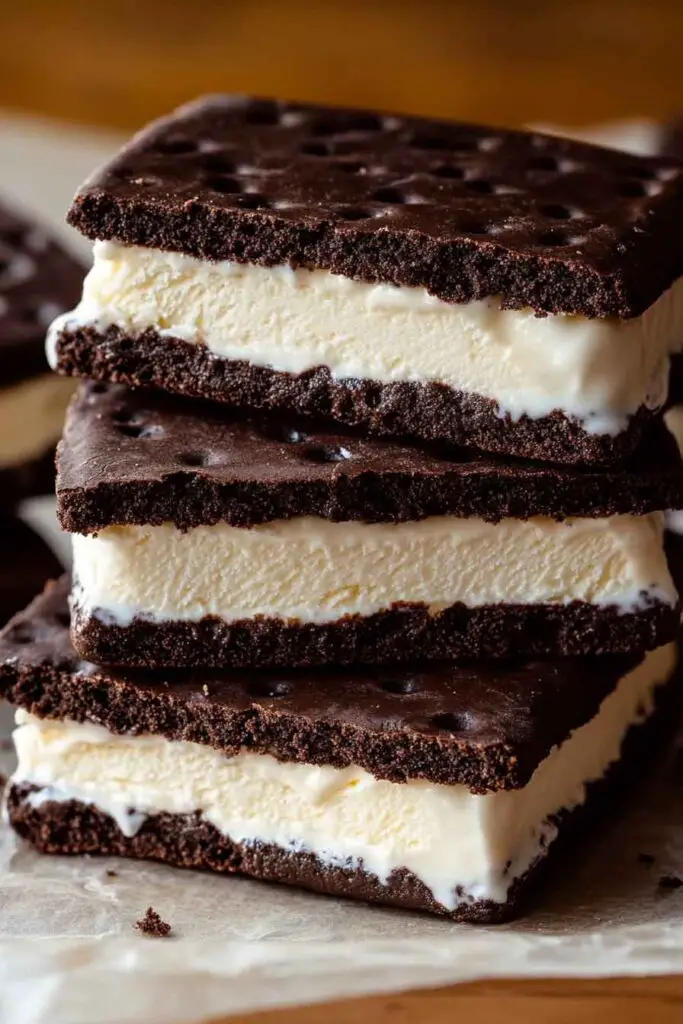
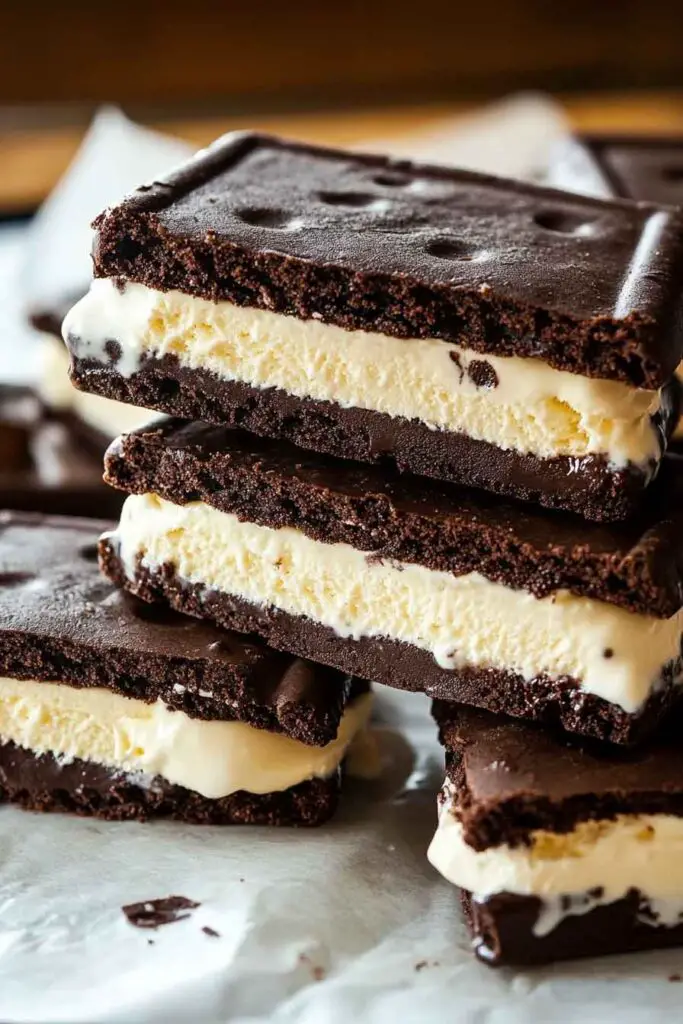
Chocolate Ice Cream Sandwiches bring together two comfort-food favorites—chewy chocolate cookies and creamy vanilla ice cream. This dessert is a nostalgic treat that feels both simple and special.
The cookie base is rich, soft, and just sturdy enough to hold the filling without crumbling. Between them, the cold, smooth layer of ice cream offers the perfect contrast—melting just a bit with each bite.
Whether you’re making these for a weekend gathering or just to stash in your freezer for later, these sandwiches are always a win. They’re easy to prep ahead, kid-friendly, and totally satisfying.

Chocolate Sandwich Overview
This dessert is made up of two elements:
- The Cookie: A dark chocolate, cake-like cookie with a slight chew. It holds its shape when frozen, making it ideal for sandwiches.
- The Ice Cream: You can use store-bought vanilla or your favorite homemade flavor. It should be slightly softened so it spreads easily.
These sandwiches are made by baking large, flat chocolate cookies, pairing them up, and filling them with a scoop of softened ice cream. After a short chill in the freezer, they’re ready to enjoy.
- Black Cocoa Powder: Used for deep color and rich chocolate flavor.
- Butter and Sugar: Creamed together for a soft, cake-like texture.
- Egg White: Keeps the cookie light and tender.
- Flour + Cocoa Powder: A mix that gives structure without being dry.
- Milk + Vanilla: Helps thin the batter and enhance flavor.
You can use either vanilla or chocolate ice cream, depending on your preference. Vanilla gives a nice contrast; chocolate doubles down on the richness.
What You Need to Know Before You Start
Prep Time & Chill Time:
- Prep Time: 25 minutes
- Bake Time: 10 minutes
- Assembly Time: 15 minutes
- Freeze Time: At least 1 hour (for firm sandwiches)
Yield:
- Makes about 8–10 sandwiches, depending on cookie size.
Difficulty Level:
- Beginner-friendly, especially with store-bought ice cream.
Required Kitchen Tools
- Mixing bowls
- Hand or stand mixer
- Rubber spatula
- Baking sheet
- Parchment paper
- Ice cream scoop or spoon
- Offset spatula (optional)
- Freezer-safe container or tray
Ingredients to Make Chocolate Cookie Sandwiches
For the Chocolate Cookies:
- ½ cup (113g) unsalted butter, softened
- ¾ cup (150g) granulated sugar
- 1 large egg white
- 1 tsp vanilla extract
- ¼ cup (60ml) milk
- 1 cup (125g) all-purpose flour
- ¼ cup (25g) black cocoa powder
- ¼ cup (25g) dark cocoa powder
- ½ tsp baking powder
- ¼ tsp fine sea salt
For the Filling:
- 1 pint (2 cups or 473ml) vanilla ice cream (or flavor of choice), slightly softened
How to Make Chocolate Ice Cream Sandwiches
Step-by-Step Instructions
1. Preheat your oven:
Set it to 350°F (175°C). Line a baking sheet with parchment paper.
2. Make the cookie dough:
In a mixing bowl, cream together the softened butter and sugar until light and fluffy—about 2–3 minutes.
3. Add wet ingredients:
Mix in the egg white, vanilla extract, and milk. Stir until smooth.
4. Combine dry ingredients:
In a separate bowl, whisk together the flour, both cocoa powders, baking powder, and salt.
5. Mix to form dough:
Add the dry ingredients to the wet and stir until just combined. Don’t overmix—the dough should be thick and smooth.
6. Scoop and flatten:
Spoon heaping tablespoons of dough onto the baking sheet, spacing them 2 inches apart. Flatten slightly with damp fingers or the back of a spoon to form even rounds.
7. Bake:
Bake for 8–10 minutes. The cookies should be set but soft in the center. Don’t overbake.
8. Cool completely:
Let the cookies cool on the pan for 5 minutes, then transfer them to a wire rack.
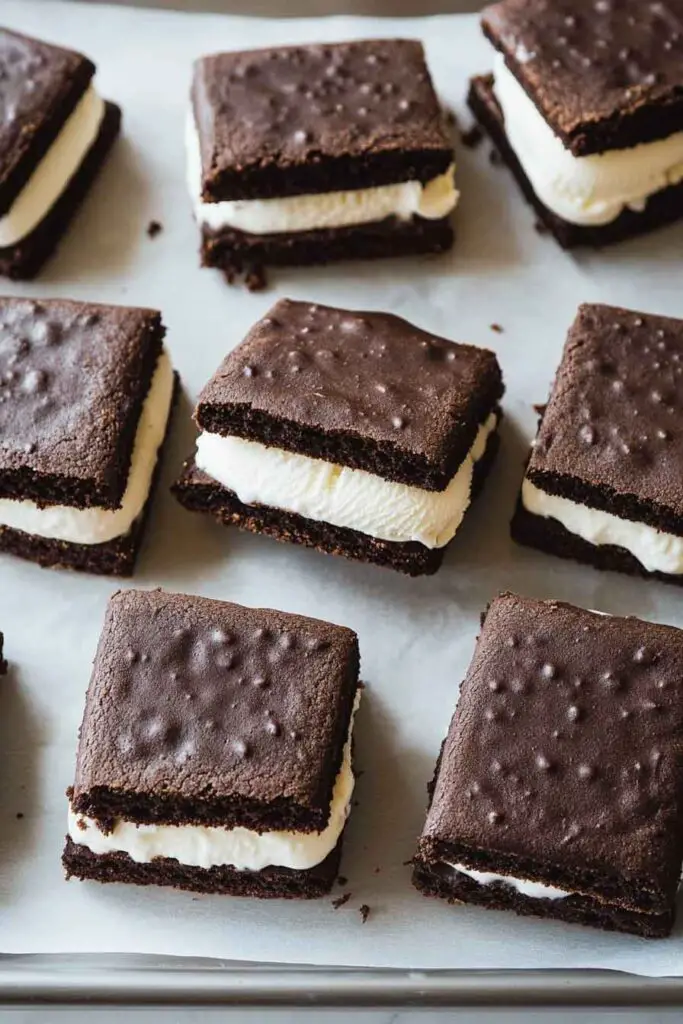
Assembling the Ice Cream Sandwiches
1. Match cookie pairs:
Once cookies are cool, find similar-sized pairs.
2. Add the ice cream:
Scoop about ¼ cup of softened ice cream onto one cookie. Press the matching cookie on top gently to spread the ice cream evenly.
3. Smooth the edges:
Use a small spatula or clean finger to neaten the sides.
4. Freeze:
Place the sandwiches on a tray lined with parchment and freeze for at least 1 hour, or until firm.
5. Store:
Transfer to a freezer-safe bag or container. Keeps well for up to 2 weeks.
Serving Suggestion:
Let the sandwiches sit at room temperature for 2–3 minutes before eating, so the cookies soften slightly. Serve with melted chocolate drizzle or roll the sides in mini chocolate chips or sprinkles if you like a fun finish.
Recipe Variations
1. Chocolate-Chip Ice Cream Sandwiches
Fold ¼ cup of mini chocolate chips into the cookie dough before baking for extra texture and chocolate flavor.
2. Brownie Sandwiches
Use a brownie-style cookie base for a fudgier, denser texture. You can also slightly underbake your cookies if you want them more gooey.
3. Different Ice Cream Flavors
Try swapping vanilla ice cream for:
- Mint chocolate chip
- Strawberry
- Salted caramel
- Cookies and cream
These pair well with the dark chocolate cookie base.
4. Vegan Version
- Use vegan butter and a flax egg (1 tbsp ground flaxseed + 2.5 tbsp water).
- Replace milk with any plant milk (like oat or almond).
- Choose a dairy-free ice cream.
Tips & Tricks
- Soft ice cream spreads easier: Let it sit on the counter for 5–10 minutes.
- Freeze cookies before assembly for less melting while building sandwiches.
- Use a cookie cutter to trim uneven edges for a neat presentation.
- Roll edges in toppings like crushed nuts, coconut flakes, or sprinkles for fun textures and flavors.
- For crispier cookies, bake a minute longer and cool on the pan.

Chocolate Ice Cream Sandwiches
8–10
sandwiches25
minutes10
minutes290
kcal15
minutes1
hourIngredients
- Cookies:
½ cup (113g) unsalted butter, softened
¾ cup (150g) granulated sugar
1 large egg white
1 tsp vanilla extract
¼ cup (60ml) milk
1 cup (125g) all-purpose flour
¼ cup (25g) black cocoa powder
¼ cup (25g) dark cocoa powder
½ tsp baking powder
¼ tsp fine sea salt
- Filling:
1 pint (473ml) vanilla ice cream (or flavor of choice), slightly softened
Directions
- Preheat oven to 350°F (175°C). Line baking sheet with parchment.
- In a bowl, cream butter and sugar until light and fluffy (2–3 min).
- Mix in egg white, vanilla, and milk until smooth.
- In a separate bowl, whisk together flour, cocoa powders, baking powder, and salt.
- Combine dry and wet ingredients. Stir gently until smooth.
- Scoop tablespoon-sized dough onto baking sheet. Flatten gently.
- Bake for 8–10 minutes. Let cool on pan for 5 minutes, then move to wire rack.
- Pair cookies of similar size. Scoop softened ice cream onto one cookie and sandwich with the other.
- Smooth edges with spatula. Place sandwiches on a tray and freeze for 1 hour.
- Store in airtight container or wrap individually for longer storage.
Notes
- Serving Tip:
Let sit at room temperature for 2 minutes before eating.
Nutrition Information (Per Sandwich)
- Calories: 290 kcal
- Carbohydrates: 34g
- Protein: 4g
- Fat: 15g
- Saturated Fat: 9g
- Cholesterol: 35mg
- Sodium: 105mg
- Fiber: 3g
- Sugar: 20g
- Calcium: 60mg
- Iron: 1.5mg
(Nutrition may vary based on ice cream brand and size of cookies.)
Chocolate Ice Cream Sandwich FAQs
Q: Can I make these ahead of time?
Yes. Once assembled, they can be frozen for up to 2 weeks. Just wrap individually in parchment or plastic wrap to avoid freezer burn.
Q: Why are my cookies too hard after freezing?
Try letting them sit at room temp for a couple minutes before eating. Also, make sure you don’t overbake them initially.
Q: Can I use store-bought cookies?
You can, but homemade cookies tend to be softer and freeze better with ice cream in between.
Q: What if I don’t have black cocoa powder?
You can use all regular dark cocoa powder. The flavor will still be rich—just slightly less intense in color and taste.
Conclusion
These Chocolate Ice Cream Sandwiches are a great mix of classic comfort and a touch of fun. The soft chocolate cookies pair beautifully with your favorite ice cream, and they’re just the right size for a satisfying treat without being too heavy.
What I love most is how customizable they are. Whether you stick to vanilla or try something bold like caramel or coffee, the result is always rewarding. Plus, they store well in the freezer, so you can enjoy them anytime.
Make a batch, wrap them up, and keep a few ready for when that dessert craving hits. It’s simple, honest, and always hits the spot.