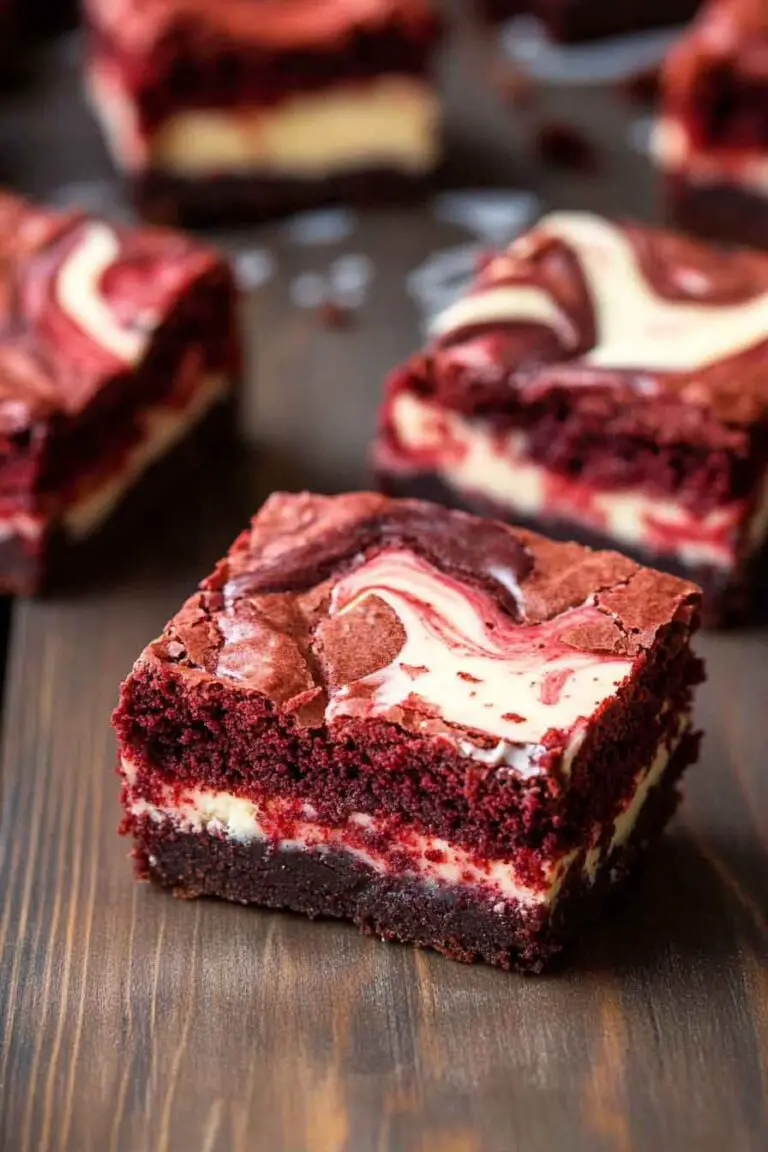
Strawberry Cheesecake Brownies
Brownies. Cheesecake. Strawberries. All in one bite.
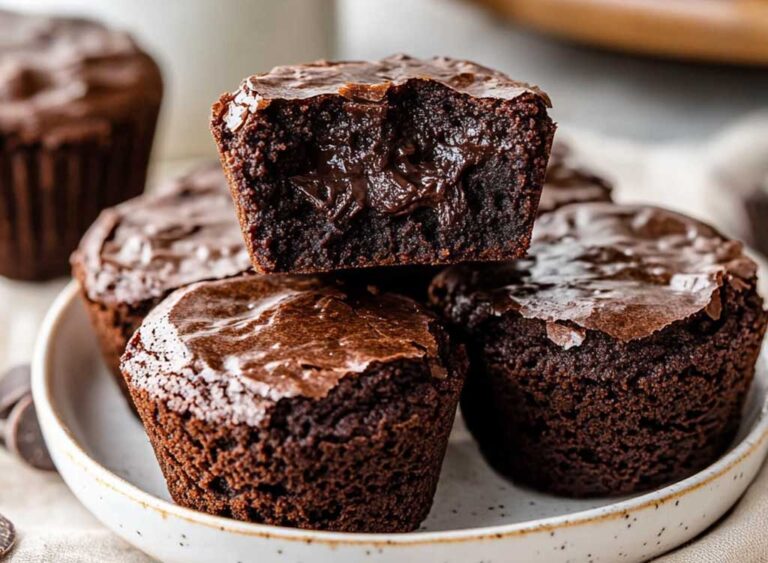
If that sounds like something you need in your life right now — trust me, it is. These bars are rich, fudgy, creamy, and fruity all at once. And the best part? They look stunning without much effort at all.
I’m talking about those pretty pink swirls that make people think you spent hours in the kitchen. You didn’t. But you don’t have to tell them that.
Why You’ll Love These
- Two desserts in one. Deep chocolate brownie. Creamy cheesecake. Fruity strawberry ribbons. One square.
- No fancy equipment. Forget water baths and springform pans. Just a regular baking dish and a bowl.
- They actually get better overnight. The layers settle as they chill. Make them the night before and thank yourself in the morning.
- Simple ingredients. Nothing weird. Nothing you need to hunt down.
- Great for sharing — or not. No judgment here.
Before You Start — What to Know
| Prep Time | 20 minutes |
| Bake Time | 35–40 minutes |
| Cooling Time | At least 2 hours (overnight is better) |
| Total Time | About 3 hours including cooling |
| Servings | 16 bars (9×13 pan) or 9 thicker bars (8×8 pan) |
| Difficulty | Easy to intermediate |
The swirling step looks impressive. It’s not. A toothpick does all the work.
Tools You’ll Need
- 9×13 inch baking pan (or 8×8 for thicker bars)
- Parchment paper
- Two mixing bowls — one large, one medium
- Hand mixer or stand mixer
- Rubber spatula
- Toothpick or skewer
- Measuring cups and spoons
- Whisk
Ingredients
Brownie Layer
- 1 cup (2 sticks / 226g) unsalted butter, melted — this is what gives you that dense, fudgy texture
- 1½ cups (300g) granulated sugar
- 3 large eggs, room temperature
- 2 teaspoons pure vanilla extract
- ¾ cup (94g) all-purpose flour — spoon and level it, don’t scoop
- ¾ cup (75g) Dutch-processed cocoa powder — smoother and darker than regular cocoa
- ½ teaspoon kosher salt
- ½ teaspoon baking powder
Cheesecake Layer
- 8 oz (226g) full-fat brick cream cheese, softened — not the spreadable kind from a tub
- ¼ cup (50g) granulated sugar
- 1 large egg, room temperature
- 1 teaspoon pure vanilla extract
Strawberry Swirl
- ½ cup strawberry pie filling — scoop up some of the whole strawberry pieces along with the gel
Ingredient Notes Worth Reading
Cream cheese temperature matters. Cold cream cheese = lumpy cheesecake layer. Those lumps won’t bake out. Pull it from the fridge at least 30–45 minutes early.
Dutch-processed vs. natural cocoa. Dutch-processed gives you that deep, almost black brownie look with a smoother flavor. Natural cocoa works fine — just expect a slightly sharper, more bitter chocolate taste.
Strawberry pie filling. It’s easy, it’s reliable, and it swirls beautifully. But if you want something fresher, simmer ½ cup of strawberries (fresh or frozen) with 1–2 tablespoons sugar and a squeeze of lemon until it thickens. Done.
Melted butter. Let it cool a bit before you add eggs. Pour it in hot and you’ll scramble them. Nobody wants scrambled brownie eggs.
Variations to Try
- Swap in raspberry filling for a tangier, more grown-up flavor contrast
- Fold in ½ cup chocolate chips to the brownie batter for extra richness
- Add a graham cracker crust as the bottom layer for a more traditional cheesecake feel
- Dice fresh strawberries into the cheesecake layer for more texture
- Add a pinch of cinnamon to the brownie batter — it quietly deepens the chocolate flavor in a way people can’t quite put their finger on

Step-by-Step Instructions
Step 1 — Prep Your Pan
Preheat the oven to 350°F (177°C). Line your baking pan with parchment paper and leave some overhang on the sides — that’s your handle for lifting the bars out later. Lightly grease the parchment.
Step 2 — Make the Brownie Batter
In a large bowl, whisk the melted butter and sugar together. Add eggs one at a time, whisking after each. Stir in the vanilla.
Now sift in the cocoa powder, flour, salt, and baking powder. Switch to a rubber spatula. Fold — don’t beat. Stop as soon as you see no more dry streaks. The batter will be thick. That’s good.
Spread two-thirds of this batter into your prepared pan. Set the rest aside.
Step 3 — Make the Cheesecake Layer
Beat the softened cream cheese and sugar together until completely smooth — about 2 minutes on medium with a hand mixer. Add the egg and vanilla. Beat just until incorporated.
Pour this over the brownie base and spread it out evenly.
Step 4 — Add Strawberry and the Top Layer
Drop spoonfuls of strawberry filling across the cheesecake layer. Space them out. Then drop small spoonfuls of the reserved brownie batter on top of that.
Now grab your toothpick. Drag it through the layers in slow S-curves or figure-eight motions. 8 to 10 passes is enough. More than that and the layers blur together into a muddy swirl. Less is genuinely more here.
Step 5 — Bake
Bake for 35–40 minutes. You’re looking for a cheesecake layer that looks set — not jiggly in the center. A toothpick poked into the brownie portion should come out with a few moist crumbs, not wet batter.
If the top starts browning too fast, loosely tent the pan with foil around the 25-minute mark.
Step 6 — The Hardest Part: Cooling
Cool in the pan at room temperature for at least 1 hour. Then move it to the refrigerator for at least 1 more hour before you slice.
Warm cheesecake bars fall apart. Cold ones slice cleanly. Plan ahead and you’ll be rewarded.
Serving Ideas
Lift the whole slab out using the parchment overhang. Place on a cutting board. Use a sharp knife and wipe the blade clean between every cut — this is what gives you those clean, bakery-looking edges.
From there, you’ve got options:
- Dust with powdered sugar right before serving for a simple, elegant finish
- Add a small dollop of whipped cream and a fresh strawberry slice on each bar
- Serve with a scoop of vanilla ice cream if you’re making it a proper dessert
- Arrange on a platter with some bars flipped to show the swirl — the natural pattern does all the work for you
Storing Them
| Storage | How Long |
|---|---|
| Refrigerator (airtight container) | Up to 5 days |
| Freezer (wrapped individually, then in a freezer bag) | Up to 2 months |
| Room temperature | No more than 2 hours |
Because of the cream cheese, these must stay cold. That’s non-negotiable.
To freeze: wrap each bar in plastic wrap, then drop into a zip-top bag. Thaw overnight in the fridge when you’re ready to eat them.
Tips That Actually Make a Difference
Don’t rush the cooling. Seriously. This is the most common reason cheesecake brownies look like a mess. Bake them the night before you need them.
Room temperature ingredients. Cold eggs or cold cream cheese won’t blend smoothly. Take them out early.
Swirl gently. You’re creating a pattern, not mixing a batter. A few light passes is all it takes.
Weigh your flour if you have a kitchen scale. Too much flour is the single biggest reason brownies turn out dry instead of fudgy.
Fold after adding flour. Don’t beat. Overmixing builds up gluten and turns your fudgy brownies cakey. Not what we’re after.
Parchment paper is non-negotiable. Cutting cheesecake bars out of a bare greased pan is a frustrating experience. Just use the parchment.
Nutrition (Per Bar — Based on 16 Servings)
| Nutrient | Amount |
|---|---|
| Calories | ~290 kcal |
| Total Fat | 17g |
| Saturated Fat | 10g |
| Cholesterol | 85mg |
| Sodium | 130mg |
| Total Carbohydrates | 32g |
| Dietary Fiber | 1g |
| Total Sugars | 23g |
| Protein | 4g |
| Calcium | 35mg |
| Iron | 1.5mg |
These are estimates based on standard measurements and will vary by brand and portion size.

Strawberry Cheesecake Brownies
Course: Brownie Recipes16
bars20
minutes40
minutes290
kcal2
hourIngredients
- Brownie Layer:
1 cup (226g) unsalted butter, melted and slightly cooled
1½ cups (300g) granulated sugar
3 large eggs, room temperature
2 teaspoons pure vanilla extract
¾ cup (94g) all-purpose flour, spooned and leveled
¾ cup (75g) Dutch-processed cocoa powder
½ teaspoon kosher salt
½ teaspoon baking powder
- Cheesecake Layer:
8 oz (226g) full-fat brick cream cheese, softened
¼ cup (50g) granulated sugar
1 large egg, room temperature
1 teaspoon pure vanilla extract
- Strawberry Swirl:
½ cup strawberry pie filling
Directions
- Preheat oven to 350°F (177°C). Line a 9×13 inch pan with parchment paper and lightly grease.
- Whisk melted butter and sugar. Add eggs one at a time, then vanilla. Fold in cocoa, flour, salt, and baking powder until just combined.
- Spread two-thirds of brownie batter into the pan.
- Beat cream cheese and sugar until smooth. Mix in egg and vanilla. Spread over brownie layer.
- Drop spoonfuls of strawberry filling over cheesecake. Drop remaining brownie batter on top in small spoonfuls.
- Swirl gently with a toothpick — 8 to 10 strokes.
- Bake 35–40 minutes until the cheesecake layer is set and a toothpick comes out with moist crumbs.
- Cool in the pan for 1 hour, then refrigerate at least 1 more hour before slicing.
Frequently Asked Questions
Can I use fresh strawberries instead of pie filling? Yes. Dice about ½ cup, toss with 1 tablespoon sugar, and use that instead. The swirl will be less smooth but the flavor is brighter and less sweet.
Why did my cheesecake layer crack? Almost always overbaking. Pull the pan when the center still has a slight wobble — it firms up as it cools. Also, try not to open the oven door repeatedly while it’s baking.
My layers blended together. What happened? Two likely reasons: the brownie batter was too warm when you added the cheesecake layer, or you over-swirled. Let the base cool a few minutes before layering, and keep that toothpick moving lightly.
Can I make these gluten-free? A 1:1 gluten-free flour blend works well here. The texture may be slightly more crumbly, but the flavor holds up fine.
Do I have to refrigerate these? Yes. The cream cheese layer makes that a requirement. Don’t leave them sitting out for more than 2 hours.
Can I double the recipe? Yes — but use two 9×13 pans. Don’t try to bake a double batch in one deep pan. The center won’t cook through before the edges overbake.
Final Thoughts
These bars come together with ingredients you probably already have. No complicated techniques. No special equipment.
The only thing that trips people up? Not waiting long enough for them to cool. That one step is the difference between beautiful, clean slices and a delicious but messy pile.
Make them the evening before. Wake up to perfect bars.
Worth it every single time.