Rainbow Drip Cake Magic
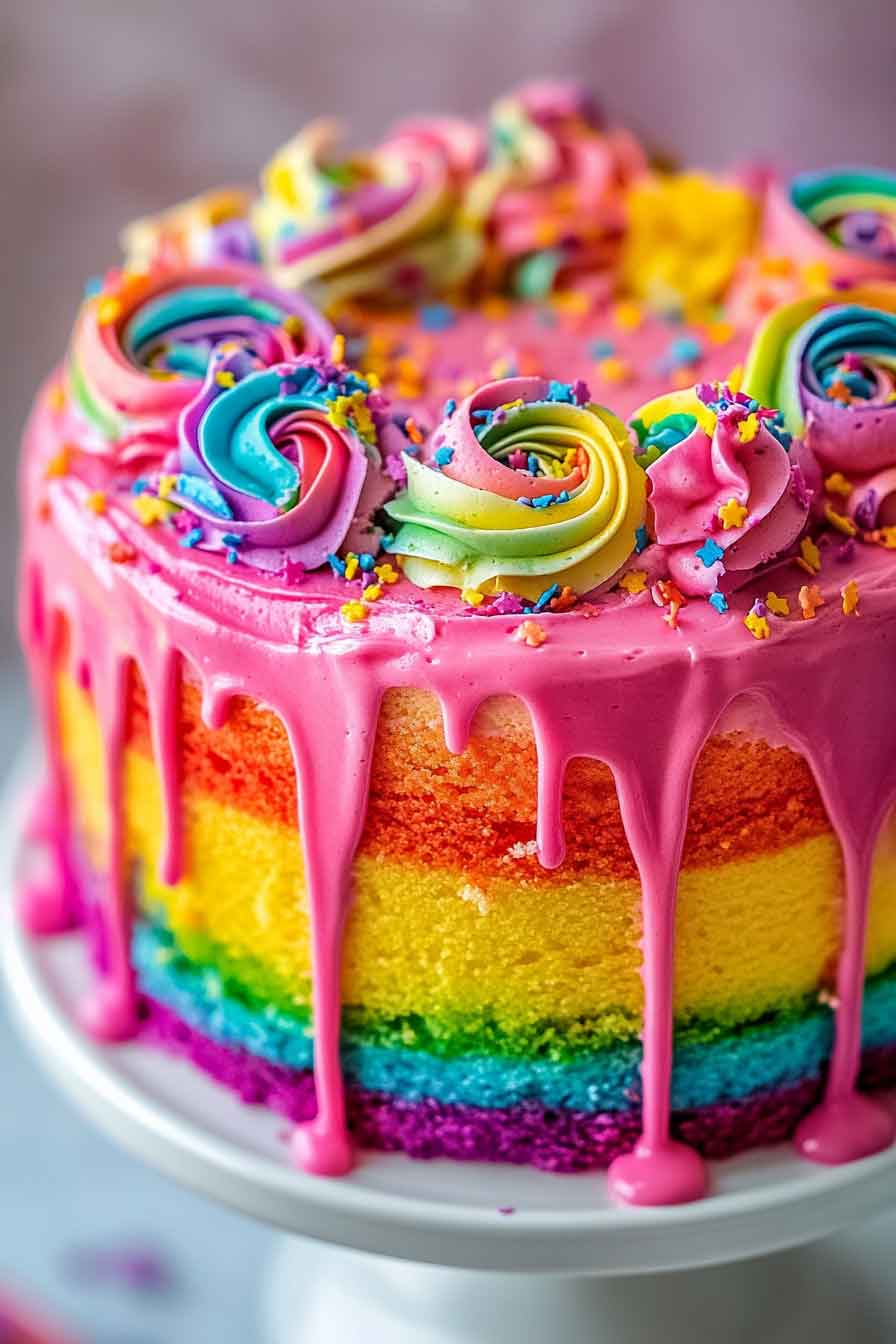
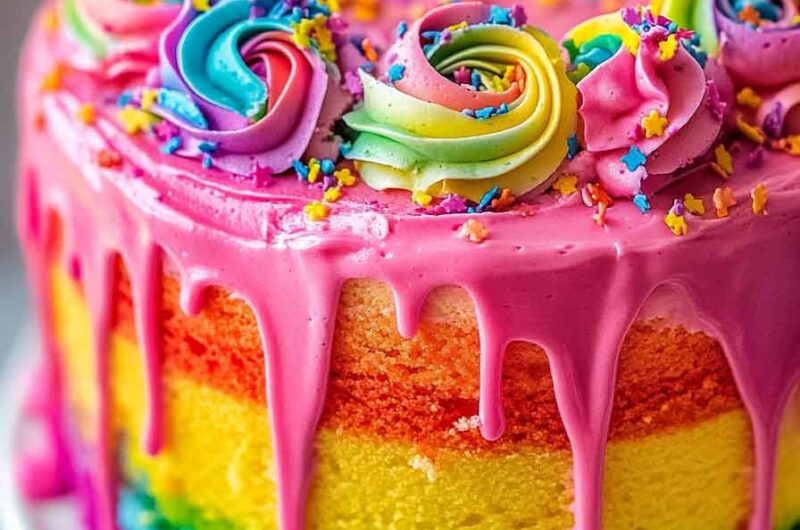
This cake is bright, colorful, and full of fun—it’s like a rainbow you can eat. Each layer is soft, sweet, and bursting with color, all covered in a silky white frosting and topped with a glossy drip. I made it for a birthday once, and it instantly became the centerpiece of the table.
I love how cheerful it looks when you cut into it—every slice shows off the colors like magic. The soft cake, creamy frosting, and chocolate drip come together perfectly. It’s simple to make but looks like a showstopper.
If you want a dessert that makes people smile the moment they see it, this Rainbow Drip Cake Magic is it. Let’s bake it together—it’s colorful, delicious, and pure happiness in every bite.

Why You’ll Love This Recipe
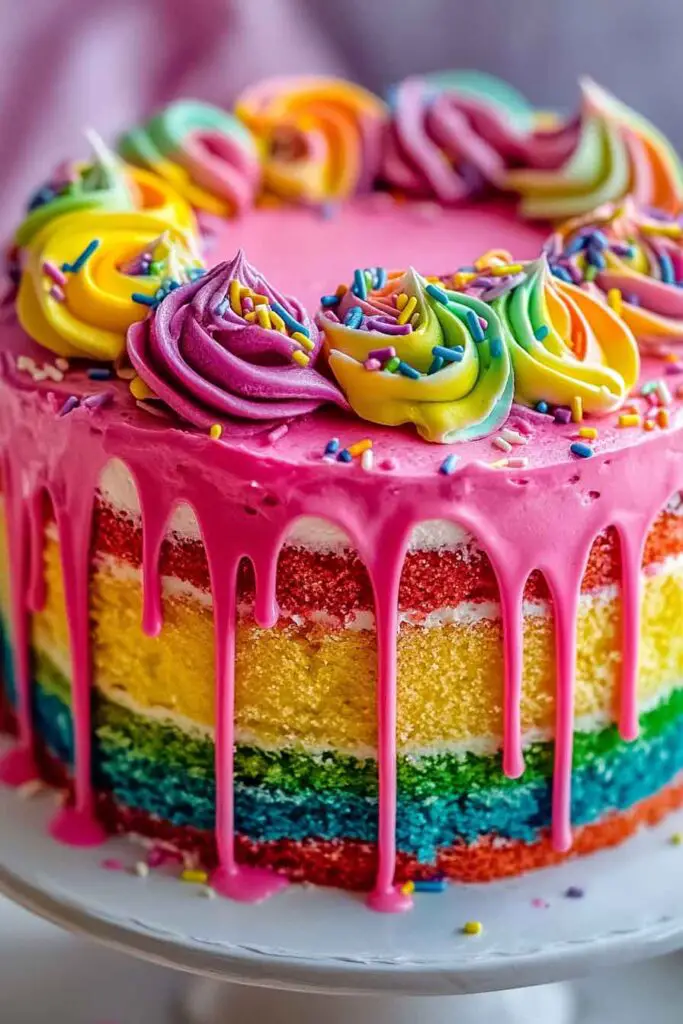
- Show-Stopping Presentation: Creates a dramatic reveal when you slice into rainbow layers
- Customizable Colors: Use any color combination to match your celebration theme
- Surprisingly Simple: Looks fancy but uses basic cake techniques
- Perfect for Celebrations: Ideal for birthdays, baby showers, or pride events
- Make-Ahead Friendly: Bake layers in advance and assemble when ready
What You Need to Know Before You Start
Prep Time & Cook Time:
- Prep Time: 45 minutes
- Cook Time: 25-30 minutes
- Cooling & Assembly Time: 2 hours
- Total Time: About 3-4 hours
Servings: This recipe makes one 3-layer 8-inch cake, serving 12-16 people. Want a taller cake? Double the recipe for 6 layers.
Difficulty: Moderate. Beginners can do this with patience, but some experience with layer cakes helps.
Required Kitchen Tools
- Three 8-inch round cake pans
- Electric mixer (hand or stand)
- Mixing bowls
- Measuring cups and spoons
- Cooling racks
- Offset spatula
- Cake turntable (optional but helpful)
- Piping bags or squeeze bottles for drip
- Toothpicks for testing doneness
Ingredients
This colorful cake uses simple pantry ingredients that come together to create something magical. The gel food coloring brings vibrant hues while white chocolate creates that perfect drippy effect.
For the Cake Layers:
- 3 cups all-purpose flour
- 1 tablespoon baking powder
- 1/2 teaspoon salt
- 1 cup unsalted butter, softened to room temperature
- 2 cups sugar
- 4 large eggs, at room temperature
- 1 cup whole milk, at room temperature
- 2 teaspoons vanilla extract
- Gel food coloring in rainbow colors (red, orange, yellow, green, blue, purple)
For the Buttercream Frosting:
- 1 and 1/2 cups unsalted butter, softened
- 6 cups powdered sugar
- 3-4 tablespoons whole milk
- 2 teaspoons vanilla extract
- Pinch of salt
For the White Chocolate Drip:
- 1 cup white chocolate chips
- 1/3 cup heavy cream
For Decoration:
- Rainbow sprinkles
- Extra white chocolate for drizzling (optional)
Variations for Rainbow Drip Cake
- Chocolate Base: Use chocolate cake instead of vanilla for richer flavor
- Different Color Schemes: Try pastel colors, ombre effect, or tie-dye swirls
- Flavor Boost: Add almond extract or lemon zest to the batter
- Dark Chocolate Drip: Use dark chocolate instead of white for contrast
- Inside Surprise: Add sprinkles to the batter for extra fun
- Cream Cheese Frosting: Swap buttercream for tangy cream cheese frosting
How to Make Rainbow Drip Cake Magic Step-by-Step Instructions
1. Prepare Your Pans
Preheat oven to 350°F. Grease three 8-inch round pans with butter and line the bottoms with parchment paper circles. This prevents sticking.
2. Mix Dry Ingredients
Whisk together flour, baking powder, and salt in a medium bowl. Set this aside while you work on the wet ingredients.
3. Cream Butter and Sugar
Beat softened butter and sugar together using an electric mixer on medium speed for 3-4 minutes until light and fluffy. This adds air for a tender crumb.
4. Add Eggs and Vanilla
Add eggs one at a time, beating well after each addition. Mix in vanilla extract until everything is combined smoothly.
5. Alternate Dry and Wet
With the mixer on low speed, add the flour mixture in three parts, alternating with milk in two parts. Start and end with flour. Mix just until combined to avoid tough cake.
6. Divide and Color Batter
Divide batter equally into six bowls. Add different gel food coloring to each bowl to create your rainbow colors. Stir each bowl until color is evenly distributed.
7. Layer the Colors
Pour two colors into each prepared pan, creating layers or swirls. You can drop spoonfuls of each color and gently swirl with a knife for a marbled effect.
8. Bake the Layers
Bake for 25-30 minutes until a toothpick inserted in the center comes out clean. The tops should spring back when lightly pressed.
9. Cool Completely
Let cakes cool in pans for 10 minutes, then turn out onto cooling racks. Allow them to cool completely before frosting, which takes about an hour.
10. Make Buttercream
Beat softened butter until creamy. Gradually add powdered sugar one cup at a time, alternating with splashes of milk. Add vanilla and salt. Beat on high for 3 minutes until fluffy.
11. Level and Stack
Use a serrated knife to level the tops of each cake layer if needed. Place the first layer on your serving plate. Spread a layer of buttercream on top. Repeat with remaining layers.
12. Crumb Coat
Apply a thin layer of frosting around the entire cake to seal in crumbs. Refrigerate for 30 minutes until firm.
13. Final Frost
Apply a thicker, smooth layer of buttercream over the chilled crumb coat. Use an offset spatula to create smooth sides and top.
14. Make White Chocolate Drip
Heat heavy cream until just simmering. Pour over white chocolate chips and let sit for 2 minutes. Stir until smooth and glossy. Let cool for 5-10 minutes until slightly thickened.
15. Create the Drip
Pour white chocolate around the edges of the cake, letting it drip down naturally. Fill in the top and smooth gently. Work quickly before chocolate sets.
16. Decorate
Add rainbow sprinkles to the top while the chocolate is still wet. You can also drizzle extra melted white chocolate for more texture.
Serving and Decoration
Place your finished Rainbow Drip Cake on a colorful cake stand or white platter to make the colors pop. Surround the base with extra sprinkles or fresh flowers for an elegant touch. When serving, use a sharp knife dipped in hot water and wiped clean between cuts for neat slices that show off those beautiful rainbow layers.
For an extra special presentation, add sparkler candles or rainbow ribbon around the cake board. The white chocolate drip catches light beautifully, making this cake perfect for photos.
How to Serve Rainbow Drip Cake
This cake is perfect for:
- Birthday Parties: The ultimate birthday cake for kids and adults who love color
- Baby Showers: Reveal the gender or just celebrate with joy
- Pride Celebrations: Show your colors with this festive dessert
- Tea Parties: Serve smaller slices with coffee or tea
- Bake Sales: This eye-catching cake always sells out first
Pair with vanilla ice cream, fresh berries, or just enjoy it on its own. The cake is moist enough that it does not need extra accompaniments.
Storing Rainbow Drip Cake
- Room Temperature: Keep covered at room temperature for up to 2 days if your kitchen is cool
- Refrigerator: Store in an airtight container or covered with plastic wrap for up to 5 days
- Freezer: Wrap unfrosted cake layers tightly in plastic wrap and foil. Freeze for up to 3 months. Thaw in the refrigerator before assembling
- Frosted Cake: You can freeze the fully assembled cake. Freeze uncovered for 30 minutes, then wrap well. Thaw in refrigerator overnight
Bring refrigerated cake to room temperature 30 minutes before serving for the best flavor and texture.
Tips and Tricks for Success
- Room Temperature Ingredients: This is critical for smooth batter and even baking
- Gel Food Coloring Works Best: Liquid colors can make batter too thin and colors less vibrant
- Don’t Overmix: Mix just until ingredients combine to keep cake tender
- Level Your Layers: Flat tops make stacking easier and prevent sliding
- Chill Between Steps: Cold cake is easier to frost smoothly
- Test Your Drip: Try the chocolate on a cold glass first to check consistency
- Work Fast with Drip: White chocolate sets quickly, so have everything ready
- Use a Turntable: Makes frosting much easier and more even
- Measure Flour Correctly: Spoon flour into measuring cup and level off with a knife
Nutrition
| Nutrient | Amount Per Serving |
|---|---|
| Calories | 520 |
| Total Fat | 26g |
| Saturated Fat | 16g |
| Cholesterol | 95mg |
| Sodium | 180mg |
| Total Carbohydrates | 68g |
| Dietary Fiber | 1g |
| Sugars | 52g |
| Protein | 5g |
Based on 16 servings. Nutritional values are approximate.
Rainbow Drip Cake Magic
Course: Cake Recipes10–12
servings45
minutes25
minutes520
kcal2
hourIngredients
- For Cake:
3 cups (375g) all-purpose flour (spooned & leveled)
1 tablespoon baking powder
1/2 teaspoon salt
1 cup (226g) unsalted butter, softened to room temperature
2 cups (400g) sugar
4 large eggs, at room temperature
1 cup (240ml) whole milk, at room temperature
2 teaspoons vanilla extract
Gel food coloring (red, orange, yellow, green, blue, purple)
- For Buttercream:
1 and 1/2 cups (339g) unsalted butter, softened
6 cups (720g) powdered sugar
3-4 tablespoons whole milk
2 teaspoons vanilla extract
Pinch of salt
- For Drip:
1 cup (180g) white chocolate chips
1/3 cup (80ml) heavy cream
- For Decoration:
Rainbow sprinkles
Directions
- Prep Pans: Preheat oven to 350°F (177°C). Grease three 8-inch round pans and line bottoms with parchment paper.
- Dry Mix: Whisk flour, baking powder, and salt together. Set aside.
- Cream: Beat butter and sugar on medium speed for 3-4 minutes until fluffy.
- Add Eggs: Mix in eggs one at a time, then vanilla.
- Combine: On low speed, add flour mixture in three parts, alternating with milk in two parts. Start and end with flour.
- Color: Divide batter into six bowls. Tint each with different gel food coloring.
- Layer: Pour two colors into each pan, creating layers or swirls.
- Bake: Bake 25-30 minutes until toothpick comes out clean.
- Cool: Cool in pans 10 minutes, then turn onto racks to cool completely (about 1 hour).
- Buttercream: Beat butter until creamy. Gradually add powdered sugar and milk. Add vanilla and salt. Beat on high 3 minutes.
- Stack: Level cake tops if needed. Stack layers with buttercream between each.
- Crumb Coat: Apply thin frosting layer. Chill 30 minutes.
- Final Frost: Apply smooth layer of buttercream over entire cake.
- Make Drip: Heat cream until simmering. Pour over white chocolate. Wait 2 minutes, then stir until smooth. Cool 5-10 minutes.
- Drip: Pour chocolate around cake edges, letting it drip down. Fill top and smooth.
- Decorate: Add sprinkles while chocolate is wet.
Rainbow Drip Cake FAQs
Can I use a boxed cake mix? Yes, you can use three boxes of white cake mix and divide the batter to color. Follow box instructions for baking time.
Why did my drip slide off completely? The chocolate was too warm. Let it cool a bit more until it coats the back of a spoon thickly.
Can I make this ahead? Yes, bake layers up to 2 days ahead and keep wrapped at room temperature, or freeze for longer storage. Frost the day you plan to serve.
My cake layers domed in the middle. What happened? Oven was too hot. Try lowering temperature by 25 degrees and using cake strips on the pans.
Can I use liquid food coloring? You can, but colors will be less vibrant and you may need to adjust liquid in the recipe.
How do I get smooth frosting? Use an offset spatula and keep dipping it in hot water, wiping dry between smoothing passes.
Conclusion
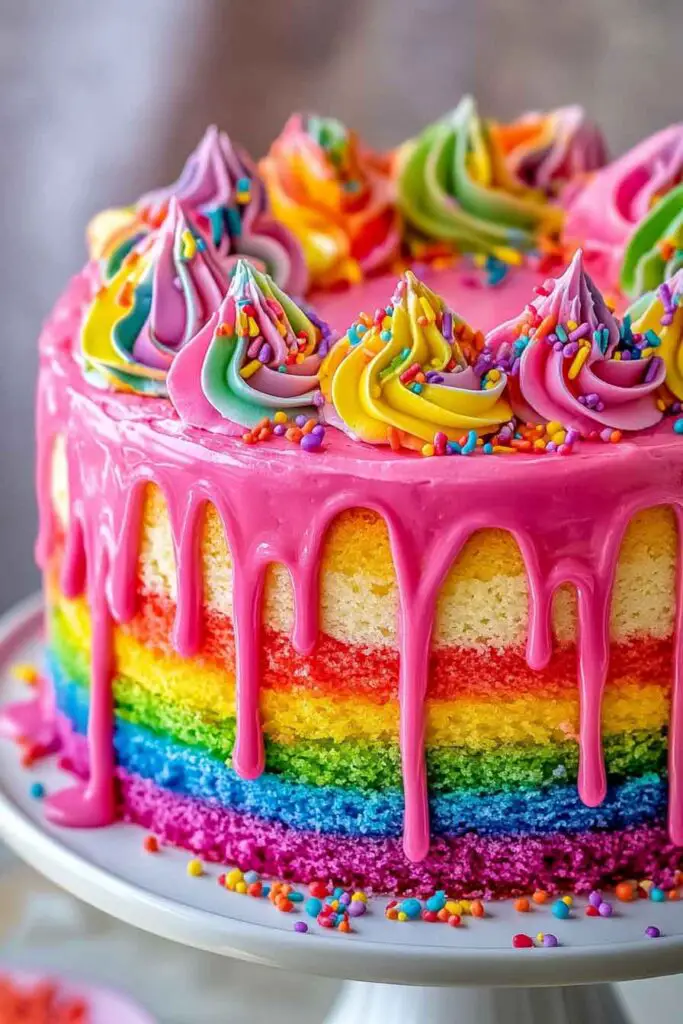
Rainbow Drip Cake Magic proves that a little color can turn a simple cake into pure joy. The vibrant layers surprise everyone who cuts into it, while the elegant white chocolate drip makes it look bakery-worthy. Whether you are celebrating a birthday, shower, or just want to brighten someone’s day, this cake delivers smiles with every slice.
The best part is watching faces light up when that first slice reveals the rainbow inside. It is a cake that tastes as good as it looks, with moist layers and creamy frosting that balance perfectly. Once you master this technique, you can customize colors for any occasion.