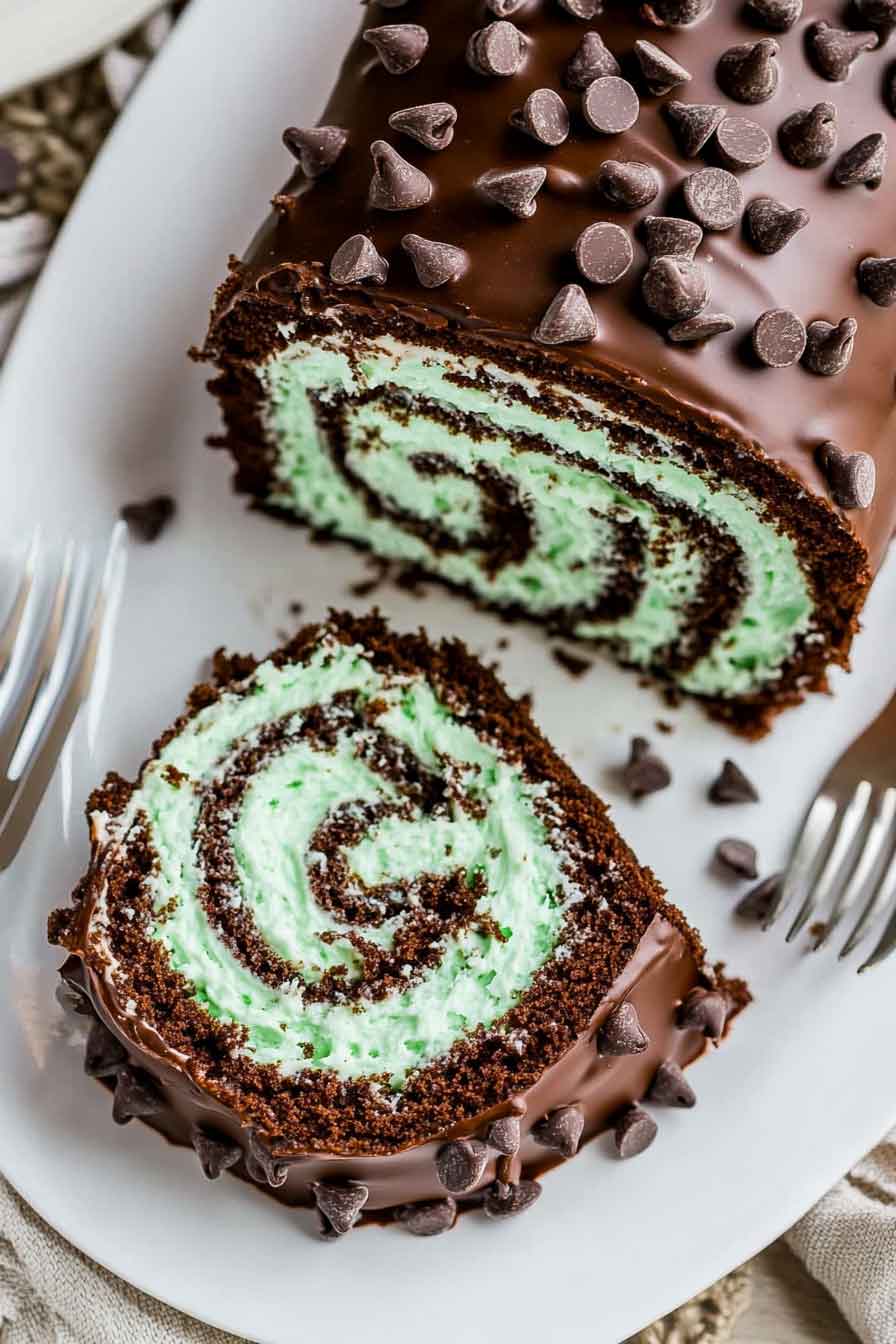
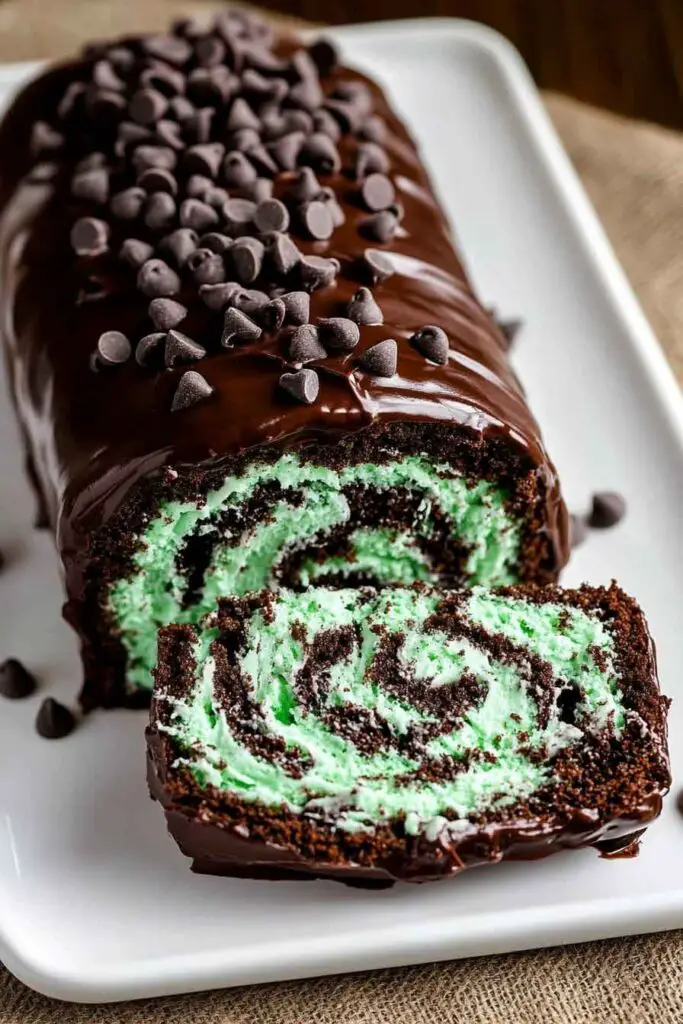
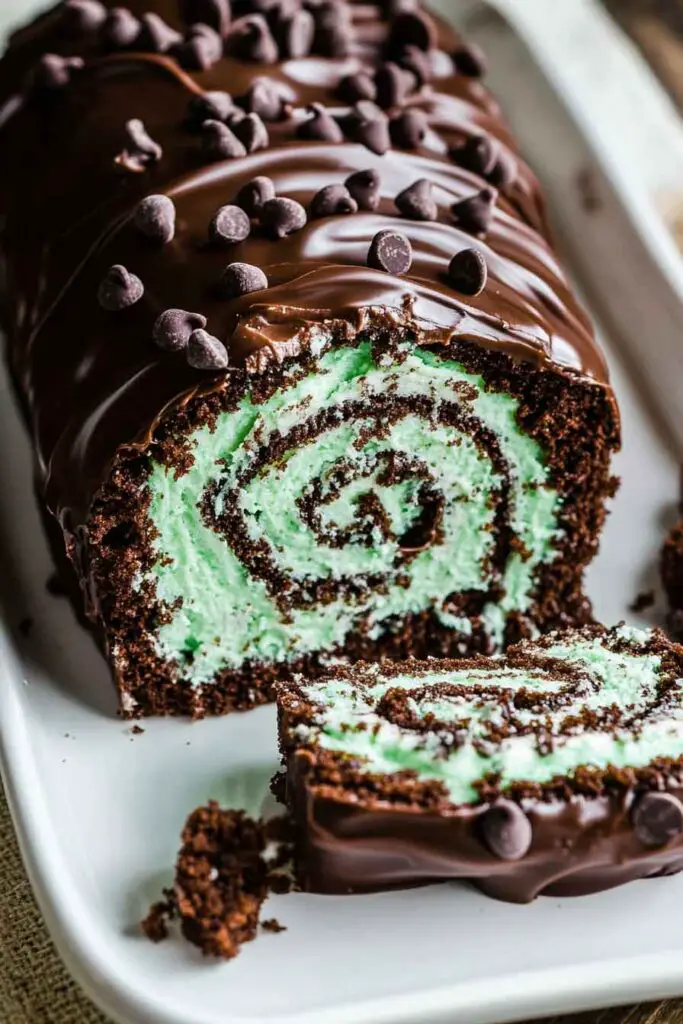
Mint Chocolate Roll Cake
Alright, this Mint Chocolate Roll Cake is seriously cool—literally and flavor-wise. It’s rich, fudgy chocolate cake rolled up with a creamy mint filling that’s light and fluffy. Every slice looks fancy but tastes like a giant mint chocolate candy.
I made it for a family dinner, and everyone was like, “Whoa, you made that?” The swirl is so pretty, and the minty goodness? Just the right chill.
But don’t worry—it’s easier than it looks. Mix, bake, roll, and chill. Let’s make it together—it’s gonna be your new favorite dessert roll!

Why You’ll Love This Recipe
- Refreshing yet Decadent: The airy sponge cake keeps things light, while the creamy filling and ganache offer satisfying richness.
- Texture Harmony: The tender sponge, fluffy whipped cream, and glossy topping create layers of texture in every bite.
- Visually Impressive: The swirl looks beautiful on a dessert plate—perfect for holidays like Christmas or events like birthdays.
- Custom Flavor Control: Love a strong mint taste? Add a few more drops of extract. Prefer a subtle hint? Keep it light. You can also play with different chocolate chips or fillings.

What You Need to Know Before You Start
Time Breakdown:
- Prep Time: 25 minutes – This includes gathering ingredients, mixing, and preparing the pan and towel for rolling.
- Bake Time: 12 minutes – A sponge cake bakes quickly, but timing is important for a flexible texture that rolls well.
- Cool & Chill Time: 1 hour+ – The cake must cool fully before filling, and chilling afterward allows everything to set properly.
- Total Time: ~1 hour 45 minutes – Plan ahead if you’re serving it the same day.
Yields:
This recipe makes 10 slices. Each slice is rich enough that one piece is usually plenty for a serving. If making for a larger group, you can double the recipe and bake two rolls side by side.
Skill Level:
Intermediate. Rolling a cake may sound intimidating, but if you prep the towel properly and don’t overbake the sponge, the process becomes very manageable. Plus, the frosting and garnish help hide small imperfections.
Required Kitchen Tools (Detailed)
You won’t need any fancy equipment, but a few basics make the process smoother:
- Mixing Bowls: You’ll need at least two—one for the eggs and sugar, one for dry ingredients.
- Electric Mixer: Either a stand mixer or a handheld one is fine; it helps whip the eggs to a light, thick consistency.
- Whisk: Use this to gently combine the flour and cocoa to avoid lumps.
- Rubber Spatula: Ideal for folding ingredients without deflating the batter.
- Sifter/Fine Mesh Sieve: Use to sift cocoa powder and flour for a lump-free, airy batter.
- Jelly Roll Pan (10×15 inch): This specific size is key. A larger pan will produce a thinner cake that may crack when rolled.
- Parchment Paper: Prevents sticking. Make sure it overhangs slightly so you can lift the cake easily.
- Clean Kitchen Towel: This is used for rolling the cake while it’s warm—essential for shaping the roll without cracks.
- Offset Spatula (optional): Helps spread batter and filling evenly.
- Wire Cooling Rack: Cools the cake quickly and evenly without moisture buildup underneath.
Ingredient Details & Why They Matter
Chocolate Sponge Cake Ingredients
- Eggs (3 large): These are whipped with sugar to give the cake structure and airiness—no other leavening is needed.
- Granulated Sugar (¾ cup): Adds sweetness and helps the eggs whip to volume.
- Brewed Coffee or Water (2 tsp): Coffee enhances the chocolate flavor subtly, without tasting like coffee. Water works too.
- Vanilla Extract (1 tsp): Rounds out the cocoa’s bitterness and adds depth.
- Unsweetened Cocoa Powder (¼ cup): Use natural cocoa for the best rise and soft texture.
- Salt (¼ tsp): Just a pinch to balance sweetness and enhance flavor.
- Baking Powder (1 tsp): Adds gentle lift to the batter for a fluffy, rollable sponge.
- All-Purpose Flour (¾ cup): Sifted for a fine crumb. Avoid overmixing to keep it light.
- Powdered Sugar (for rolling): Prevents the cake from sticking to the towel when you roll it. Also adds a subtle sweetness to the outer layer.
Mint Whipped Cream Filling
- Heavy Whipping Cream (1 cup): Whips to soft peaks and holds its shape well inside the roll.
- Powdered Sugar (4 tbsp): Dissolves easily into the cream, adding gentle sweetness.
- Peppermint Extract (½ to ¾ tsp): A little goes a long way—start small, taste, and adjust.
- Green Food Coloring (optional, 6 drops): Adds visual interest and a minty look. You can skip it if you prefer a white filling.
- Mini Chocolate Chips (⅓ cup): Adds texture and an extra chocolate bite with every slice.
Ganache Topping
- Milk Chocolate Chips (2 cups): These melt smoothly and complement the mint. You can substitute with semi-sweet for a deeper cocoa flavor.
- Heavy Cream (1¼ cups): When heated and poured over the chocolate, it creates a silky ganache that sets beautifully.
- Vanilla Extract (½ tsp): Gives the ganache a richer undertone.
- Peppermint Extract (¼ tsp): Just a hint ties the topping to the mint inside without being overpowering.
- Mini Chocolate Chips or Andes Baking Chips (¼ cup): Garnish adds a final minty crunch and visual appeal.
How to Make Mint Chocolate Roll Cake – Step-by-Step Instructions
1. Preheat the Oven and Prepare the Pan
- Preheat your oven to 350°F (175°C).
- Lightly grease a 10×15-inch jelly roll pan, then line it with parchment paper. Let the paper overhang the short sides a little for easy lifting later.
- Lightly spray or butter the parchment as well.
- Dust a clean kitchen towel generously with powdered sugar. Set it aside—it’s essential for rolling the warm cake later.
Tip: Use a light hand with grease and sugar so your cake doesn’t get greasy or overly sweet on the outside.
2. Make the Chocolate Sponge Cake Batter
A. Beat the Eggs and Sugar
- In a large mixing bowl, beat 3 eggs with ¾ cup granulated sugar using an electric mixer on high speed for about 4–5 minutes.
- The mixture should become thick, pale, and foamy. This is crucial—it helps the cake rise without much leavening.
B. Add the Wet Ingredients
- Mix in 2 teaspoons brewed coffee or water and 1 teaspoon vanilla extract.
- Beat again briefly until just combined.
C. Sift and Fold in Dry Ingredients
- In a separate bowl, sift together:
- ¾ cup all-purpose flour
- ¼ cup unsweetened cocoa powder
- 1 teaspoon baking powder
- ¼ teaspoon salt
- Gently fold the dry ingredients into the wet mixture in batches using a rubber spatula. Be gentle—don’t stir or beat, or you’ll deflate the batter.
Tip: The batter should stay fluffy and pourable, not runny. If it seems too thick, check that your flour and cocoa were sifted.
3. Bake the Cake
- Pour the batter into your prepared jelly roll pan. Use an offset spatula or the back of a spoon to spread it evenly to all edges and corners.
- Bake on the center rack for 10 to 12 minutes. The top should be set and spring back lightly when touched. Don’t overbake or the cake may crack when rolled.
4. Roll the Cake (While Warm)
- Right out of the oven, immediately loosen the edges of the cake with a knife and turn it out onto the prepared powdered-sugar towel.
- Peel off the parchment paper carefully.
- Starting at the short end, gently roll up the warm cake with the towel inside. This shapes the cake and prevents cracks later.
- Let the cake cool completely while rolled—about 30–40 minutes.
Tip: Don’t skip the towel. It keeps the cake from sticking and helps train the sponge into a roll shape.
5. Make the Mint Whipped Cream Filling
- In a cold mixing bowl, pour in 1 cup heavy whipping cream.
- Beat on medium-high speed until it begins to thicken.
- Add 4 tablespoons powdered sugar, ½ to ¾ teaspoon peppermint extract, and 6 drops green food coloring (if using).
- Continue to whip until soft peaks form.
- Fold in ⅓ cup mini chocolate chips or Andes chips.
Tip: Don’t overwhip—the cream should be smooth and spreadable, not stiff or grainy.
6. Fill and Roll the Cake
- Once the cake is completely cool, carefully unroll it.
- Gently spread the filling evenly over the entire surface using a spatula. Leave a slight border around the edges to prevent overflow when rolling.
- Reroll the cake, this time without the towel. Work slowly and firmly for a tight roll.
- Wrap the roll in plastic wrap and chill for 30 minutes to set.
7. Make the Chocolate Ganache Topping
- Place 2 cups milk chocolate chips in a heatproof bowl.
- In a saucepan, heat 1¼ cups heavy cream just until it begins to simmer—don’t boil.
- Pour the hot cream over the chocolate chips. Let sit for 2–3 minutes.
- Add ½ teaspoon vanilla and ¼ teaspoon peppermint extract, then stir slowly until smooth and glossy.
Tip: If the ganache looks split or too thin, let it cool slightly—it thickens as it rests.
8. Frost and Garnish
- Unwrap the chilled cake and place it on a serving platter.
- Pour the ganache over the roll, letting it drip slightly down the sides. Smooth it out with a spatula.
- Sprinkle the top with ¼ cup mini chocolate chips or chopped Andes mints for texture and visual appeal.
- Chill again for at least 15–20 minutes before slicing to allow the topping to firm up.
Serving and Decoration
This Mint Chocolate Roll Cake is as delightful to look at as it is to eat. Here are some simple and effective ideas for serving and dressing it up:
- Chill Before Slicing: Let the cake chill in the fridge for at least 30 minutes after ganache is applied. This helps you get clean slices.
- Slice with a Warm Knife: Run your knife under hot water and wipe it dry before each cut to prevent the ganache from sticking.
- Garnish Options:
- Sprinkle crushed mint candies or crushed Oreo cookies over the ganache.
- Add a dollop of whipped cream and a fresh mint leaf to each plated slice.
- Use a piping bag to pipe extra ganache in decorative swirls on top.
How to Serve Mint Chocolate Roll Cake
- As a Holiday Dessert: This cake fits beautifully on a holiday dessert tray, especially with the green mint filling. It’s great for Christmas or St. Patrick’s Day.
- With a Hot Drink: Pair slices with hot chocolate, coffee, or peppermint tea for a cozy after-dinner treat.
- For a Party: Make ahead and serve it chilled. The clean swirls and glossy topping make a strong impression.
How to Store Mint Chocolate Roll Cake
- Refrigerator: Keep the roll cake tightly wrapped in plastic wrap or stored in an airtight container for up to 3–4 days in the fridge.
- Freezer: You can freeze the un-frosted cake roll (before ganache) for up to 1 month. Wrap it in plastic wrap and foil. Thaw in the refrigerator before frosting and serving.
Note: For best texture, avoid freezing with the ganache already on—it may turn grainy after thawing.
Tips and Tricks for Success
- Roll While Warm: Rolling the cake when it’s still warm is key. If it cools flat, it’s more likely to crack.
- Don’t Overbake: A sponge cake should be moist and bendable. Keep a close eye at the 10-minute mark.
- Use Powdered Sugar on the Towel: This prevents sticking. Shake off any excess before rolling.
- Whip Cream to Soft Peaks: Overwhipping can make the cream grainy and hard to spread.
- Cool the Ganache Slightly Before Pouring: If it’s too hot, it can slide right off the cake. Wait until it thickens just a bit for a better coating.
Nutrition
Here’s a general nutrition estimate per slice (based on 10 servings):
| Nutrient | Amount per Serving |
|---|---|
| Calories | ~370 kcal |
| Total Fat | 23g |
| Saturated Fat | 14g |
| Carbohydrates | 36g |
| Sugar | 27g |
| Protein | 4g |
| Fiber | 2g |
| Sodium | 95mg |
Nutrition may vary slightly depending on exact brands and serving size.
Mint Chocolate Roll Cake
Course: Cake Recipes10
servings25
minutes12
minutes370
kcal1
hourIngredients
For the Chocolate Cake:
3 large eggs
¾ cup granulated sugar
2 tsp brewed coffee or water
1 tsp vanilla extract
¼ cup unsweetened cocoa powder
¼ tsp salt
1 tsp baking powder
¾ cup all-purpose flour
Powdered sugar (for rolling)For the Mint Filling:
1 cup heavy whipping cream
4 tbsp powdered sugar
½ to ¾ tsp peppermint extract
6 drops green food coloring (optional)
⅓ cup mini chocolate chips or Andes baking chipsFor the Ganache Topping:
2 cups milk chocolate chips
1¼ cups heavy cream
½ tsp vanilla extract
¼ tsp peppermint extract
¼ cup mini chocolate chips or Andes chips (for garnish)
Directions
- Preheat oven to 350°F (175°C). Line a 10×15-inch jelly roll pan with parchment paper and lightly grease. Dust a clean kitchen towel with powdered sugar and set aside.
- Beat eggs and sugar until thick and pale, 4–5 minutes. Mix in coffee and vanilla.
- Sift and fold in cocoa powder, salt, baking powder, and flour gently with a spatula.
- Spread the batter evenly in the prepared pan. Bake for 10–12 minutes, or until the top springs back when touched.
- Immediately invert the hot cake onto the sugared towel. Peel off parchment. Roll the cake up with the towel from the short end. Let cool completely.
- Whip cream with powdered sugar, peppermint extract, and food coloring until soft peaks form. Fold in chocolate chips.
- Unroll cooled cake and spread the filling evenly. Reroll gently without the towel. Wrap in plastic wrap and chill for 30 minutes.
- Make ganache: Heat cream to simmering, pour over chocolate chips. Let sit 2–3 minutes. Add vanilla and peppermint, then stir until smooth.
- Frost roll with ganache and top with extra chips. Chill for 20 minutes before slicing.
FAQs
Can I use semi-sweet chocolate instead of milk chocolate for the ganache?
Yes. It will give a deeper chocolate flavor and less sweetness. You can also mix the two for balance.
Can I skip the green food coloring?
Absolutely. It’s purely for presentation. The filling will still taste minty and delicious without it.
What if my cake cracks when rolling?
It’s okay—just patch it up with the ganache topping. Chilling helps the roll firm up and hide imperfections.
Can I make this a day ahead?
Yes. This dessert actually gets better with time. Chill overnight, and frost the next day if you prefer.
Conclusion
This Mint Chocolate Roll Cake is a refreshing twist on a classic dessert. The combination of soft chocolate sponge, airy mint cream, and glossy ganache makes each bite a satisfying treat. While the rolling step may sound complex, a little patience and these step-by-step instructions will guide you through it easily. Whether you’re baking for a holiday or just want something sweet and special, this recipe is worth the effort.