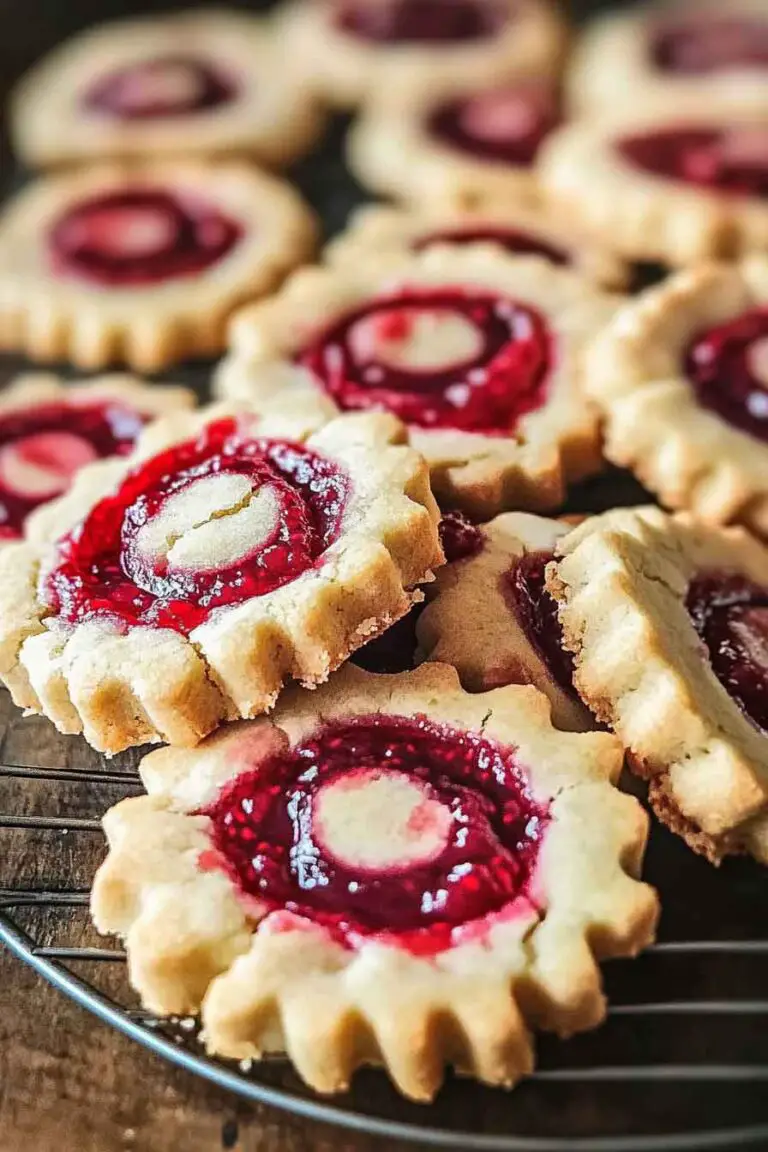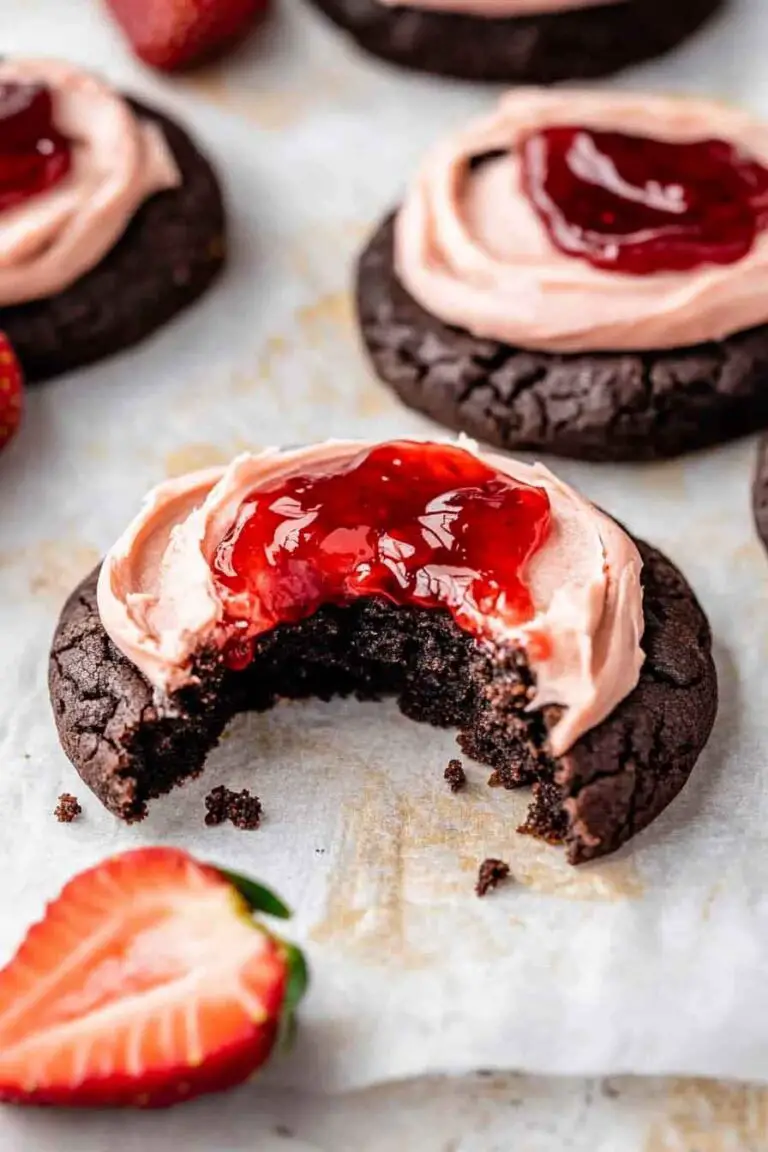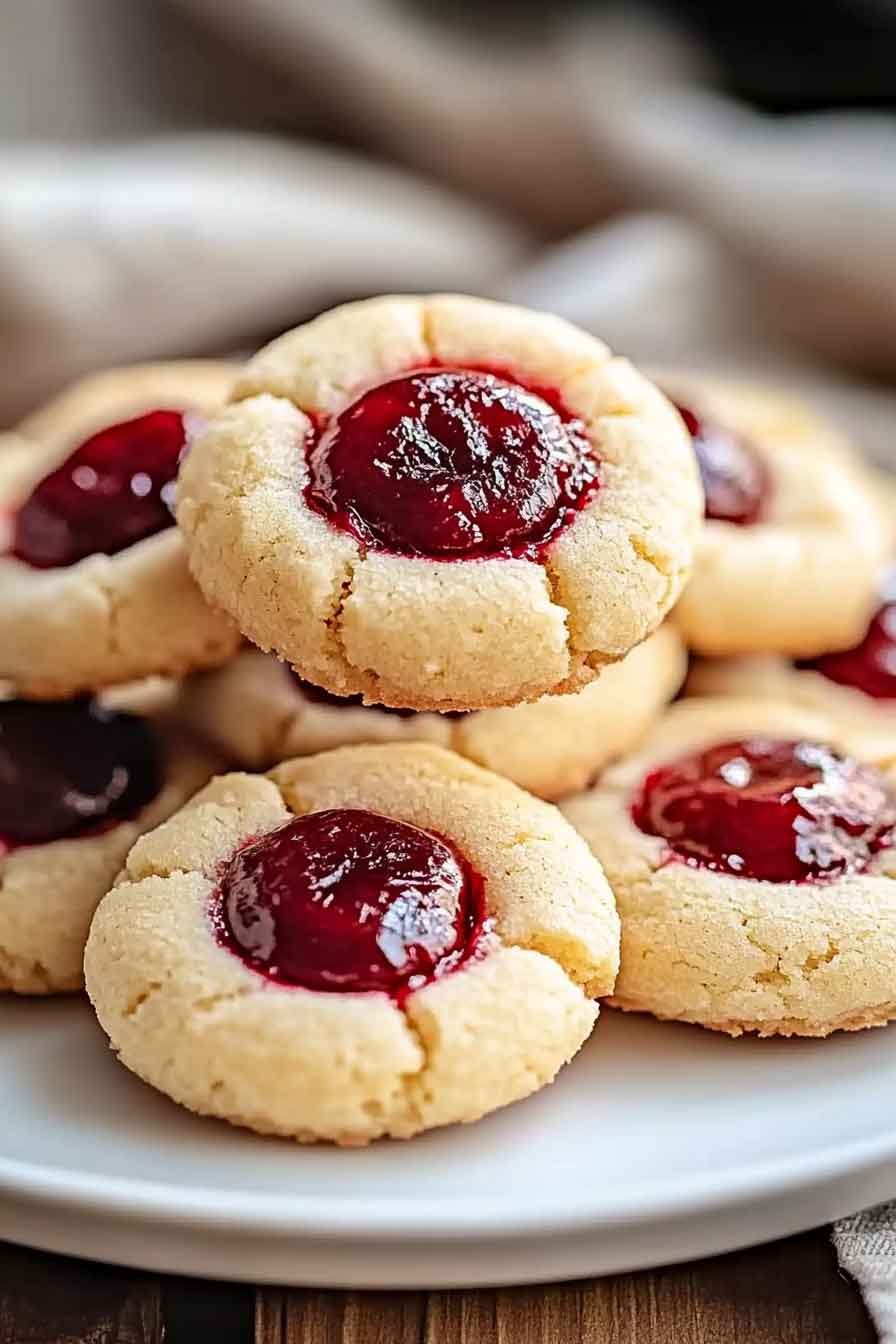
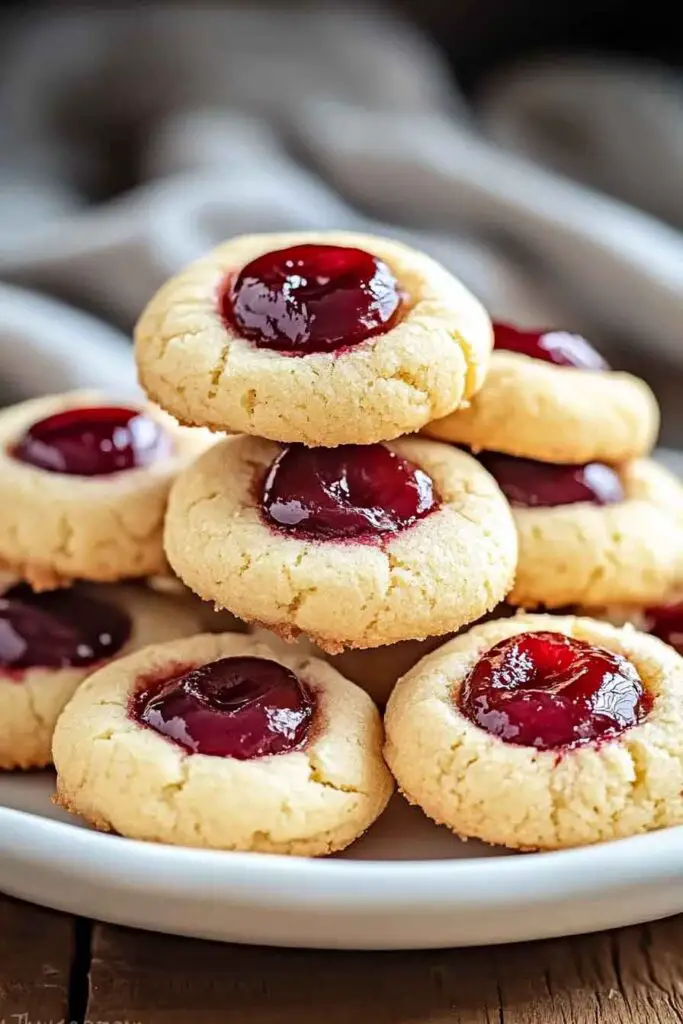
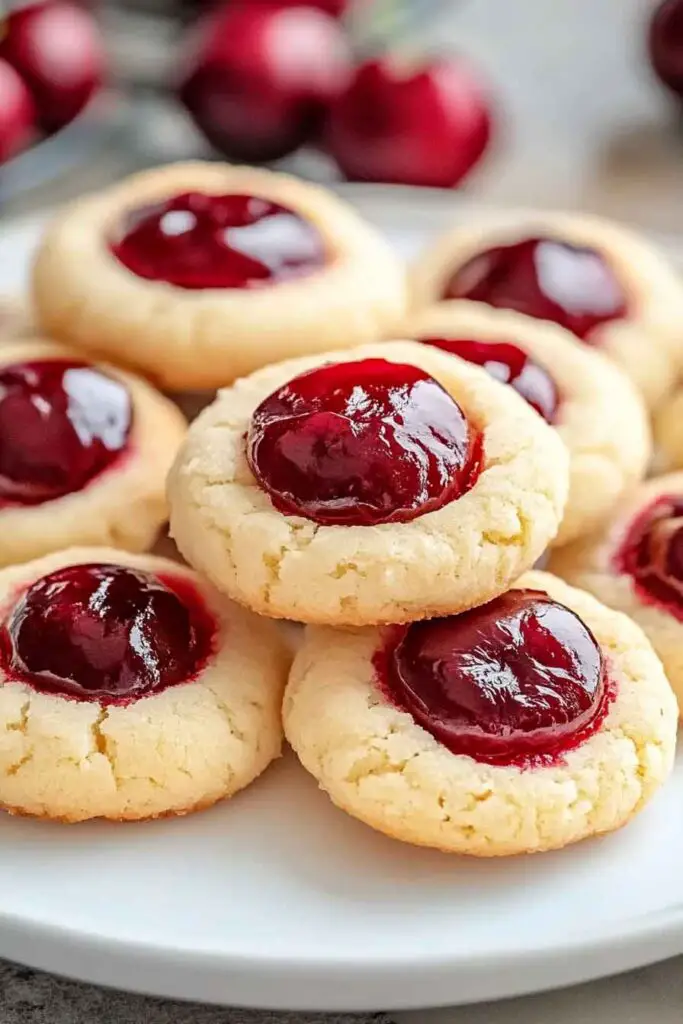
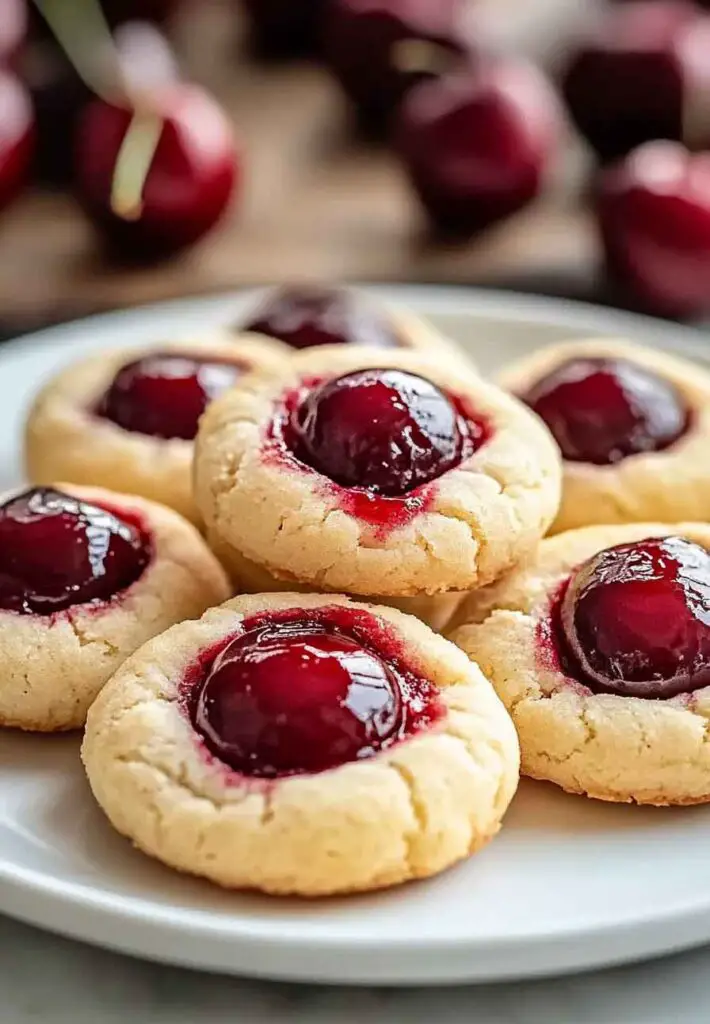
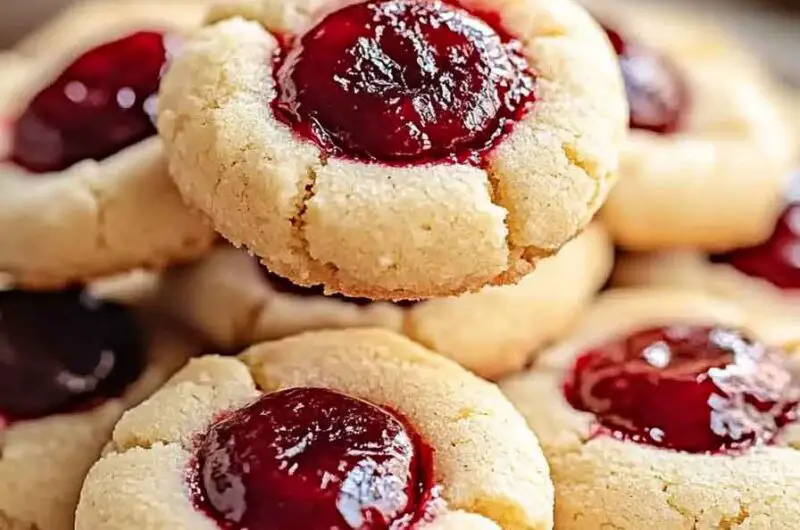
Irresistible Cherry Thumbprint Cookies
These Cherry Thumbprint Cookies are a little old-fashioned and totally irresistible. They’re soft, buttery cookies with sweet cherry filling right in the center. One bite and you get that perfect mix of tender cookie and fruity jam.
I’ve been making these since I was a kid, and they still feel special every time. They look fancy, but they’re super easy to make. And that pop of red? So pretty on a holiday cookie tray.
Great for Christmas, tea time, or just a sweet little treat. Let me show you how I make them. They always bring a smile.

Why You’ll Love This Recipe
- Balanced Sweetness and Texture: These cookies are subtly sweet, which allows the cherry center to shine without overwhelming the palate. The dough is soft yet structured, creating a light, melt-in-your-mouth base that complements the sticky fruit filling.
- Customizable and Versatile: This recipe works with different types of jam, but cherry is traditional. You can use maraschino cherry halves for a retro twist or high-quality cherry preserves for a more natural result. Either way, the cookie holds its shape and flavor beautifully.
- Minimal Tools, Maximum Reward: The dough comes together in one bowl—no stand mixer required. It’s an approachable recipe with satisfying results even for first-time bakers.
- Ideal for Gifting or Entertaining: Their jewel-like centers make them a showpiece for cookie swaps, care packages, or festive dessert platters. They travel well, store easily, and always earn compliments.
- Freezer-Friendly Dough: You can prepare the dough in advance, freeze it, and bake fresh whenever needed—perfect for planning ahead or portioning out cookies over time.
What You Need to Know Before You Start
Prep Time & Cook Time:
- Prep Time: 20 minutes to prepare the dough and form the cookies
- Optional Chill Time: 30 minutes if your kitchen is warm or the dough feels too soft
- Bake Time: 12 to 14 minutes, depending on your oven and cookie size
- Total Time: Around 40–45 minutes (including baking but excluding optional chilling)
Servings:
This recipe yields approximately 24 cookies, depending on the exact size of your dough balls and depth of the thumbprint. Each one is roughly 1.5 inches wide and perfect for small bites or pairing with other treats.
Difficulty Level:
Easy. This is a reliable recipe for beginner bakers—especially those learning the fundamentals of shortbread-style doughs. There’s no yeast, no rolling pins, and no special equipment required. Just measure carefully, follow the shaping steps, and you’ll get professional-looking cookies every time.
Required Kitchen Tools
To get started, gather the following tools. You don’t need anything fancy—just a few kitchen basics:
- Mixing Bowls: One large (for creaming the butter and sugar) and one medium (for mixing dry ingredients)
- Rubber Spatula or Hand Mixer: A spatula is sufficient for creaming, but a hand mixer makes it quicker and smoother
- Measuring Cups & Spoons: Dry and liquid cups, plus a teaspoon and tablespoon measure
- Small Cookie Scoop or Tablespoon: Helps portion out even cookie dough balls
- Parchment Paper: Lining your baking sheet ensures even baking and prevents sticking
- Baking Sheet: Light-colored sheets are best for even browning
- Spoon or Thumb: For pressing the classic “thumbprint” into each dough ball before baking
- Cooling Rack: Allows air to circulate and prevents soggy bottoms after baking
Ingredients for Cherry Thumbprint Cookies
This dough is a classic butter-based cookie that’s gently sweetened and flavored with vanilla. The cherry filling adds color, flavor, and a chewy contrast to the soft cookie base.
Here’s what you’ll need:
- 1 cup (226g) unsalted butter, softened
This is the backbone of your dough. The butter should be fully softened to room temperature—not melted—so it creams easily and creates a tender crumb. Unsalted butter allows you to control the salt in the recipe. - 1/2 cup (100g) granulated sugar
A small amount of sugar ensures the cookies aren’t overly sweet, allowing the cherry filling to take center stage. - 2 large egg yolks
Egg yolks add richness and structure. They also help bind the dough without introducing too much moisture, which is important for shortbread texture. - 1 teaspoon pure vanilla extract
Vanilla deepens the flavor of the dough and balances the sweetness of the cherries. Use pure vanilla extract—not imitation—for the best results. - 2 cups (250g) all-purpose flour, spooned and leveled
All-purpose flour gives structure. Spoon it into your measuring cup and level it off with a knife for accuracy—too much flour leads to dry cookies. - 1/4 teaspoon salt
A pinch of salt sharpens the overall flavor and keeps the sweetness in check. - 1/2 cup cherry preserves or jam or 12 maraschino cherries, halved
Use good-quality cherry preserves with real fruit if possible. Maraschino cherries add a bold red color and old-fashioned appeal. Either option bakes up well. - Optional: Powdered sugar, for light dusting
After cooling, a dusting of powdered sugar gives the cookies a classic finish and visual contrast, especially if you’ve used bright red cherry centers.
Variations for Cherry Thumbprint Cookies
While cherry is the traditional filling, this cookie base adapts easily to other flavors or styles. Here are a few simple ways to make this recipe your own:
- Different Jam Fillings: Swap cherry preserves for raspberry, strawberry, blueberry, or apricot jam. Aim for thicker, chunkier preserves to avoid runny centers.
- Almond Flavor: Replace half of the vanilla extract with almond extract for a deeper, nutty taste that pairs beautifully with cherry.
- Nut Coating Option: For added texture, roll each dough ball in finely chopped pecans, almonds, or walnuts before pressing the thumbprint and baking.
- Chocolate Cherry: After baking and cooling, drizzle melted dark or white chocolate over the cookies for extra richness.
- Maraschino Cherry Center: Place half of a maraschino cherry in each thumbprint before baking instead of using preserves. This creates a vibrant, classic bakery-style cookie.
- Gluten-Free Adaptation: Use a 1:1 gluten-free baking flour blend designed for cookies. Check for xanthan gum in the blend to help maintain structure.
How to Make Cherry Thumbprint Cookies – Step-by-Step
1. Cream Butter and Sugar
In a large bowl, cream together the softened butter and granulated sugar until the mixture is smooth and slightly fluffy. This can be done with a rubber spatula or a hand mixer on medium speed for about 1–2 minutes.
Pro Tip: Don’t overbeat. You’re looking for soft and spreadable—not whipped like frosting.
2. Add Egg Yolks and Vanilla
Add the two egg yolks and vanilla extract to the butter-sugar mixture. Mix until fully incorporated. The yolks will enrich the dough without making it too moist.
3. Combine Dry Ingredients
In a separate bowl, whisk together the flour and salt until evenly distributed. This helps ensure the salt gets mixed throughout the dough instead of clumping in one spot.
4. Form the Dough
Gradually add the flour mixture into the wet ingredients. Use a spatula or your hands to mix just until a soft, slightly crumbly dough forms. The dough should hold together easily when pressed.
Note: If the dough feels sticky, chill it for 20–30 minutes before shaping.
5. Shape and Press
Scoop about 1 tablespoon of dough (or use a small cookie scoop) and roll it into a smooth ball between your palms.
Place on a parchment-lined baking sheet, spacing the balls about 2 inches apart.
Use your thumb or the back of a rounded measuring spoon to gently press a shallow well into the center of each ball. Don’t press too deep—you want a small dip, not a tunnel.
6. Fill with Cherry Preserves
Using a small spoon, fill each indentation with about 1/2 teaspoon of cherry preserves. Do not overfill, or the jam may bubble over during baking.
If using maraschino cherries, press half a cherry (cut side down) gently into the center of each cookie.
7. Bake
Place the cookies in a preheated 350°F (177°C) oven and bake for 12–14 minutes, or until the edges are just starting to turn golden.
The centers should remain soft and lightly colored.
8. Cool and Serve
Let the cookies cool on the baking sheet for 5 minutes, then transfer to a wire rack to cool completely.
Once fully cooled, dust lightly with powdered sugar if desired.
Serving and Decoration
These cookies look beautiful straight from the oven, but you can elevate their presentation with a few finishing touches:
- Dusting with Powdered Sugar: Once the cookies are completely cool, sift a light layer of powdered sugar over the tops. It adds contrast, especially against a bright red cherry center.
- Holiday Touches: For festive occasions, drizzle a thin line of white chocolate over the cookies or add colored sugar before baking.
- Serving Ideas: These cookies are best served at room temperature. Pair them with tea, coffee, or as part of a dessert platter with shortbreads, chocolate chip cookies, or biscotti.
How to Store Cherry Thumbprint Cookies
Room Temperature:
Store the baked cookies in an airtight container at room temperature for up to 5 days. Place a piece of parchment between layers to prevent sticking.
Refrigerator (for longer storage):
Cookies can also be kept in the fridge for up to 10 days, but allow them to come to room temperature before serving for best texture.
Freezing Baked Cookies:
Once baked and cooled, freeze cookies in a single layer on a tray. After frozen, transfer to a sealed bag or container. They’ll keep well for up to 2 months. Thaw at room temperature.
Freezing the Dough:
Roll the dough into balls and make the thumbprint. Freeze unbaked on a tray until solid. Store in a zip-top bag for up to 2 months. When ready to bake, add the filling and bake from frozen, adding 1–2 extra minutes to the baking time.
Tips and Tricks for Success
- Don’t Skip the Chill: If your dough feels sticky or too soft, a short chill in the fridge helps firm it up, making shaping and indenting easier.
- Don’t Overfill the Center: A small spoonful of jam is enough—too much will overflow and stick to the pan.
- Use Room Temperature Ingredients: This ensures even mixing and a consistent dough texture.
- Consistent Cookie Size: Use a cookie scoop for even baking and uniform appearance.
- Avoid Overbaking: The cookies should be just turning golden on the edges. They’ll continue to firm up as they cool.
Nutrition
| Nutrient | Per Cookie (1 of 24) |
|---|---|
| Calories | ~125 kcal |
| Carbohydrates | 14g |
| Protein | 1g |
| Fat | 7g |
| Saturated Fat | 4g |
| Cholesterol | 30mg |
| Sodium | 40mg |
| Sugar | 5g |
| Fiber | <1g |
| Calcium | 6mg |
| Iron | 0.4mg |
Note: These values are approximate and will vary based on exact ingredients and portions used.
Irresistible Cherry Thumbprint Cookies
Course: Uncategorized24
cookies2
minutes10
minutes125
kcal30
miniutesIngredients
1 cup (226g) unsalted butter, softened
1/2 cup (100g) granulated sugar
2 large egg yolks
1 teaspoon pure vanilla extract
2 cups (250g) all-purpose flour, spooned & leveled
1/4 teaspoon salt
1/2 cup cherry preserves or 12 maraschino cherries, halved
Optional: Powdered sugar, for dusting
Directions
- In a large bowl, cream the butter and sugar until smooth and slightly fluffy.
- Add egg yolks and vanilla; mix until fully combined.
- In a separate bowl, whisk together flour and salt. Gradually mix into the wet ingredients until a soft dough forms.
- Scoop 1 tablespoon of dough, roll into a ball, and place on parchment-lined baking sheet.
- Use your thumb or spoon to press an indentation into each ball. Fill with 1/2 teaspoon of cherry preserves or place half a maraschino cherry in the center.
- Bake at 350°F (177°C) for 12–14 minutes or until the edges are lightly golden.
- Cool on the baking sheet for 5 minutes, then transfer to a wire rack to cool completely.
- Optional: Dust with powdered sugar once cooled.
Cherry Thumbprint Cookies FAQs
Can I make these cookies without eggs?
Yes, you can substitute the two egg yolks with 2 tablespoons of milk or cream for moisture. The texture may be slightly different, but the cookies will still hold their shape.
My cookies spread too much. What went wrong?
This often happens when the butter is too soft or the dough wasn’t chilled. To prevent spreading, refrigerate the dough for 30 minutes before baking, especially if your kitchen is warm.
Can I use other types of flour?
All-purpose flour works best for structure. If you use whole wheat or gluten-free flour, expect a change in texture. Choose a 1:1 gluten-free blend if making substitutions.
Should I bake with or without the jam filling?
Always bake the cookies with the filling already in the center. If added afterward, the preserves won’t set properly and may slide out.
Can I double the recipe?
Yes, this recipe doubles easily. Just be sure not to overcrowd your baking sheets—bake in batches if needed.
What’s the best way to get even thumbprints?
Instead of using your thumb, try the back of a round 1/2 teaspoon measuring spoon for uniform wells. It keeps the cookies looking neat and professional.
Conclusion
Irresistible Cherry Thumbprint Cookies are a timeless treat that combine simplicity with elegance. They’re easy enough for beginner bakers to enjoy, yet offer enough flexibility for seasoned cooks to personalize. Whether you fill them with jam or cherries, dress them up with powdered sugar, or leave them classic and plain, these cookies always deliver.
With just a handful of ingredients and a few basic steps, you get soft, buttery cookies that melt in your mouth and brighten any dessert spread. Make a batch for your next holiday celebration, cookie box, or just because—it’s hard to go wrong with a classic done right.