Cookie Monster Cheesecake Recipe
The moment you see it, you can’t help but smile.
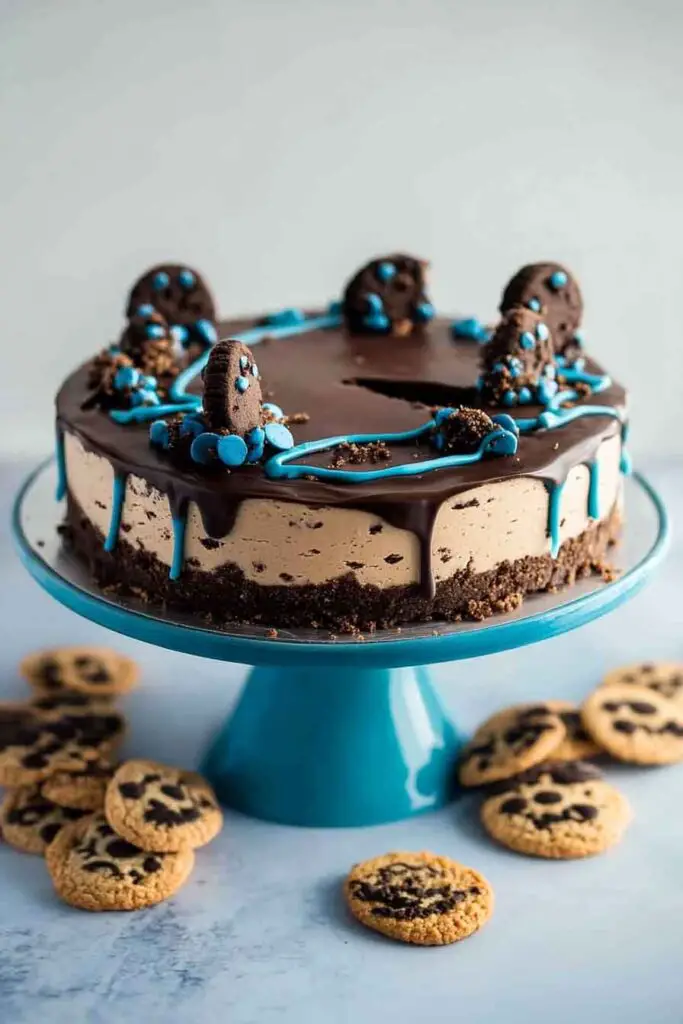
This Cookie Monster Cheesecake is creamy, crunchy, and packed with cookie pieces in every bite.
I made it for a family movie night, and the bright blue color had everyone excited before the first slice.
It’s rich, sweet, and a little silly in the best way.
If you love cookies and cheesecake together, this one’s a must-try.
Let’s make it and bring a bit of fun to dessert time.

Why You’ll Love This Recipe
- Crowd-Pleaser: Kids and adults alike love the playful Cookie Monster design and rich flavors.
- Fun to Make: Decorating this cheesecake is creative and enjoyable, making it great for baking with children.
- Impressive Presentation: The blue whipped cream and cookie decorations create a memorable centerpiece.
- Perfect Texture: The combination of crunchy cookie crust and creamy cheesecake filling provides delightful contrast.
- Customizable: Adjust the sweetness or add extra cookies to suit your taste.
What You Need to Know Before You Start
Prep Time & Cook Time:
- Prep Time: 30 minutes
- Cook Time: 50 minutes
- Chill Time: 4 hours (or overnight)
- Total Time: About 5 hours and 20 minutes
Servings: This recipe makes one 9-inch cheesecake, serving 10-12 people. Perfect for parties or family gatherings.
Difficulty: Moderate. Beginners can make this with careful attention, while experienced bakers will find it straightforward and fun.
Required Kitchen Tools
- 9-inch springform pan
- Mixing bowls (large and medium)
- Electric mixer (hand or stand)
- Rubber spatula
- Measuring cups and spoons
- Parchment paper
- Cooling rack
- Piping bag with round tip (optional, for decoration)
Ingredients for Cookie Monster Cheesecake
This whimsical cheesecake combines simple ingredients to create layers of delicious flavor. The chocolate chip cookie base provides crunch, while the creamy filling and playful decorations bring the Cookie Monster theme to life. Here’s everything you’ll need to bring this dessert together:
For the Cookie Crust:
- 2 cups crushed chocolate chip cookies (about 15-18 cookies)
- 3 tablespoons unsalted butter, melted
- Pinch of salt
For the Cheesecake Filling:
- 24 ounces (3 packages) full-fat cream cheese, softened to room temperature
- 3/4 cup granulated sugar
- 3 large eggs, at room temperature
- 1 teaspoon vanilla extract
- 1/4 cup whipping cream
- 1 cup semisweet mini chocolate chips
For the Topping and Decoration:
- 2 cups whipping cream, cold
- 1/4 cup granulated sugar
- Sky blue gel paste food coloring
- 6-8 Oreo cookies
- 1/4 cup semisweet chocolate chips
- Blue candy melts (for additional decoration, optional)
Variations for Cookie Monster Cheesecake
- Use Different Cookies: Swap chocolate chip cookies with sugar cookies or graham crackers for the crust.
- Add Cookie Chunks: Fold chopped Oreos into the cheesecake batter for extra texture.
- Make It Minty: Add 1/2 teaspoon peppermint extract to the filling for a minty twist.
- Try White Chocolate: Use white chocolate chips instead of semisweet for a sweeter flavor.
- Go Nut-Free: Ensure all cookies are nut-free if serving guests with allergies.
- Make Mini Cheesecakes: Use a muffin tin to create individual Cookie Monster cheesecakes.
How to Make Cookie Monster Cheesecake Step-by-Step Instructions
1. Prepare the Cookie Crust
Crush chocolate chip cookies into fine crumbs using a food processor or place them in a sealed bag and crush with a rolling pin. Mix the cookie crumbs with melted butter and a pinch of salt. Press this mixture firmly into the bottom of a 9-inch springform pan lined with parchment paper. Place in the refrigerator while preparing the filling.
2. Make the Cheesecake Filling
Beat the softened cream cheese in a large bowl using an electric mixer until smooth and creamy, about 2 minutes. Add the granulated sugar and beat until well combined and fluffy. Add the eggs one at a time, mixing on low speed after each addition until just incorporated. Stir in the vanilla extract and whipping cream. Fold in the mini chocolate chips gently with a spatula.
3. Bake the Cheesecake
Preheat your oven to 325°F. Pour the cheesecake filling over the prepared crust, spreading it evenly with a spatula. Tap the pan gently on the counter to release air bubbles. Bake for 45-50 minutes. The edges should be set, but the center may jiggle slightly. Turn off the oven, crack the door open, and let the cheesecake cool inside for 1 hour. This prevents cracking.
4. Chill the Cheesecake
Remove the cheesecake from the oven and let it cool completely at room temperature. Cover with plastic wrap and refrigerate for at least 4 hours or overnight. This chilling time allows the cheesecake to set properly and develop the best flavor and texture.
5. Prepare the Cookie Monster Topping
Beat the cold whipping cream with sugar in a chilled bowl until stiff peaks form. Add a small amount of sky blue gel paste food coloring and mix until the desired Cookie Monster blue color is achieved. Be careful not to overmix, or the cream may become grainy.
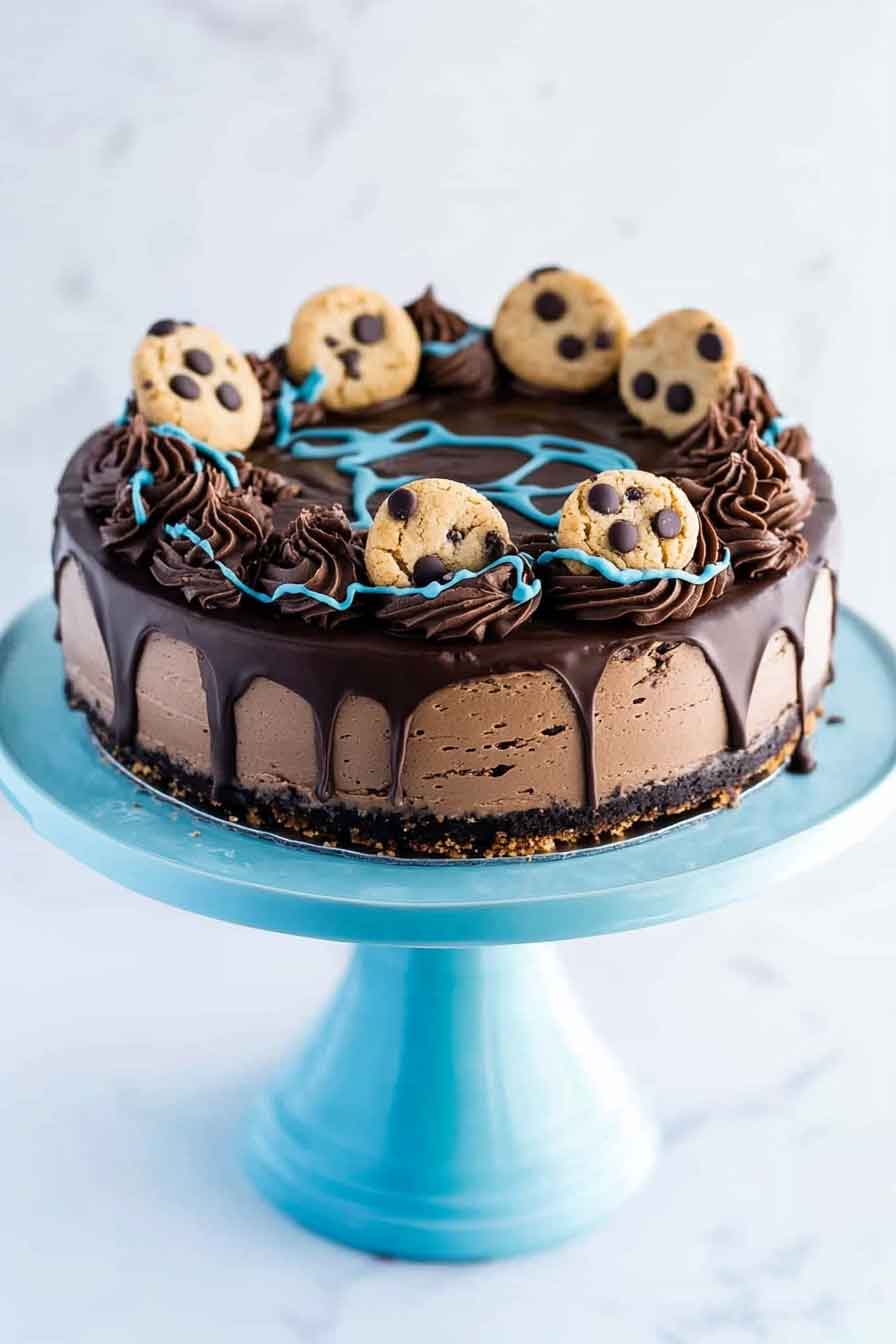
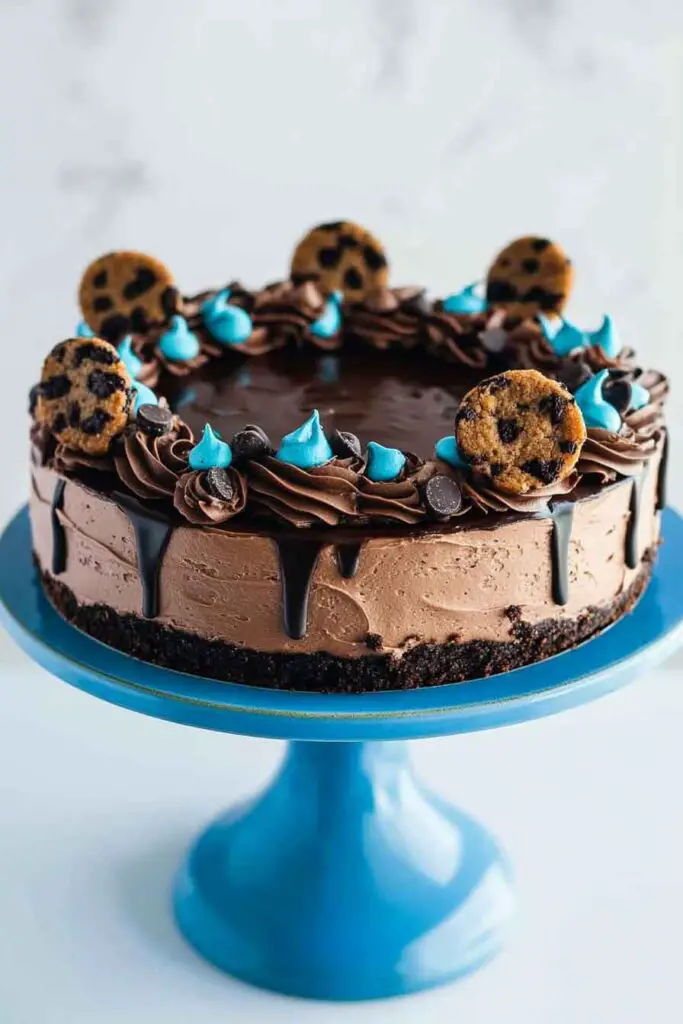
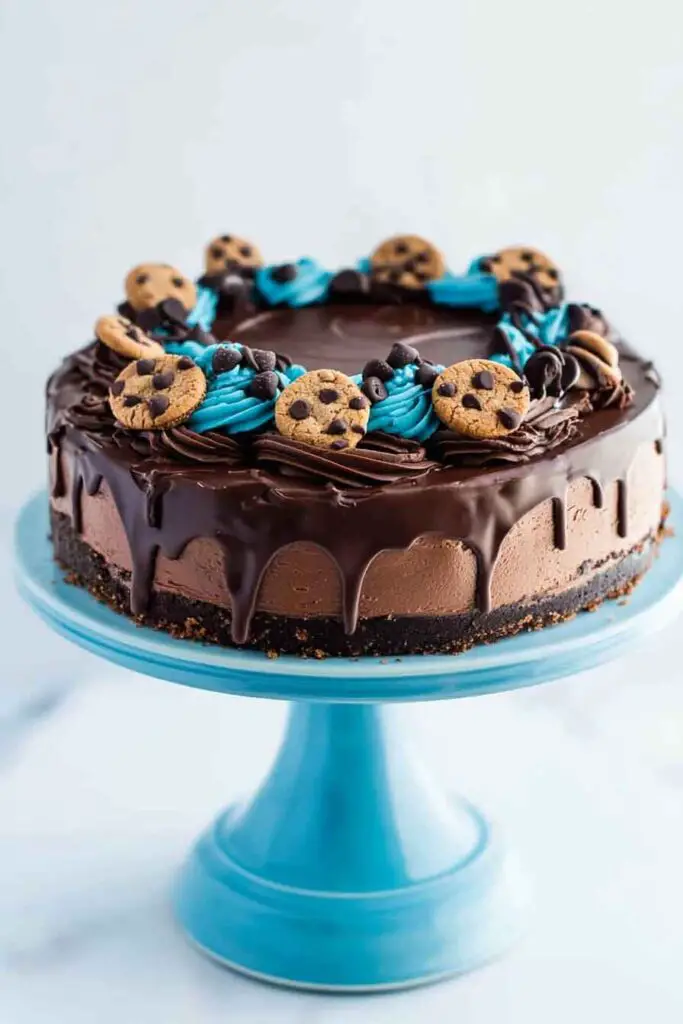
6. Decorate the Cheesecake
Remove the cheesecake from the springform pan and place it on a serving plate. Spread or pipe the blue whipped cream over the top of the chilled cheesecake, creating a fluffy texture. Place two Oreo cookies near the top for eyes. Add chocolate chips or small pieces of melted chocolate for the pupils. Arrange additional Oreo cookies and chocolate chip cookies around the mouth area to create Cookie Monster’s signature cookie-eating expression.
Serving and Decoration
Present your Cookie Monster Cheesecake on a colorful cake stand or plate. The playful blue topping and cookie decorations make this dessert a conversation starter. Serve chilled with extra cookies on the side for guests who want more crunch. This cheesecake works beautifully for birthday parties, children’s celebrations, or Sesame Street-themed events. Cut with a warm, clean knife for neat slices.
How to Serve Cookie Monster Cheesecake
This fun dessert is perfect for various occasions:
- Birthday Parties: Serve as the main dessert for children’s birthday celebrations.
- Theme Parties: Ideal for Sesame Street or cookie-themed gatherings.
- Family Dinners: Bring this out for weekend family desserts.
- Potlucks: Transport in the springform pan for easy carrying.
- With Milk: Serve slices with cold milk for the full cookie experience.
Storing Cookie Monster Cheesecake
- Refrigerator: Store covered in the refrigerator for up to 5 days. The whipped cream topping is best enjoyed within 2-3 days.
- Freezer: Freeze the cheesecake without the whipped cream topping for up to 2 months. Wrap tightly in plastic wrap and aluminum foil. Thaw in the refrigerator overnight before adding the blue whipped cream and decorations.
- Make-Ahead: Bake the cheesecake 1-2 days ahead and store in the refrigerator. Add the whipped cream topping and decorations on the day of serving for the freshest appearance.
Tips and Tricks for Success
- Room Temperature Ingredients: Ensure cream cheese and eggs are at room temperature for a smooth, lump-free filling.
- Avoid Overmixing: Mix the filling on low speed once eggs are added to prevent incorporating too much air, which can cause cracks.
- Water Bath Alternative: For extra insurance against cracking, place a pan of hot water on the oven rack below the cheesecake while baking.
- Check Doneness: The cheesecake is done when the edges are set but the center still jiggles slightly like gelatin.
- Gel Food Coloring: Use gel paste rather than liquid food coloring for vibrant blue color without thinning the whipped cream.
- Sharp Knife: Clean and warm your knife between cuts for neat, professional-looking slices.
- Creative Decorating: Let children help place the cookie decorations for added fun.
Nutrition
| Nutrient | Per Serving (1 slice, based on 12 servings) |
|---|---|
| Calories | 485 |
| Total Fat | 32g |
| Saturated Fat | 18g |
| Cholesterol | 125mg |
| Sodium | 280mg |
| Total Carbohydrates | 45g |
| Dietary Fiber | 1g |
| Sugars | 32g |
| Protein | 7g |
Nutritional values are approximate and may vary based on specific ingredients used.

Cookie Monster Cheesecake Recipe
Course: Cake Recipes10–12
servings30
minutes50
minutes485
kcal4
hourIngredients
- For the Crust:
2 cups crushed chocolate chip cookies
3 tablespoons unsalted butter, melted
Pinch of salt
- For the Filling:
24 ounces cream cheese, softened
3/4 cup granulated sugar
3 large eggs, room temperature
1 teaspoon vanilla extract
1/4 cup whipping cream
1 cup semisweet mini chocolate chips
- For the Topping:
2 cups whipping cream, cold
1/4 cup granulated sugar
Sky blue gel paste food coloring
6-8 Oreo cookies
1/4 cup semisweet chocolate chips
Blue candy melts (optional)
Chocolate chip cookies for decoration
Directions
- Make Crust: Combine crushed chocolate chip cookies with melted butter and salt. Press into bottom of 9-inch springform pan. Refrigerate.
- Prepare Filling: Beat cream cheese until smooth. Add sugar and beat until fluffy. Mix in eggs one at a time on low speed. Stir in vanilla and whipping cream. Fold in mini chocolate chips.
- Bake: Preheat oven to 325°F. Pour filling over crust. Bake 45-50 minutes until edges are set but center jiggles slightly. Turn off oven, crack door, and cool for 1 hour.
- Chill: Cool completely at room temperature, then refrigerate 4 hours or overnight.
- Make Topping: Beat cold whipping cream with sugar until stiff peaks form. Add blue food coloring and mix until desired color is reached.
- Decorate: Remove cheesecake from pan. Spread blue whipped cream on top. Add Oreo cookies for eyes with chocolate chip pupils. Arrange cookies around mouth area to create Cookie Monster face.
- Serve: Slice with a warm, clean knife and enjoy chilled.
Cookie Monster Cheesecake FAQs
Can I use store-bought cookie dough for the crust?
Yes, you can bake store-bought chocolate chip cookie dough, let it cool, then crush it for the crust. This saves time while still providing great flavor.
Why did my cheesecake crack?
Cracks usually occur from overmixing, baking at too high a temperature, or cooling too quickly. Follow the gradual cooling method in the oven to minimize cracking.
Can I make this cheesecake without eggs?
Egg-free cheesecakes are possible using alternatives like cornstarch or additional cream, but the texture will differ. Look for no-bake cheesecake recipes for easier egg-free options.
How do I get the whipped cream blue without it looking gray?
Use gel paste food coloring specifically designed for baking. Start with a small amount and add gradually until you achieve a bright Cookie Monster blue.
Can I use a regular cake pan instead of a springform pan?
Springform pans make removing cheesecake easier, but you can line a regular pan with parchment paper that extends over the edges to lift the cheesecake out.
How far ahead can I make this?
Bake the cheesecake up to 2 days ahead and store it in the refrigerator. Add the whipped cream and decorations on the day you plan to serve it.
Conclusion
Cookie Monster Cheesecake is a delightful dessert that combines rich cheesecake with playful decorations to create something truly special. The chocolate chip cookie crust provides the perfect crunchy base, while the creamy filling studded with mini chocolate chips delivers classic cheesecake satisfaction. The sky blue whipped cream topping and cookie decorations transform this dessert into an edible work of art that captures Cookie Monster’s lovable personality. Whether you’re celebrating a birthday, hosting a themed party, or simply want to bring extra joy to dessert time, this cheesecake delivers smiles along with delicious flavor. The combination of cookies, cream cheese, and chocolate creates a treat that’s as fun to make as it is to eat.