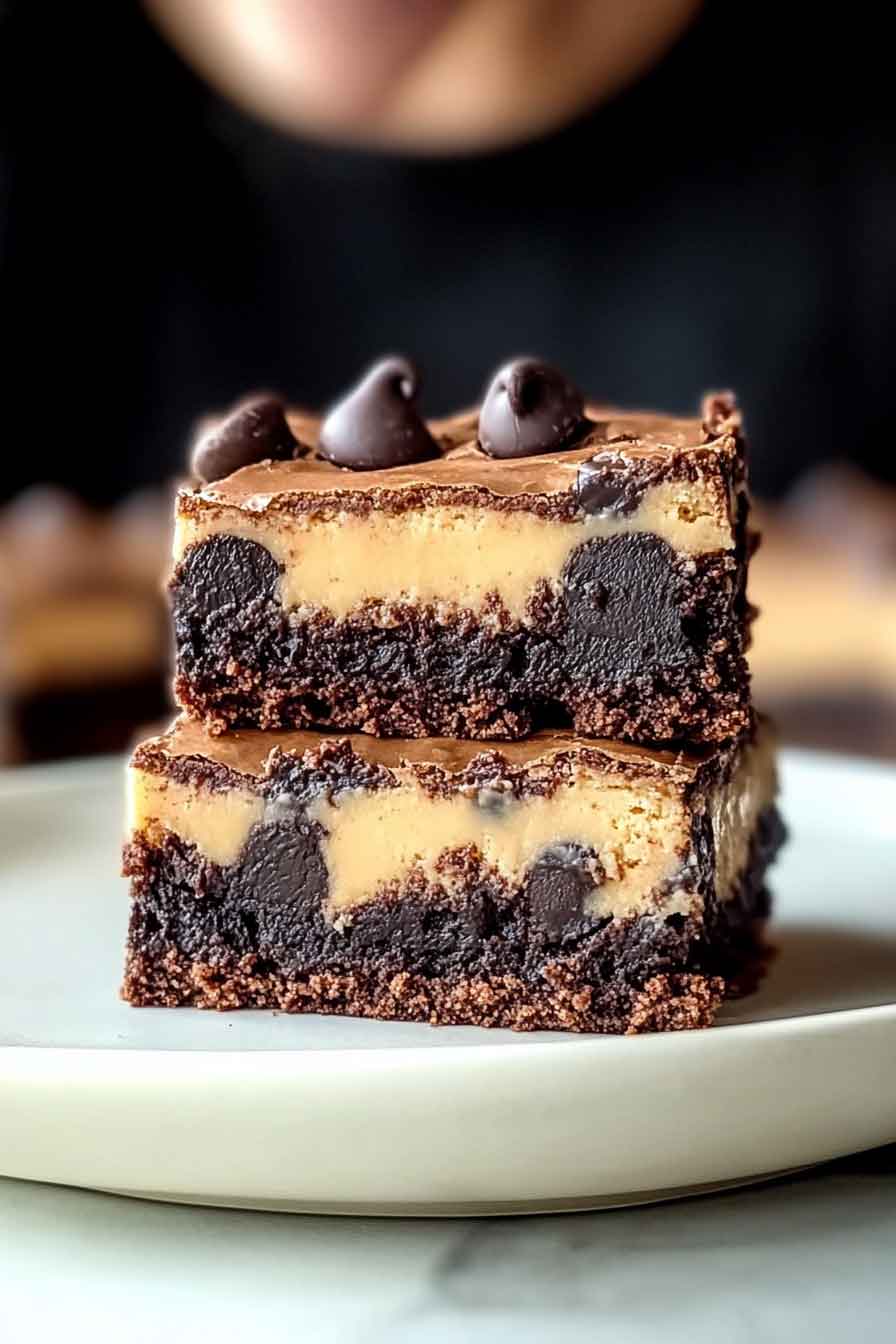
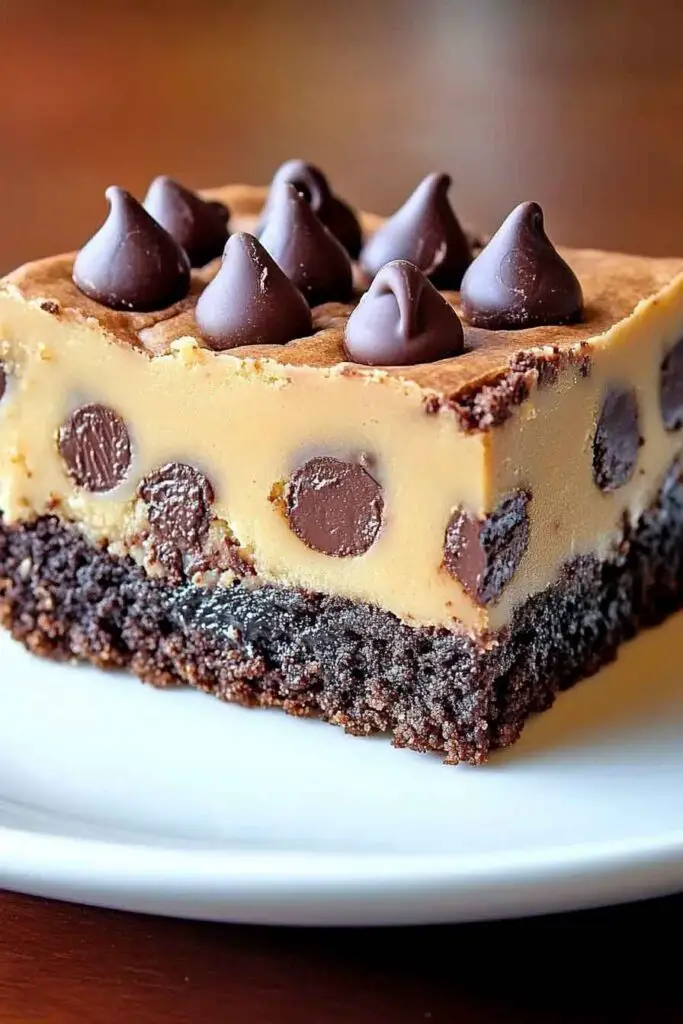
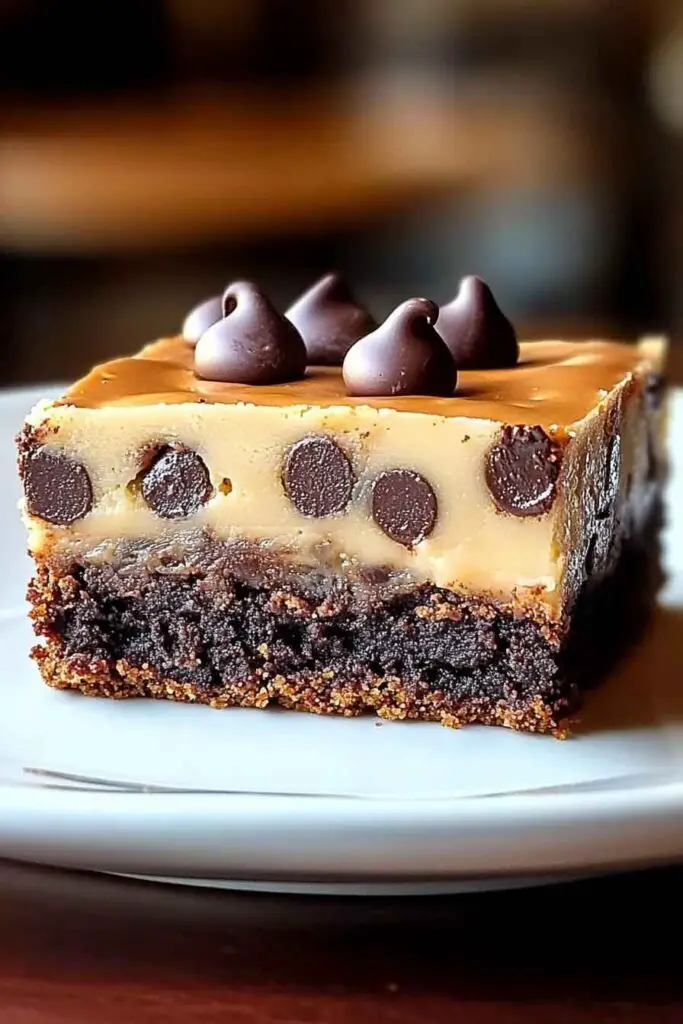
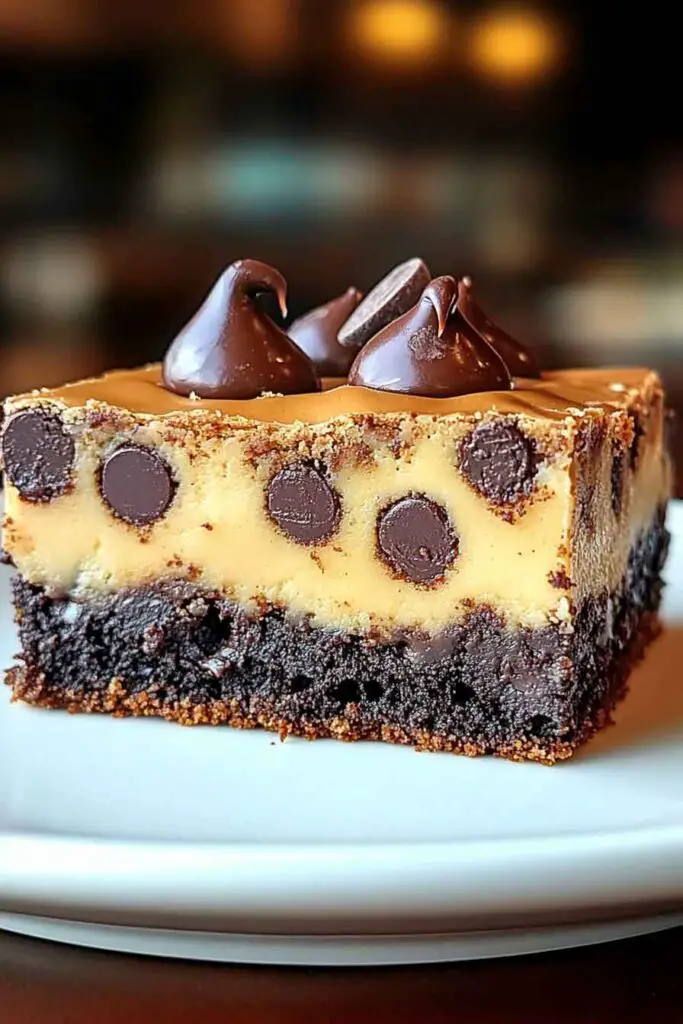
Brookie Layered Brownie Cookie Bars
Can’t choose between a brownie and a cookie? Don’t worry—these brookie bars give you both. One bite, and it’s chocolatey, chewy bliss.
I baked a batch on a rainy afternoon, and wow—they vanished fast. The bottom is fudgy brownie, the top is gooey cookie, and together? Total perfection.
They’re rich, soft, and packed with melty chocolate in every layer. You get the best of both worlds in every bite. Trust me, you’ll want extras.

Let’s bake a pan of these brookie bars right now. They’re easy, indulgent, and totally crave-worthy. You ready? Let’s go!
Why You’ll Love This Recipe
- Best of Both Worlds: You get the deep chocolate flavor and moist texture of brownies, plus the sweet, buttery chewiness of cookies in one bar.
- Made with Simple Ingredients: Most of these ingredients are pantry staples, so no need for special shopping trips.
- Flexible and Customizable: You can swap chocolate chips for nuts, white chocolate, or even add caramel bits to make it your own.
- Perfect for Make-Ahead: These bars store well and taste great even after a day or two.
- Kid-Approved and Family-Friendly: Soft, sweet, and rich without being too complicated or fancy.
What You Need to Know Before You Start
Prep Time & Cook Time:
- Prep Time: 25 minutes (including mixing and layering)
- Bake Time: 35-40 minutes
- Total Time: About 1 hour
Servings:
Makes about 16 bars—enough for a small gathering or to enjoy over several days.
Difficulty Level:
Moderate. It involves preparing two different doughs and layering them, but the steps are straightforward.
Kitchen Tools You’ll Need
- Medium and large mixing bowls (one for brownie, one for cookie dough)
- Measuring cups and spoons for precise ingredient amounts
- Whisk to mix wet and dry ingredients smoothly
- Rubber spatula for folding ingredients gently
- 9×13 inch baking pan (lined with parchment paper or lightly greased)
- Oven thermometer (optional but helps for accurate baking)
- Cooling rack to cool bars evenly after baking
Ingredients for Brookie Layered Brownie Cookie Bars
Brownie Layer:
- 1/2 cup (115g) unsalted butter, melted
- 1 cup (200g) granulated sugar
- 2 large eggs, at room temperature
- 3/4 cup (95g) all-purpose flour (spooned and leveled)
- 1/3 cup (35g) unsweetened cocoa powder
- 1/4 teaspoon salt
- 1 teaspoon pure vanilla extract
Cookie Layer:
- 1/2 cup (115g) unsalted butter, softened (not melted)
- 1/2 cup (100g) granulated sugar
- 1/4 cup (55g) packed light brown sugar
- 1 large egg, at room temperature
- 1 teaspoon pure vanilla extract
- 1 cup (125g) all-purpose flour (spooned and leveled)
- 1/2 teaspoon baking soda
- 1/4 teaspoon salt
- 3/4 cup (130g) semi-sweet chocolate chips
How to Make Brookie Layered Brownie Cookie Bars: Step-by-Step Instructions
1. Prepare the Brownie Layer
- Melt the Butter: In a microwave-safe bowl, gently melt the unsalted butter until fully liquid. Let it cool slightly so it’s warm, not hot.
- Mix Sugar and Eggs: In a medium bowl, whisk together the granulated sugar and eggs until smooth and combined. The mixture should be slightly pale.
- Add Butter and Vanilla: Slowly whisk the melted butter and vanilla extract into the sugar and eggs mixture until well blended.
- Sift Dry Ingredients: In a separate bowl, sift the all-purpose flour, unsweetened cocoa powder, and salt. This ensures no lumps and even mixing.
- Combine Wet and Dry: Gradually fold the dry ingredients into the wet mixture using a spatula or wooden spoon. Mix gently until just combined—don’t overmix or the brownies will be tough.
- Set Aside: Once mixed, set the brownie batter aside while you prepare the cookie dough.
2. Prepare the Cookie Dough Layer
- Cream Butter and Sugars: Using a hand mixer or stand mixer, beat the softened butter, granulated sugar, and brown sugar together until creamy and fluffy. This usually takes about 2-3 minutes on medium speed.
- Add Egg and Vanilla: Mix in the egg and vanilla extract until fully incorporated.
- Mix Dry Ingredients: In a separate bowl, whisk together the flour, baking soda, and salt.
- Combine Dry and Wet: Gradually add the dry mixture to the wet ingredients and mix on low speed until just combined.
- Fold in Chocolate Chips: Using a spatula, gently fold the semi-sweet chocolate chips into the dough evenly.
3. Assemble the Bars
- Prepare the Pan: Line a 9×13 inch baking pan with parchment paper, leaving extra overhang for easy removal later. Lightly grease the parchment paper.
- Add Brownie Batter: Spread the brownie batter evenly into the bottom of the prepared pan. Use an offset spatula or the back of a spoon to smooth it out.
- Add Cookie Dough: Gently drop spoonfuls of cookie dough over the brownie layer. Use your fingers or a spatula to carefully spread and press the cookie dough evenly on top. Don’t worry if it’s a bit thick in spots; it will spread while baking.
- Final Check: Make sure both layers cover the pan evenly.
4. Bake the Brookie Bars
- Preheat Oven: Make sure your oven is fully preheated to 350°F (177°C).
- Bake Time: Place the pan in the center rack and bake for 35-40 minutes. Check around 35 minutes—when the cookie layer is golden and a toothpick inserted in the center comes out with a few moist crumbs (not wet batter), it’s done.
- Cooling: Remove from the oven and let the bars cool completely in the pan on a wire rack. Cooling fully helps them set and makes cutting easier.
Serving Suggestions for Brookie Layered Brownie Cookie Bars
- Straight Up: These bars are perfect on their own—soft, chewy, and rich. Serve them at room temperature or slightly warmed for a gooey experience.
- With Ice Cream: A scoop of vanilla or chocolate ice cream pairs beautifully for an indulgent dessert.
- Drizzle: Try drizzling melted caramel or chocolate sauce over the top for extra sweetness.
- Coffee or Milk: These bars go perfectly with a cold glass of milk or a hot cup of coffee for a comforting snack.
- Party Platter: Cut into small squares and serve alongside fresh fruit or nuts for a balanced dessert board.
How to Store Brookie Bars
- Room Temperature: Store in an airtight container for up to 3 days. Keep away from direct sunlight or heat.
- Refrigerator: To keep fresh longer, store in the fridge for up to 5 days. Bring to room temperature before serving.
- Freezing: Wrap bars tightly in plastic wrap and foil, then freeze for up to 3 months. Thaw overnight in the fridge or at room temperature.
Variations to Try
- Nutty Twist: Add ½ cup chopped walnuts or pecans to the cookie dough for crunch.
- White Chocolate: Swap semi-sweet chips for white chocolate or mix both for more flavor.
- Peanut Butter: Swirl some peanut butter into the brownie layer before baking.
- Salted Caramel: Sprinkle a pinch of flaky sea salt on top before baking for a sweet-salty combo.
- Vegan Version: Use plant-based butter and egg substitutes to make it dairy and egg free.
Nutrition Information (per bar, based on 16 servings)
| Nutrient | Amount |
|---|---|
| Calories | 210 kcal |
| Total Fat | 10 g |
| Saturated Fat | 6 g |
| Cholesterol | 45 mg |
| Sodium | 110 mg |
| Total Carbohydrate | 28 g |
| Dietary Fiber | 1.5 g |
| Sugars | 18 g |
| Protein | 2 g |
Brookie Layered Brownie Cookie Bars
Course: Cookie Recipes16
bars25
minutes210
kcalIngredients
- Brownie Layer:
1/2 cup (115g) unsalted butter, melted
1 cup (200g) granulated sugar
2 large eggs
3/4 cup (95g) all-purpose flour
1/3 cup (35g) unsweetened cocoa powder
1/4 tsp salt
1 tsp vanilla extract
- Cookie Layer:
1/2 cup (115g) unsalted butter, softened
1/2 cup (100g) granulated sugar
1/4 cup (55g) packed light brown sugar
1 large egg
1 tsp vanilla extract
1 cup (125g) all-purpose flour
1/2 tsp baking soda
1/4 tsp salt
3/4 cup (130g) semi-sweet chocolate chips
Directions
- Preheat oven to 350°F (177°C). Line a 9×13 inch pan with parchment paper, grease lightly.
- Prepare brownie batter: Melt butter, whisk with sugar and eggs, add vanilla. Sift and fold in flour, cocoa powder, salt. Set aside.
- Prepare cookie dough: Cream softened butter and sugars until fluffy. Mix in egg and vanilla. Add dry ingredients and fold in chocolate chips.
- Spread brownie batter evenly in the pan.
- Drop spoonfuls of cookie dough over brownie layer and spread gently.
- Bake for 35-40 minutes until cookie layer is golden and a toothpick comes out mostly clean.
- Cool completely before cutting into bars.
Brookie Layered Brownie Cookie Bars FAQs
Q: Can I make the brownie and cookie dough ahead of time?
A: Yes, you can prepare both doughs a day ahead and keep them covered in the fridge. Bring to room temperature before assembling.
Q: Can I use store-bought cookie dough?
A: Absolutely. Just spread the brownie layer first, then press store-bought cookie dough on top before baking.
Q: How do I know when the bars are done baking?
A: The cookie layer should be golden brown, and a toothpick inserted in the center should come out with a few moist crumbs but not wet batter.
Q: Can I make these bars gluten-free?
A: Yes, substitute the all-purpose flour with a gluten-free flour blend suitable for baking.
Conclusion
Brookie Layered Brownie Cookie Bars are a delightful way to enjoy two classic treats in one easy dessert. The rich, fudgy brownie base pairs perfectly with the soft, chewy cookie topping, making every bite satisfyingly delicious. Whether you’re baking for family, friends, or just yourself, these bars are sure to please with their simple ingredients and comforting flavors.
With straightforward steps and flexible variations, this recipe fits well into any baker’s collection—from beginners to seasoned pros. Plus, they store well, so you can enjoy them days after baking without losing that homemade goodness.
Give these brookie bars a try next time you want a dessert that’s both fun and familiar. I’m confident they’ll become a favorite go-to in your kitchen.