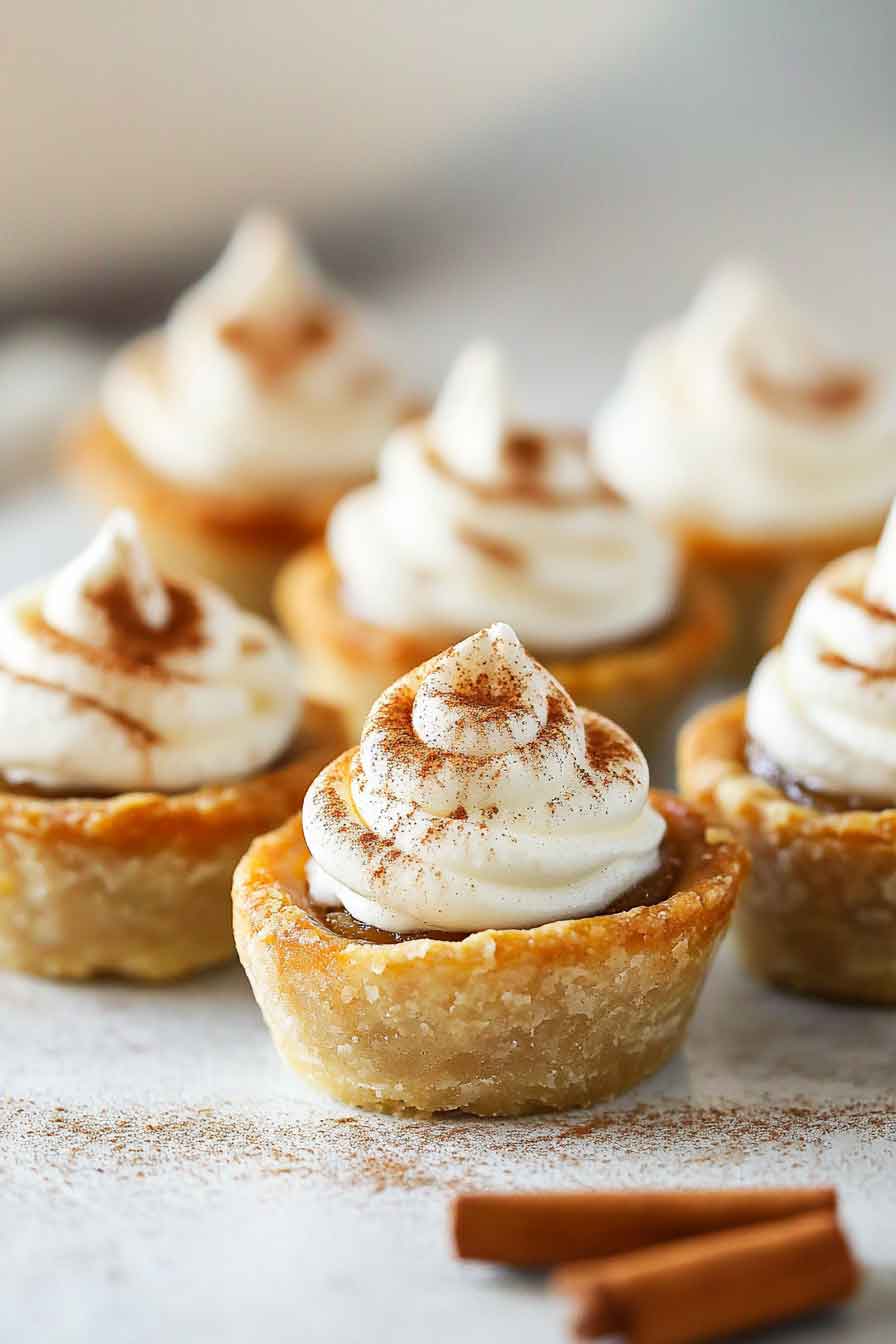
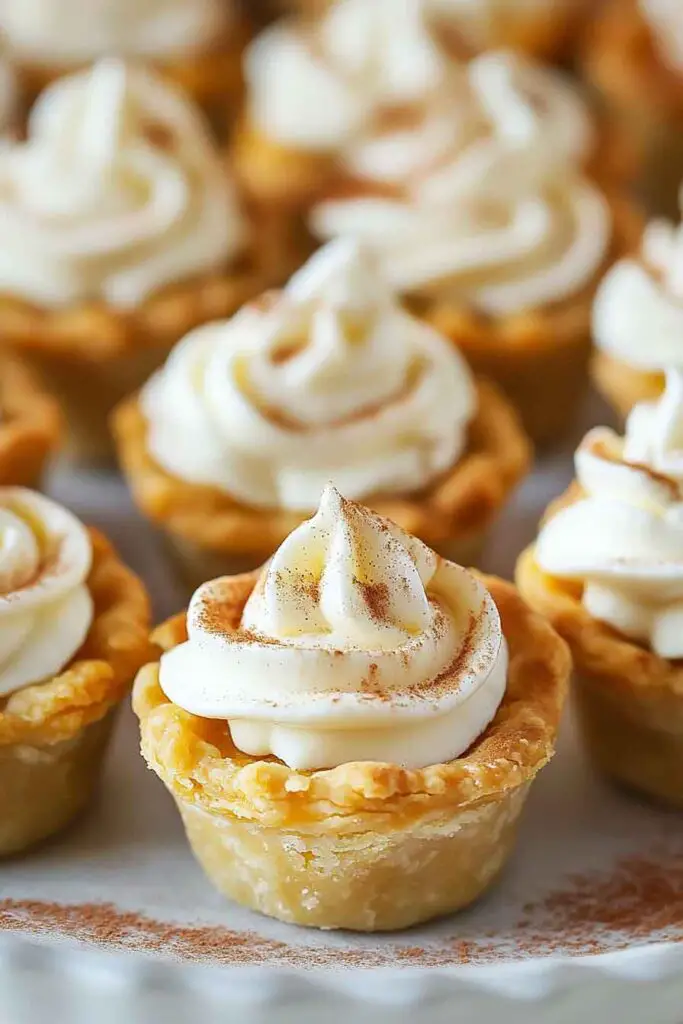
Adorable Mini Pumpkin Pies
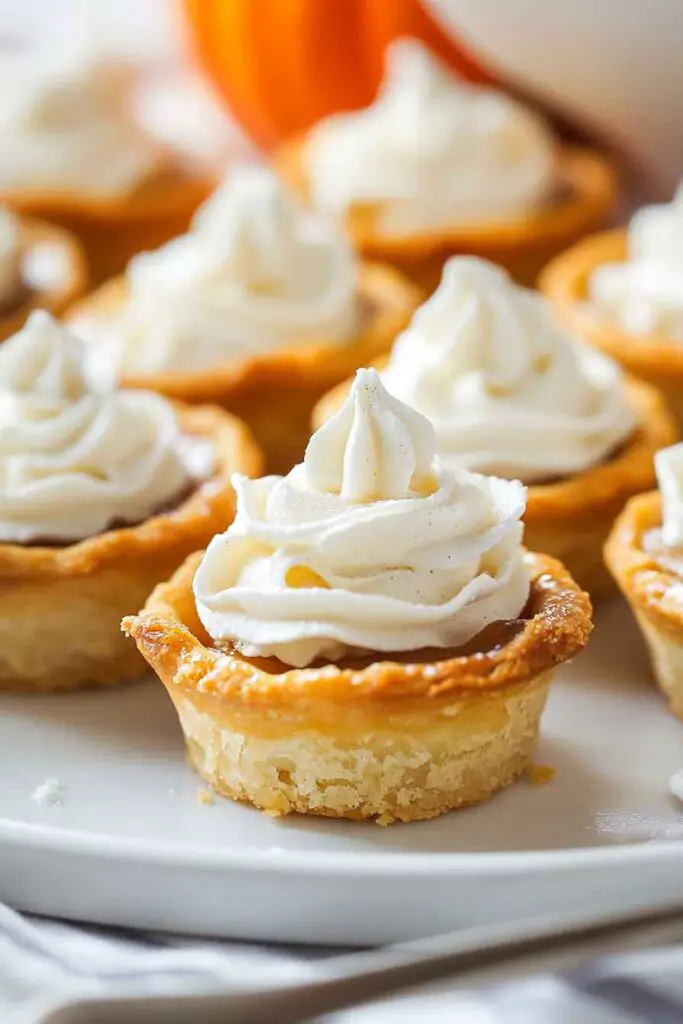
Okay, these Adorable Mini Pumpkin Pies? They’re cute, cozy, and packed with classic fall flavor in every little bite. Creamy pumpkin filling, warm spices, and a flaky crust—all in perfect mini size.
I made them for a fall get-together, and they were a total hit. That soft, spiced center with the buttery crust? So simple, so yummy.
They’re easy to make and even easier to share. Just fill, bake, and serve. Let’s whip up a batch—you’re gonna want to keep them all to yourself!

Why You’ll Love This Recipe
- Perfect for Little Hands (and Big Cravings): These mini pies are just the right size for a sweet treat without needing a fork or plate. They’re also easier for kids to handle—and love helping to make them.
- That Classic Pumpkin Spice Flavor: A simple blend of cinnamon, nutmeg, and ginger gives the filling that familiar warm flavor, while canned pumpkin makes it smooth and fuss-free.
- Approachable for Beginners: No need for special pans or pastry skills. If you can use a muffin tin and roll out dough, you’re already set.
- Make-Ahead & Freezer-Friendly: Bake these ahead and freeze them for when guests come over. They reheat well and still taste fresh.
What You Need to Know Before You Start
Prep & Cook Time:
- Prep Time: 20 minutes — This includes rolling out the crust, mixing the filling, and prepping your muffin tin.
- Cook Time: 25 to 30 minutes — Just until the pumpkin filling is set and the crust edges are golden brown.
- Cooling Time: Let the pies cool in the tin for at least 10 minutes before removing. Full cooling takes about 30 minutes.
- Total Time: About 50–60 minutes, depending on cooling and decorating time.
Yield:
This recipe makes 12 mini pumpkin pies, using a standard 12-cup muffin tin. If you’re baking for a crowd, simply double the recipe and rotate two tins in the oven.
Skill Level:
Beginner-friendly, but satisfying for experienced bakers too. It’s a great opportunity to introduce children to baking—especially with cutting dough and mixing the filling.
Required Kitchen Tools
You don’t need fancy equipment here. Just a few basic kitchen tools will get the job done:
- Muffin tin – A standard 12-cup tin is perfect.
- 3-inch round cookie cutter or drinking glass – This cuts the pie crust into circles that fit neatly into the muffin cups.
- Mixing bowl – For whisking together the filling ingredients.
- Whisk or hand mixer – Helps blend the pumpkin, egg, milk, and spices until silky smooth.
- Rolling pin – Only needed if you’re rolling out your own crust or a pre-made sheet.
- Measuring cups and spoons – For accurate measurements of spices and liquids.
- Cooling rack – Allows the pies to cool evenly without getting soggy bottoms.
Ingredients for Mini Pumpkin Pies
Each ingredient in this recipe has a purpose, whether it’s adding richness to the filling or structure to the crust.
For the Crust:
- 2 pie crusts – You can use your favorite homemade recipe or store-bought refrigerated dough. You’ll roll these out and cut them into circles to press into the muffin tin. They form the buttery shell that holds the filling.
For the Pumpkin Filling:
- 1 cup canned pumpkin puree – Be sure to use 100% pure pumpkin, not pumpkin pie filling. Pumpkin pie filling contains added sugar and spices, which throws off the balance of the recipe.
- 1/2 cup packed light brown sugar – Adds just the right amount of sweetness and a subtle molasses flavor that pairs beautifully with pumpkin.
- 1/3 cup whole milk – This makes the filling creamy and light. You can also use evaporated milk for a richer texture.
- 1 large egg – This binds the filling together as it bakes, helping it to set without being too firm.
- 1/2 teaspoon ground cinnamon – Warm and sweet, this is the spice that gives pumpkin pie its signature flavor.
- 1/4 teaspoon ground ginger – Adds a gentle spice and balances the sweetness.
- 1/4 teaspoon ground nutmeg – Just a pinch adds depth and a subtle earthiness.
- 1/4 teaspoon salt – A small amount sharpens all the other flavors and prevents the filling from tasting flat.
Optional Toppings:
These aren’t required, but they add fun, flavor, and visual appeal:
- Whipped cream – Dollop a swirl on each mini pie just before serving.
- Extra pie dough cutouts – Use leftover crust to cut mini leaf or pumpkin shapes and bake separately for garnish.
- Cinnamon sugar – Sprinkle a pinch over each pie before baking for a lightly sweet crunch on top.
Variations for Mini Pumpkin Pies
Mini pumpkin pies are simple and versatile. Here are a few easy ways to make the recipe your own:
- Add a Creamy Twist: Mix 2 tablespoons of softened cream cheese into the pumpkin filling for extra richness.
- Use a Graham Cracker Crust: Instead of pie dough, press a graham cracker and melted butter mixture into the muffin cups and bake for 5 minutes before filling.
- Add a Touch of Vanilla: Stir in ½ teaspoon of vanilla extract to the filling for a gentle sweetness.
- Make It Dairy-Free: Use a plant-based milk (like oat or almond) and a dairy-free crust to accommodate dietary needs.
- Add Topping Before Baking: Sprinkle a few chopped pecans or a light streusel topping over each pie before baking for a bit of crunch.
How to Make Mini Pumpkin Pies – Step-by-Step Instructions
Follow these simple steps to create soft, creamy, golden mini pumpkin pies that come out perfect every time.

1. Preheat and Prep
Preheat your oven to 350°F (175°C). Lightly grease a 12-cup muffin tin or line it with paper liners for easy cleanup.
2. Roll and Cut the Pie Crust
If using store-bought crust, let it sit at room temperature for 10 minutes to soften slightly.
- Lightly flour your work surface.
- Roll out the crust to about ⅛-inch thick.
- Use a 3-inch round cutter or glass to cut 12 circles.
- Gently press each circle into a muffin cup, smoothing the dough along the bottom and sides. Make sure there are no air bubbles under the crust.
If you have extra dough, re-roll and use small cookie cutters to make leaf or pumpkin shapes for decorating the tops.
3. Make the Pumpkin Filling
In a medium mixing bowl, whisk together:
- 1 cup canned pumpkin puree
- ½ cup packed light brown sugar
- ⅓ cup whole milk
- 1 large egg
- ½ teaspoon cinnamon
- ¼ teaspoon ground ginger
- ¼ teaspoon ground nutmeg
- ¼ teaspoon salt
Whisk until smooth and fully combined. The mixture will be slightly runny but thick enough to spoon.
4. Fill the Crusts
Spoon the pumpkin filling into each crust, filling about ¾ full. Do not overfill, as the filling will puff slightly while baking.
If you’re using dough cutouts, gently place them on top of the filling before baking.
5. Bake
Bake at 350°F (175°C) for 25 to 30 minutes, or until:
- The filling looks set (not jiggly in the center).
- The crust is lightly golden around the edges.
Tip: Rotate the pan halfway through baking for even browning.
6. Cool
Allow the pies to cool in the muffin tin for 10 minutes. Then carefully remove and transfer to a wire rack to cool completely.
As the pies cool, the filling will continue to set, and the crust will firm up.
Serving and Decoration
These mini pies are sweet enough to serve plain, but here are a few easy finishing touches that take them to the next level:
- Whipped Cream Swirl: Use a piping bag or spoon to top each pie with whipped cream right before serving.
- Sprinkle of Cinnamon or Nutmeg: Adds warm spice and visual appeal.
- Dough Cutouts or Pecans: Place a small baked pie crust leaf or pecan half on top of each pie.
- Drizzle of Caramel Sauce: A small drizzle of warm caramel pairs beautifully with the pumpkin flavor.
They’re best served at room temperature or lightly chilled.
Storing Mini Pumpkin Pies
These little pies store well and are ideal for making ahead of time.
- Room Temperature: Keep uncovered for up to 2 hours if serving the same day.
- Refrigerator: Store in an airtight container for up to 4 days. Let them come to room temperature before serving, or enjoy them chilled.
- Freezer: Wrap each pie individually in plastic wrap, then store in a freezer-safe bag or container for up to 2 months. Thaw in the refrigerator overnight and bring to room temperature before serving.
To reheat, warm in a 300°F oven for 10–12 minutes.
Tips and Tricks for Success
- Don’t Overfill: Stop at about ¾ full to prevent overflow during baking.
- Check Doneness Gently: The center of the filling should be just set—not wet or overly jiggly.
- Use a Cookie Scoop: This makes filling the pies quick, even, and mess-free.
- Crust Too Soft? Chill the dough for 5–10 minutes before pressing into the muffin cups.
- Decorative Crusts: If adding dough shapes, brush them lightly with milk or egg wash for a golden finish.
Nutrition
Here’s an approximate nutrition breakdown for 1 mini pumpkin pie (without toppings):
| Nutrient | Amount |
|---|---|
| Calories | 170 kcal |
| Total Fat | 8g |
| Saturated Fat | 2.5g |
| Cholesterol | 25mg |
| Sodium | 110mg |
| Total Carbohydrate | 22g |
| Sugars | 11g |
| Protein | 3g |
| Fiber | 1g |
Note: Values may vary depending on brand of ingredients and crust used.
Adorable Mini Pumpkin Pies
Course: Easy Homemade Desserts12
mini pies20
minutes25
minutes170
kcalIngredients
2 pie crusts (store-bought or homemade)
1 cup canned pumpkin puree
½ cup packed light brown sugar
⅓ cup whole milk (or evaporated milk)]
1 large egg, room temperature
½ teaspoon ground cinnamon
¼ teaspoon ground ginger
¼ teaspoon ground nutmeg
¼ teaspoon salt
Directions
- Preheat oven to 350°F (175°C). Lightly grease a 12-cup muffin tin or line with paper liners.
- Cut and shape crusts: Roll out pie crusts to ⅛-inch thick. Cut into 3-inch rounds and press gently into muffin tin cups.
- Make the filling: In a medium bowl, whisk together pumpkin puree, brown sugar, milk, egg, cinnamon, ginger, nutmeg, and salt until smooth.
- Fill the crusts: Spoon the pumpkin filling into each crust, about ¾ full.
- Bake: Bake for 25–30 minutes or until the filling is just set and the crust edges are golden.
- Cool: Let the pies cool in the tin for 10 minutes, then transfer to a wire rack to cool completely.
- Serve or store: Serve as is or decorate with whipped cream and toppings of your choice. Store covered in the fridge for up to 4 days.
Mini Pumpkin Pie FAQs
Q: Can I make these mini pies a day ahead?
Yes. These pies are ideal for make-ahead prep. Simply bake, cool, and refrigerate them in an airtight container. Decorate with whipped cream just before serving.
Q: Can I use fresh pumpkin instead of canned?
Absolutely. Just make sure it’s well-puréed and not watery. Roast and mash the pumpkin ahead of time, and strain any excess moisture for a smooth filling.
Q: What if I don’t have a muffin tin?
You can also bake these in mini tart pans or silicone cupcake molds. Just watch the baking time—they may cook slightly faster depending on the size.
Q: How do I know when they’re done?
The edges of the filling should look firm, and the centers should no longer jiggle when lightly tapped. The crust will be lightly golden.
Q: Can kids help with this recipe?
Definitely. Kids love using cookie cutters, mixing filling, and spooning it into the crusts. This is a great introductory baking project for little helpers.
Conclusion
These Adorable Mini Pumpkin Pies offer all the warmth and spiced sweetness of traditional pumpkin pie—just in a smaller, more playful format. Whether you’re baking for the holidays, preparing school treats, or just want a cozy dessert that feels special without being complicated, this recipe hits the mark. It’s approachable, reliable, and just the right size for any gathering.
And perhaps best of all—these mini pies invite creativity. From toppings and crust designs to flavor twists, they’re a lovely blank canvas for your personal touch.