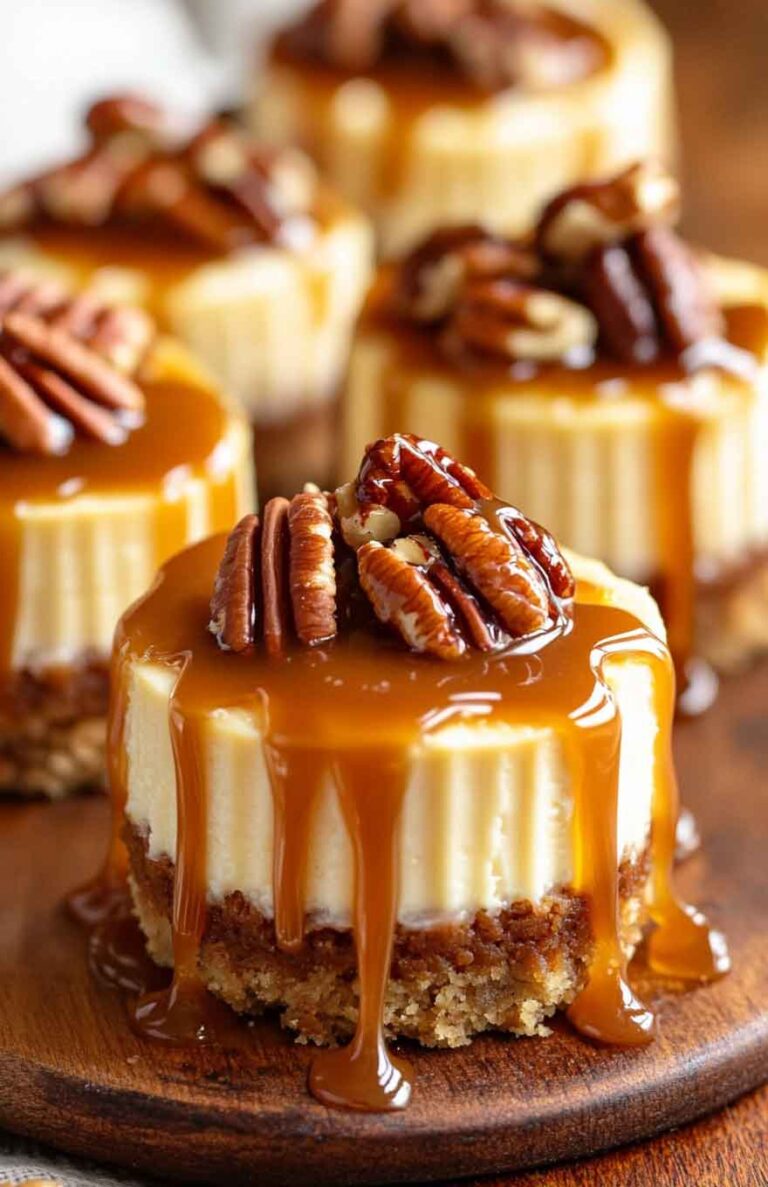
Mini Red Velvet Cheesecakes (Rich, Creamy & Perfectly Sized!)
Hey there! Have you ever had a dessert so good you just had to have another bite? That’s exactly what happens with these Mini Red Velvet Cheesecakes. They’re rich, creamy, and have that perfect mix of chocolate and tangy cheesecake.
Trust me, these little cheesecakes are a game-changer. They’ve got a soft red velvet base and a smooth, velvety cheesecake layer on top. Oh, and let’s not forget the cute factor—because mini desserts just taste better, right?
And the best part? They’re super easy to make! No water bath, no stress—just mix, bake, and enjoy. Whether it’s for a party, date night, or just because you’re craving something sweet, these cheesecakes always hit the spot. Let’s get baking!

Why You’ll Love This Recipe
- Easy to Make: No complicated techniques—just mix, bake, and chill.
- Perfect for Any Occasion: These mini cheesecakes are great for birthdays, holidays, or an everyday treat.
- Rich and Creamy: A silky cheesecake texture with just the right balance of sweetness and tang.
- Mess-Free & Convenient: No slicing needed! Just grab and enjoy.
- Make-Ahead Friendly: Chill them overnight for the best flavor.

Required Kitchen Tools
To make these Mini Red Velvet Cheesecakes, you’ll need:
- Muffin Tin: A 12-cup muffin pan for perfect portions.
- Cupcake Liners: Helps with easy removal and serving.
- Mixing Bowls: For combining ingredients.
- Hand or Stand Mixer: To whip up the cheesecake batter.
- Measuring Cups & Spoons: For precise ingredient amounts.
- Spatula: To fold and smooth the batter.
Key Ingredients
Here’s what you’ll need to create these indulgent mini cheesecakes:
For the Crust:
- Chocolate Sandwich Cookies (Oreos): Crushed for a rich, chocolatey base.
- Unsalted Butter: Helps bind the crust together.
For the Red Velvet Cheesecake Layer:
- Cream Cheese (Full-Fat): The star of the show—use block-style for best results.
- Granulated Sugar: Sweetens the cheesecake base.
- Egg: Helps the cheesecake set properly.
- Sour Cream: Adds a creamy texture and tangy flavor.
- Vanilla Extract: Enhances the overall flavor.
- Unsweetened Cocoa Powder: For that signature red velvet taste.
- Red Food Coloring: Gives the cheesecake its signature red hue.
For the Topping:
- Cream Cheese: Softened for a smooth, creamy topping.
- Powdered Sugar: Adds sweetness without grittiness.
- Heavy Cream (or Milk): Helps achieve a light and fluffy texture.
- Vanilla Extract: Adds a warm depth of flavor.
- Optional Garnish: Red sprinkles or chocolate shavings for a pretty finish.

Step-by-Step Instructions
1. Prepare the Crust
- Preheat the oven to 325°F (163°C). Line a 12-cup muffin tin with cupcake liners.
- Crush the cookies: Place the chocolate sandwich cookies in a food processor and pulse until they form fine crumbs. If you don’t have a food processor, place them in a sealed plastic bag and crush them with a rolling pin.
- Mix with butter: In a small bowl, combine the cookie crumbs with the melted butter and stir until evenly coated.
- Press into liners: Divide the mixture evenly among the muffin cups (about 1 tablespoon per cup) and press firmly to form a solid base.
- Bake for 5 minutes. Remove from the oven and let cool while preparing the cheesecake filling.
2. Make the Red Velvet Cheesecake Filling
- Beat the cream cheese: In a large mixing bowl, use a hand mixer (or stand mixer) to beat the softened cream cheese until smooth and creamy (about 2 minutes).
- Add sugar and cocoa powder: Mix in the granulated sugar and cocoa powder, beating until fully combined.
- Mix in the wet ingredients: Add the egg, sour cream, vanilla extract, and red food coloring. Beat on low speed until smooth. Be careful not to overmix, as this can cause air bubbles in the cheesecake.
- Fill the muffin cups: Spoon the cheesecake batter evenly over the prepared crusts, filling each liner almost to the top. Smooth the tops with a spoon or spatula.
3. Bake the Cheesecakes
- Bake at 325°F (163°C) for 15-18 minutes, or until the edges are set and the centers have a slight jiggle when gently shaken.
- Cool in the pan: Turn off the oven and leave the cheesecakes inside with the door slightly open for 5 minutes. Then remove them from the oven and let them cool in the muffin tin for another 15 minutes.
- Chill in the fridge: Transfer the cheesecakes to the refrigerator and chill for at least 2 hours (or overnight) before adding the topping.
Serving Suggestions & Decoration

Now that your Mini Red Velvet Cheesecakes are chilled and set, it’s time for the finishing touch—a luscious cream cheese topping!
4. Make the Cream Cheese Topping
- Beat the cream cheese: In a mixing bowl, beat the softened cream cheese until smooth.
- Add powdered sugar and vanilla: Mix in the powdered sugar and vanilla extract, beating until fully incorporated.
- Thin it out: Add heavy cream (or milk) gradually, beating until the topping reaches a light and creamy consistency.
5. Decorate the Cheesecakes
- Pipe or spread the topping: You can use a piping bag with a star tip for a fancy swirl or simply spread the topping with a spoon.
- Add garnishes: Sprinkle with red sugar sprinkles, chocolate shavings, or even a small piece of chocolate for an elegant finish.
Serving Ideas
These Mini Red Velvet Cheesecakes are already perfect as is, but you can elevate them further by pairing them with:
- Fresh Berries: Serve with raspberries or strawberries for a tart contrast.
- Chocolate Drizzle: Melted chocolate drizzled on top adds an extra indulgent touch.
- Whipped Cream: A light dollop of homemade whipped cream complements the richness.
- Crushed Cookies: Sprinkle extra crushed chocolate cookies over the topping for more texture.

Storage and Meal Prep Tips
Refrigeration:
- Store mini cheesecakes in an airtight container in the refrigerator for up to 5 days.
- Keep them chilled until ready to serve for the best texture.
Freezing:
- These mini cheesecakes freeze beautifully! Place them in a single layer in an airtight container and freeze for up to 2 months.
- Thaw overnight in the refrigerator before serving.

Mini Red Velvet Cheesecakes (Rich, Creamy & Perfectly Sized!)
Course: Cake Recipes12 mini cheesecakes
servings15
minutes15
minutes180
kcalIngredients
- For the Crust:
10 chocolate sandwich cookies (Oreos), crushed
2 tablespoons unsalted butter, melted
- For the Red Velvet Cheesecake Layer:
8 oz (225g) cream cheese, softened
1/3 cup (67g) granulated sugar
1 large egg, at room temperature
2 tablespoons sour cream
1 teaspoon vanilla extract
1 tablespoon unsweetened cocoa powder
1/2 teaspoon red food coloring (gel or liquid)
- For the Cream Cheese Topping:
4 oz (115g) cream cheese, softened
1/2 cup (60g) powdered sugar
2 tablespoons heavy cream (or milk)
1/2 teaspoon vanilla extract
Optional: Red sprinkles or chocolate shavings for garnish
Directions
- Prepare the Crust:
Preheat oven to 325°F (163°C) and line a 12-cup muffin tin with cupcake liners.
In a small bowl, mix crushed cookies with melted butter until well combined.
Divide the mixture evenly among the muffin cups, pressing it down firmly to form a crust.
Bake for 5 minutes, then remove from the oven and let cool. - Make the Cheesecake Batter:
In a mixing bowl, beat cream cheese until smooth.
Add sugar and cocoa powder and beat until fully combined.
Mix in egg, sour cream, vanilla extract, and red food coloring, beating on low speed until smooth. - Bake the Cheesecakes:
Fill each muffin cup with the cheesecake batter, nearly to the top.
Bake at 325°F (163°C) for 15-18 minutes, or until edges are set and centers have a slight jiggle.
Turn off the oven, crack the door slightly, and let the cheesecakes rest inside for 5 minutes.
Remove and let cool for 15 minutes at room temperature, then chill in the refrigerator for at least 2 hours. - Make the Cream Cheese Topping:
Beat softened cream cheese until smooth.
Add powdered sugar and vanilla extract, mixing until well combined.
Add heavy cream gradually, beating until the mixture is smooth and creamy. - Decorate and Serve:
Pipe or spread the cream cheese topping onto each cheesecake.
Garnish with red sprinkles or chocolate shavings.
Serve chilled and enjoy!
Nutrition Information (Per Cheesecake)
| Nutrient | Amount |
|---|---|
| Calories | 180 |
| Carbs | 18g |
| Protein | 3g |
| Fat | 11g |
| Sugar | 12g |
| Sodium | 120mg |
(Nutrition is estimated and may vary based on ingredients used.)
Mini Red Velvet Cheesecake FAQs
1. Can I make these in advance?
Yes! These mini cheesecakes taste even better after chilling overnight, making them a great make-ahead dessert.
2. Can I use a different crust?
Absolutely! Graham crackers, Biscoff cookies, or even vanilla wafers work well as a substitute for Oreos.
3. Do I need a water bath?
Nope! Since these are mini cheesecakes, they bake evenly without a water bath.
4. What if I don’t have red food coloring?
You can skip it! The cheesecakes will still taste delicious, just without the signature red velvet color.
5. How do I prevent cracks in my cheesecakes?
- Don’t overmix the batter.
- Bake at a low temperature (325°F).
- Avoid overbaking—cheesecakes should still have a slight jiggle in the center.
Conclusion
These Mini Red Velvet Cheesecakes are rich, creamy, and bursting with flavor in every bite! Whether you’re making them for a special occasion or just to satisfy a sweet craving, they’re guaranteed to impress. With their buttery chocolate crust, silky red velvet filling, and fluffy cream cheese topping, they’re a mini version of a classic dessert that’s just as indulgent.
Try them for yourself and let me know how they turn out! If you love this recipe, don’t forget to share it with friends and family. Happy baking!