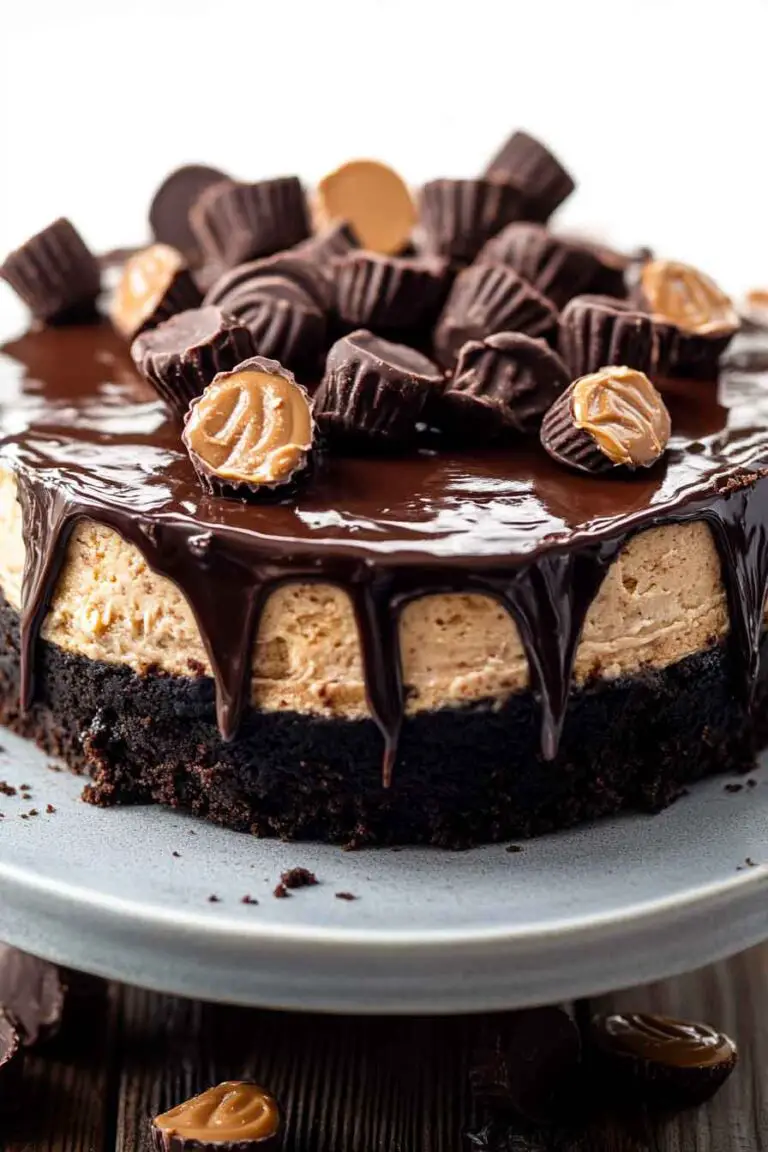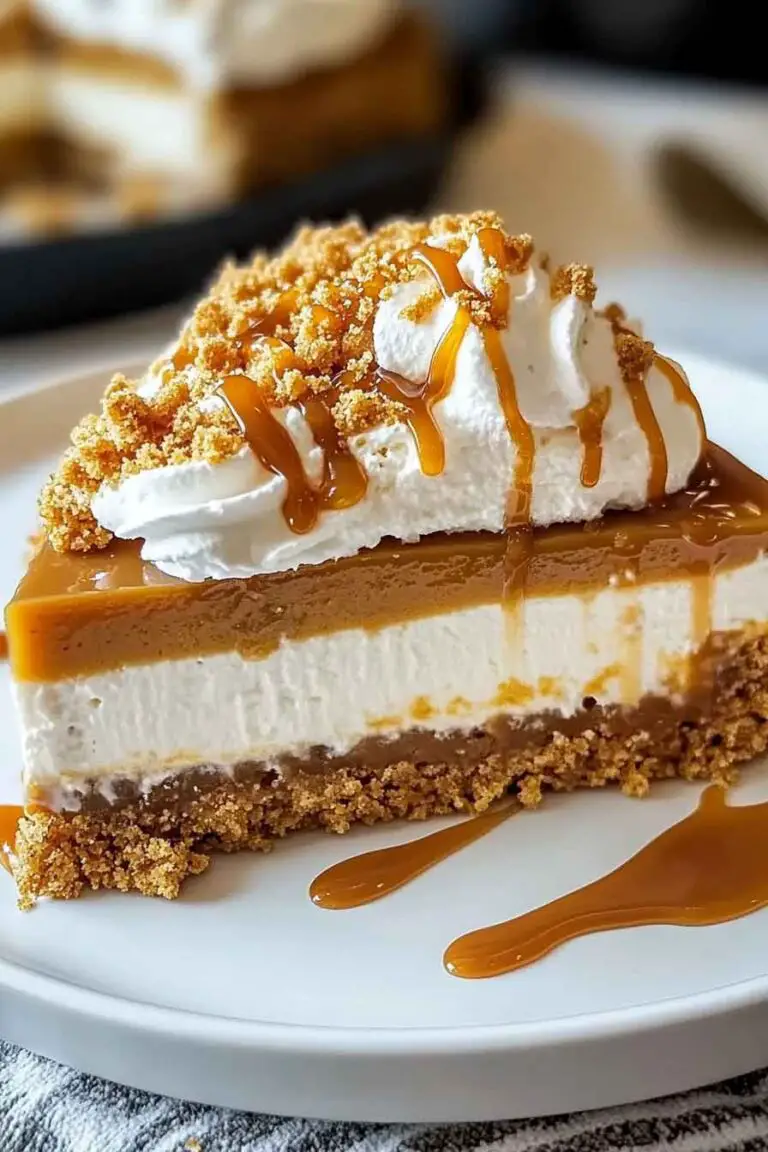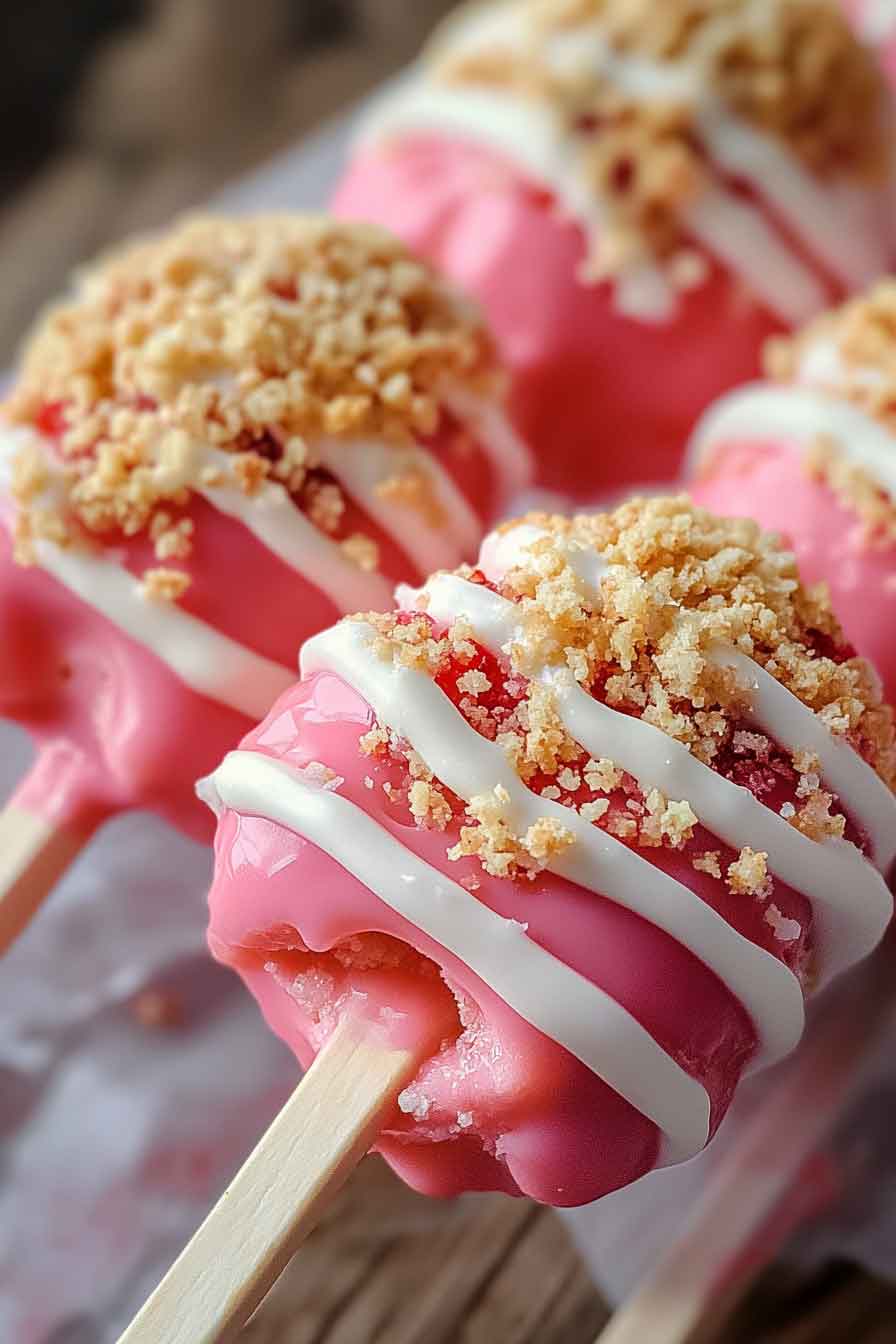
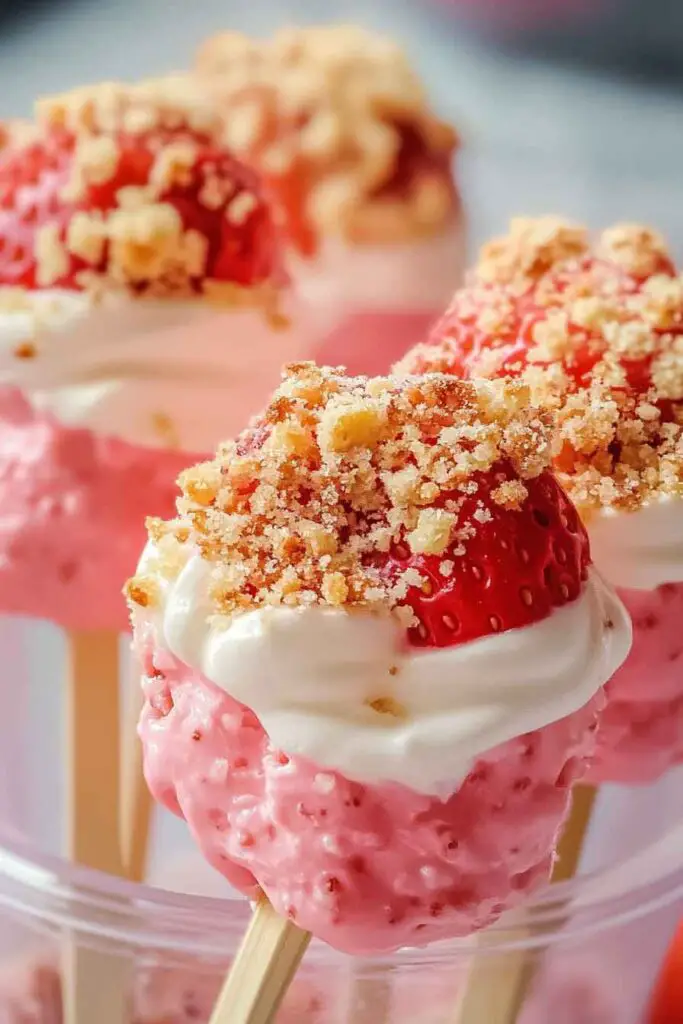
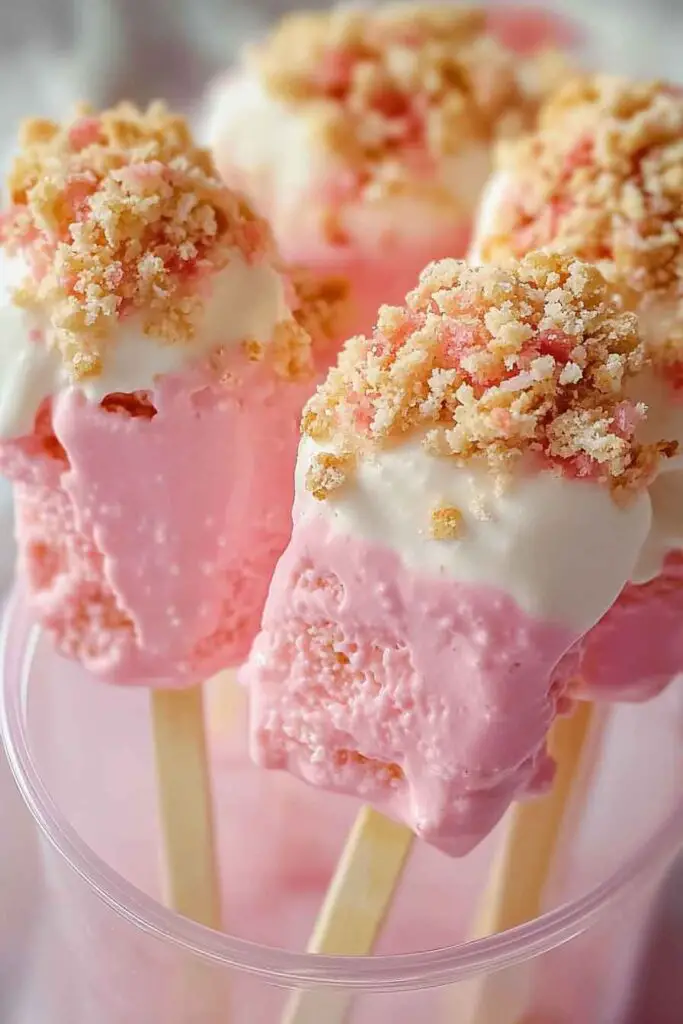
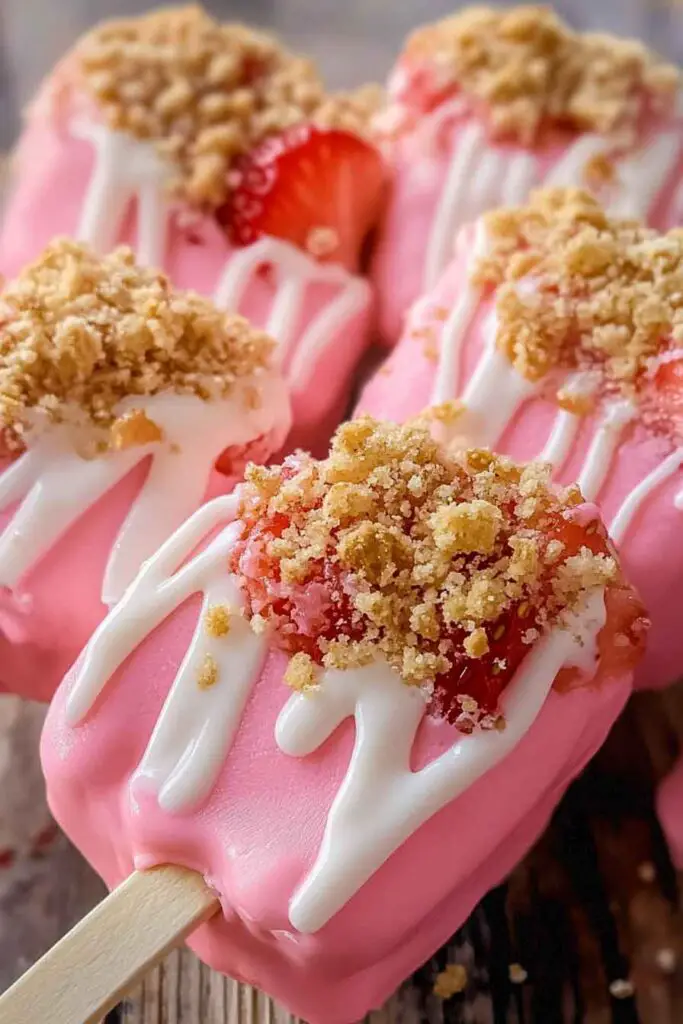
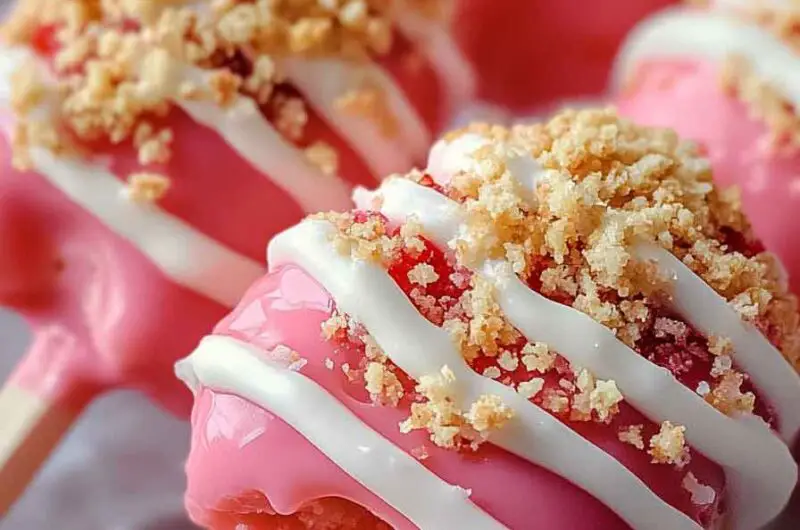
Strawberry Crunch Cheesecake Pops
Alright, these Strawberry Crunch Cheesecake Pops? They’re creamy, fruity, and coated in that nostalgic strawberry crunch you remember from your favorite ice cream bar. Each pop is made with rich cheesecake filling, dipped in strawberry-flavored coating, and rolled in buttery cookie crumbs.
I made them for a summer party, and let me tell you—they were a total hit. That smooth cheesecake center with the sweet, crunchy outside? Absolute perfection in every bite.
No baking needed, and they’re super fun to make. Just mix, chill, dip, and roll. Let’s make a batch together—you’re gonna love how fun, easy, and totally crave-worthy these pops are!

Why You’ll Love This Recipe
- No Oven Needed: These are entirely no-bake, making them an excellent option during the summer months or for small kitchens without an oven.
- Creamy Yet Structured Texture: The cheesecake center is stabilized with whipped cream, creating a texture that is light and airy but still holds its shape once frozen.
- Eye-Catching and Crowd-Pleasing: With their bright pink crunch and clean presentation on a stick, they stand out at parties or dessert tables.
- Freezer-Stable for Weeks: You can prepare these ahead of time and keep them frozen for up to 1 month, making them perfect for events or last-minute treats.
- Nostalgic but Elevated: Combines the classic flavor of strawberry shortcake ice cream with the richness of a New York-style cheesecake.
What You Need to Know Before You Start
Prep & Chill Time
- Prep Time: 25 to 30 minutes (includes making the filling and coating)
- Chill Time: 4 to 6 hours minimum (overnight strongly recommended for best texture and flavor)
- Total Time: Roughly 4 hours 30 minutes (excluding optional decorating)
Yields & Serving
- This recipe yields approximately 12 cheesecake pops, assuming standard 2.5 oz molds. Serving size may vary based on the mold or scooping method used.
- These are meant to be served cold, directly from the freezer, and soften slightly at room temperature within 5 to 7 minutes for the ideal texture.
Difficulty Level
- Beginner to Intermediate – While there is no baking involved, you’ll need to be comfortable with whipping cream to soft peaks and working efficiently to coat frozen items before they melt.
Required Kitchen Tools
To ensure smooth preparation, gather the following tools before starting:
- Electric Hand Mixer or Stand Mixer – For creaming and whipping to proper texture.
- Mixing Bowls (2-3) – One for the cheesecake base, one for whipping cream, one for coating mixture.
- Rubber Spatula – Ideal for folding and transferring thick mixtures cleanly.
- Silicone Popsicle Mold or Muffin Tin – Silicone makes unmolding easier, but metal works with parchment lining.
- Popsicle Sticks – Wooden sticks are sturdy and widely available.
- Food Processor or Zip-top Bag + Rolling Pin – For crushing Oreos and freeze-dried strawberries.
- Tray Lined with Parchment Paper – For freezing the coated pops.
- Small Offset Spatula or Butter Knife – Helps to smooth the cheesecake base into molds.

Ingredients for Strawberry Crunch Cheesecake Pops
All ingredients should be at room temperature, especially the cream cheese, to ensure a smooth and lump-free filling.
For the No-Bake Cheesecake Filling:
- 8 oz Cream Cheese (full-fat block style) – Provides the classic cheesecake flavor and richness. Avoid whipped or spreadable versions.
- ¼ cup Granulated Sugar – Just enough to sweeten the filling without overpowering the tart strawberries in the coating.
- 1 tsp Pure Vanilla Extract – Adds warmth and depth to balance the tartness.
- ½ cup Heavy Whipping Cream – Whipped to soft peaks and folded in. It lightens the filling while keeping it stable after freezing.
Note: Do not substitute whipped topping (e.g., Cool Whip) unless you’re aiming for a softer, less firm filling.
For the Crunch Coating:
- 18 Golden Oreo Cookies – Crushed to fine crumbs. The golden vanilla cookies provide a sweet, buttery crunch base.
- ½ cup Freeze-Dried Strawberries – Processed or crushed to a powdery texture for vibrant color and bold berry flavor.
- ¼ cup Unsalted Butter, Melted – Acts as a binder for the coating, ensuring it sticks to the frozen cheesecake surface.
Tip: Use freshly melted butter and toss the crumbs while warm for best adherence.
Optional Toppings (for garnish or customization):
- ¼ cup White Chocolate Chips (melted) – Drizzle over the pops once coated for contrast and extra sweetness.
- Fresh Strawberry Slices or Mint Leaves – If serving at an event immediately, garnish the platter for visual appeal.
- Sprinkles or Colored Sugar – Can be added to the coating for festive occasions.
Variations for Strawberry Crunch Cheesecake Pops
- Chocolate Shell Option: Dip frozen pops in melted white chocolate before pressing into the crumb coating for a firm candy shell.
- Fruit Swirl Filling: Add a spoonful of strawberry jam or puree to the center of each mold for a hidden fruity surprise.
- Gluten-Free: Use gluten-free sandwich cookies in place of Golden Oreos for a gluten-friendly version.
- Dairy-Free: Substitute with plant-based cream cheese and coconut cream whipped to peaks. Note that texture will be slightly softer.
- Lemon Variation: Add ½ teaspoon of lemon zest to the cheesecake filling and swap freeze-dried strawberries for raspberries for a bright, citrusy twist.
How to Make Strawberry Crunch Cheesecake Pops: Step-by-Step Instructions
1. Prepare the Crunch Coating
This is best done first so it can cool and firm slightly while you make the filling.
- Crush the Golden Oreos and Strawberries:
- Add Golden Oreo cookies and freeze-dried strawberries to a food processor.
- Pulse until you get a fine, crumbly texture. Avoid overprocessing into a powder—some texture is ideal.
- Alternatively, place cookies and strawberries in a zip-top bag and crush using a rolling pin.
- Add the Melted Butter:
- Transfer the crumb mixture to a mixing bowl.
- Drizzle in the melted butter while stirring with a fork or spatula.
- Toss until the mixture resembles wet sand and begins to clump slightly.
- Set Aside:
- Spread the coated crumbs onto a parchment-lined tray and allow to cool slightly at room temperature.
- This helps prevent melting the cheesecake when rolling the pops later.
2. Make the Cheesecake Filling
- Cream the Base:
- In a large mixing bowl, use an electric hand mixer (or stand mixer with paddle) to beat the softened cream cheese until smooth and lump-free.
- Add the granulated sugar and vanilla extract. Beat again until creamy, about 1 to 2 minutes.
- Whip the Cream Separately:
- In a clean, cold bowl, pour the heavy whipping cream.
- Beat on medium-high speed until soft peaks form. This should take about 2 to 3 minutes.
- Be careful not to overwhip—stop when the cream holds its shape but still has a slightly glossy sheen.
- Fold the Whipped Cream into the Cheesecake Base:
- Gently fold one-third of the whipped cream into the cream cheese mixture using a spatula to lighten the base.
- Then fold in the remaining whipped cream until no streaks remain.
- The texture should be airy but thick enough to hold shape.
3. Fill the Molds
- Prepare Your Popsicle Molds:
- If using silicone popsicle molds, make sure they are clean and dry.
- Insert popsicle sticks halfway into each mold cavity.
- Spoon in the Filling:
- Using a small spoon or piping bag, carefully fill each mold cavity with the cheesecake mixture.
- Tap the mold gently on the counter to release any trapped air bubbles.
- Smooth the Tops:
- Use a small offset spatula or butter knife to level the tops for clean edges once unmolded.
- Freeze Until Solid:
- Place the filled molds on a flat tray and freeze for at least 4 to 6 hours, or overnight if possible.
- Do not attempt to unmold before they’re fully set.
4. Coat the Cheesecake Pops
Once the pops are completely frozen:
- Loosen from the Mold:
- Carefully remove each cheesecake pop from the mold. Silicone molds can usually be peeled away gently.
- If using a muffin tin, briefly dip the bottom in warm water (10 seconds) to loosen the pops.
- Press into the Crunch Coating:
- Working one at a time, roll or press each frozen pop into the prepared Oreo-strawberry crumb mixture.
- Gently pat crumbs onto any missed spots with your hand.
- If crumbs aren’t sticking, let the pops sit at room temp for 1 minute to soften slightly before coating.
- Optional: Add Drizzle or Garnish:
- Drizzle with melted white chocolate using a fork or squeeze bottle.
- Allow to set for a few minutes before placing back in the freezer.
5. Freeze Again (Optional but Recommended)
- Once all pops are coated, lay them on a parchment-lined tray and freeze again for 20–30 minutes before serving. This ensures the coating firms up and doesn’t fall off while eating.
How to Serve Strawberry Crunch Cheesecake Pops
- Direct from the Freezer: Let the pops sit at room temperature for 5 minutes before serving. This softens the outer crumb slightly while maintaining the firm, creamy center.
- Party Platter Style: Arrange them on a tray lined with parchment or decorative paper. Garnish with fresh strawberries, mint leaves, or a light drizzle of melted white chocolate.
- Kid-Friendly Version: Add fun sprinkles to the coating mix or serve with mini dipping cups of strawberry sauce.
- Elegant Finish: Serve individually wrapped in wax paper tied with kitchen twine for a neat presentation at showers or events.
Storing Strawberry Crunch Cheesecake Pops
- Freezer Storage: After coating and final freezing, store the pops in a single layer in an airtight container. If stacking, separate layers with parchment paper.
- Shelf Life: Best enjoyed within 3 weeks, though they’ll keep for up to 1 month.
- Avoid Refrigeration: These are designed to be eaten frozen. Refrigerating them can cause condensation, making the coating soggy and soft.
Tips and Tricks for Success
- Use Room-Temperature Cream Cheese: This prevents lumps and ensures a smooth cheesecake texture.
- Don’t Skip the Whipping Cream Step: It adds essential airiness to the filling. Whipped topping can be used in a pinch but won’t be as stable.
- Freeze Thoroughly Before Coating: Coating partially frozen pops will cause melting and messy results.
- Press Coating Gently: Avoid forcing the coating on, especially around soft edges. Let pops rest for 30–60 seconds if they’re too cold for coating to stick.
- Double the Crunch Batch: If you love extra coating or plan to roll thickly, increase the crumb ingredients slightly.
Nutrition Information
| Nutrient | Per Pop (est.) |
|---|---|
| Calories | 215 |
| Total Fat | 15g |
| Saturated Fat | 8g |
| Carbohydrates | 18g |
| Sugars | 11g |
| Protein | 2g |
| Fiber | <1g |
| Sodium | 105mg |
| Cholesterol | 45mg |
Note: Nutrition will vary based on exact size and coating thickness.
Strawberry Crunch Cheesecake Pops
Course: Uncategorized12
pops25
minutes215
kcal4-6
hourIngredients
For Cheesecake Filling:
8 oz full-fat cream cheese, softened
¼ cup granulated sugar
1 tsp vanilla extract
½ cup heavy whipping cream (cold)For Strawberry Crunch Coating:
18 Golden Oreo cookies
½ cup freeze-dried strawberries
¼ cup unsalted butter, meltedOptional:
¼ cup white chocolate chips, melted (for drizzling)
Fresh strawberries or mint (for garnish)
Directions
- Make the Crunch Coating:
Crush Oreos and freeze-dried strawberries until fine crumbs form. Mix with melted butter and set aside. - Make the Cheesecake Filling:
Beat cream cheese until smooth. Add sugar and vanilla. Separately whip cream to soft peaks. Fold whipped cream into cream cheese mix until fully combined. - Assemble the Pops:
Spoon or pipe cheesecake mixture into silicone molds. Insert popsicle sticks. Smooth the tops. Freeze 4–6 hours or overnight. - Coat the Pops:
Remove frozen pops from molds. Roll in or press on the crumb mixture gently. Drizzle with melted chocolate if desired. Freeze 20 minutes to set. - Serve & Store:
Let sit at room temperature for 5 minutes before serving. Store in airtight container in the freezer for up to 1 month.
Frequently Asked Questions (FAQs)
Can I make these without a popsicle mold?
Yes. You can use a muffin tin lined with paper cupcake liners or silicone muffin cups. Simply add a stick to the center and freeze. The shape will be more like a mini cheesecake cup, but the flavor and texture will remain the same.
What can I use instead of freeze-dried strawberries?
Freeze-dried strawberries are best for a bold flavor and vibrant coating. However, if unavailable, you can use strawberry-flavored gelatin powder mixed with crushed Golden Oreos for a similar visual effect—but it won’t have the same real fruit taste.
Do I have to use Golden Oreos?
No, but they give the best sweet-vanilla base for the coating. Alternatives include vanilla wafers, graham crackers, or even shortbread cookies. Just keep the texture light and crumbly.
Can I make this recipe dairy-free?
Yes, but results may vary. Use dairy-free cream cheese and coconut cream (chilled and whipped) as a substitute. Texture may be softer, so consider freezing longer or serving straight from the freezer without thawing.
How do I prevent the pops from melting while coating them?
Work quickly in a cool kitchen. Coat one pop at a time, and if needed, keep the rest in the freezer until you’re ready to roll them. If crumbs aren’t sticking, let the surface of the pop soften for 30 seconds before rolling.
Conclusion
Strawberry Crunch Cheesecake Pops combine the charm of a nostalgic ice cream bar with the creamy indulgence of cheesecake—all in a portable, no-bake frozen treat. They’re easy enough for beginners, yet impressive enough to serve at parties or wrap up as gifts.
Whether you’re craving a cool dessert on a hot day or planning a dessert table that stands out, these cheesecake pops deliver with real flavor, stunning color, and a satisfying texture that hits all the right notes.
They’re also a great recipe to make with kids or customize to your taste—with variations that include chocolate shells, fruity swirls, and dairy-free options.