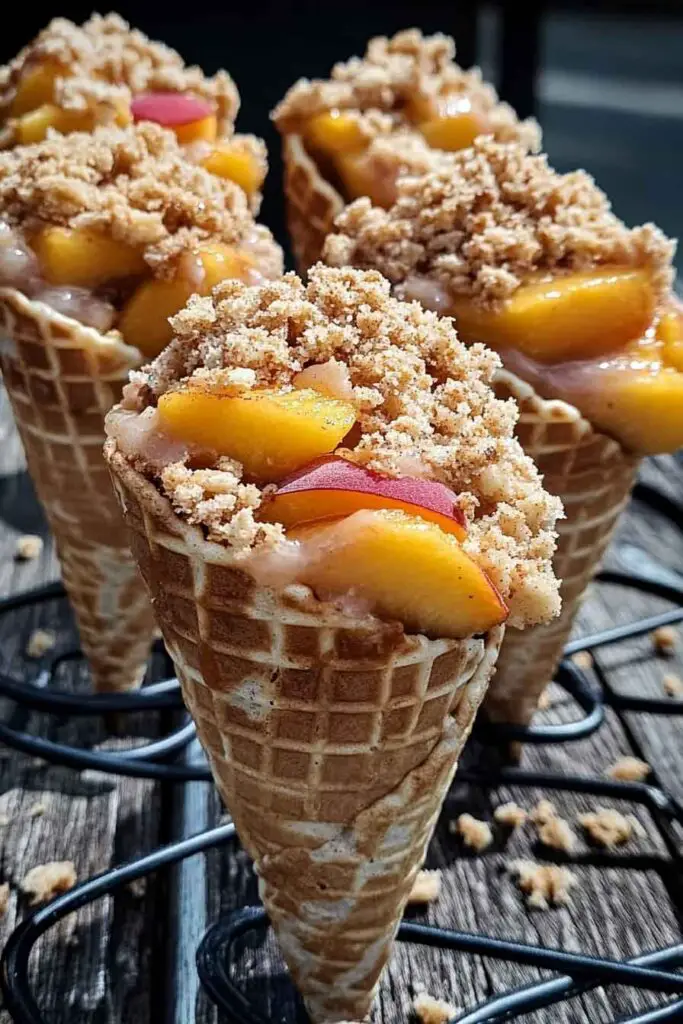
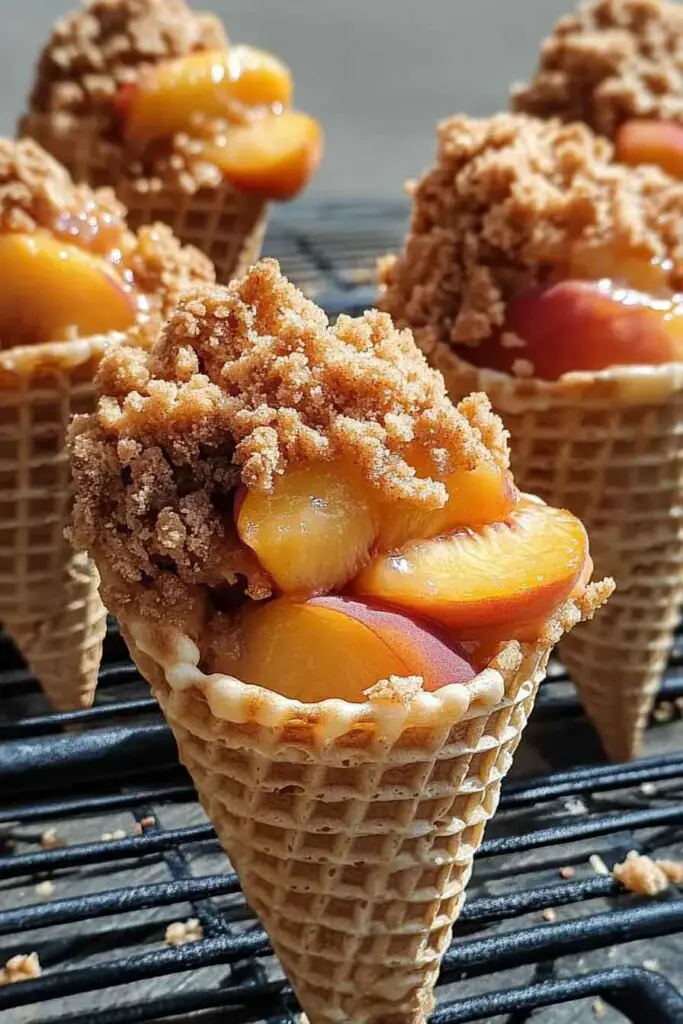
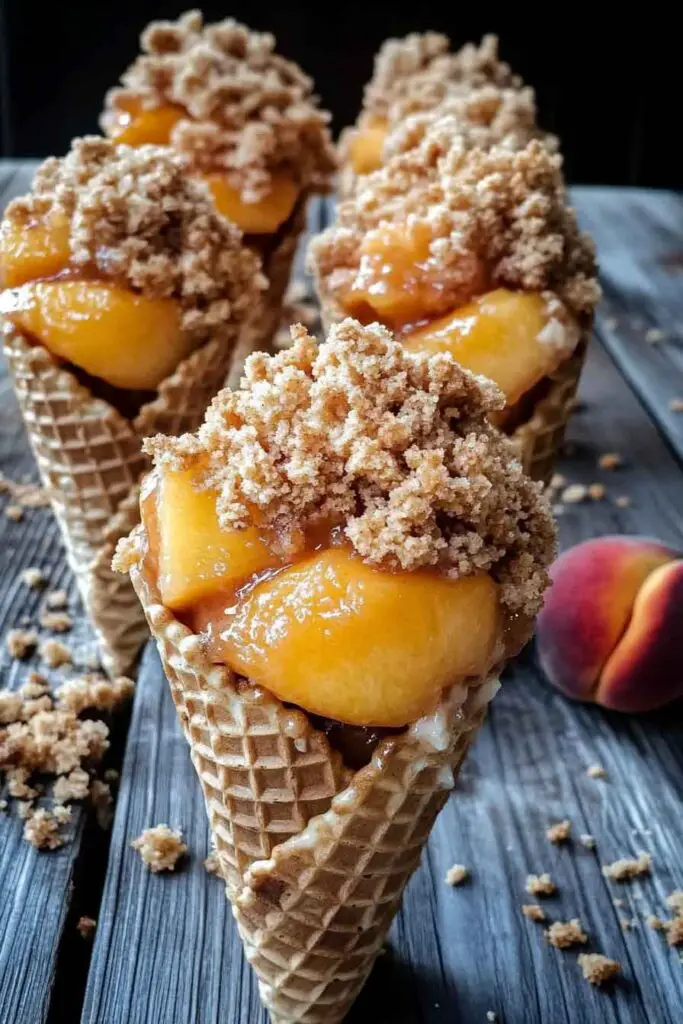
Peach Cobbler Stuffed Cones
Alright, these Peach Cobbler Stuffed Cones? They’re summer comfort food with a twist—sweet, syrupy peach cobbler spooned right into crunchy waffle cones. Warm peaches, buttery crumble, and a scoop of whipped cream or ice cream on top… every bite is a fun mix of crisp, creamy, and juicy.
I made these for a backyard barbecue, and honestly, they disappeared faster than any dessert on the table. That combo of warm cobbler filling and cool cone crunch? It’s like peach pie meets ice cream truck—perfect for parties or just a treat-yourself night.
And the best part? No plates needed! Just make your cobbler, scoop it into cones, and serve. Let’s make a batch together—these are the kind of desserts people talk about long after the last crumb is gone.

Why You’ll Love This Recipe
- Layered Flavor and Texture: You get a little bit of everything—sweet fruit, buttery cake, creamy filling, and a bit of crunch—in each bite. It’s like having cobbler and cheesecake all in one.
- Handheld and Mess-Free: No plates, no forks, and no cleanup. Just grab and go. The cone keeps everything contained, making it great for kids and outdoor settings.
- Small Batch Friendly or Party Ready: Make a few for yourself or a dozen for guests—this recipe scales well.
- No-Oven Option: The cake cubes can be toasted on the stovetop or skipped if using pre-toasted pound cake. Most of the steps are no-bake.
- Fully Customizable: You can switch out the fruit, use chocolate cones, or add different toppings like toasted coconut or caramel drizzle.
What You Need to Know Before You Start
Before you dive in, here are a few things that will help make the process smooth:
Prep Time and Cook Time
- Preparation Time: 25 minutes
- Cooking Time: 15 minutes (for the peaches and toasting the cake)
- Cooling/Chilling Time: 30 minutes (mainly for the cheesecake mousse to firm up and cones to set)
- Total Time: Approximately 1 hour and 10 minutes
Yields and Servings
This recipe makes 8 generously filled cones. You can stretch it to 10 if you’re layering a bit more lightly, or double everything for a larger crowd.
Difficulty Level
This recipe is easy enough for beginners. No baking from scratch is required. The only cooking involved is gently heating the peaches and toasting the cake. The rest is all mixing and assembling.
Tips Before You Start
- Make sure the white chocolate is fully melted and smooth before dipping the cones.
- Use canned peaches packed in juice, not syrup—they’re less sweet and balance better with the rest of the filling.
- Toast the cake cubes gently so they get slightly crisp but not dry.
- Use cold ingredients for the cheesecake mousse so it sets properly and pipes neatly into the cones.
Required Kitchen Tools
Here’s what you’ll need to prepare and assemble the cones:
- Small saucepan: To cook the peach mixture until syrupy and spiced.
- Mixing bowls: At least two—one for the cheesecake filling, one for graham crumbs or chocolate.
- Hand mixer or stand mixer: For whipping the cream and combining the pudding filling. A whisk can work too, but it takes more effort.
- Spatula and spoon: For mixing and layering components smoothly.
- Piping bag or zip-top bag (optional): Helps neatly layer the cheesecake mousse into the cone. A spoon works fine too if you’re careful.
- Baking sheet lined with parchment paper: For dipping and setting the cones.
- Sharp knife and cutting board: For chopping peaches and cubing the cake.
Ingredients for Peach Cobbler Stuffed Cones
Every element of this dessert plays a specific role—from flavor to texture. Here’s what you’ll need:
For the Cone Base:
- 8 waffle ice cream cones: Choose cones with a sturdy shape to hold the weight of the filling. Sugar cones are too small for this.
- 1 cup white chocolate chips: For dipping the rim of the cones. This creates a seal that helps hold fillings in and adds sweetness.
- 2 tablespoons coconut oil: Helps the chocolate melt smoothly and set with a glossy finish.
- 6 cinnamon graham crackers, finely crushed: These give the cones a cobbler-like coating with added crunch and spice.
For the Peach Cobbler Layer:
- 1 can (15 oz) peaches in juice, drained and chopped: Chop into small pieces to make layering easier. Juice-packed peaches are ideal to control sweetness.
- 2 tablespoons unsalted butter: Used to gently sauté the peaches and infuse richness.
- 1/3 cup light brown sugar: Adds a caramel-like sweetness that deepens the flavor of the fruit.
- 1/2 teaspoon ground cinnamon: A must-have for cobbler flavor.
- 1/4 teaspoon ground nutmeg: Adds depth and warmth.
- 1/4 cup chopped pecans (optional): For added texture and a nutty bite that pairs well with the peaches.
For the Toasted Cake Cubes:
- 2 cups cubed butter or pound cake: Use store-bought pound cake or leftover vanilla cake. Cut into ½-inch cubes for layering.
- 1 tablespoon butter (for toasting): Lightly browns the cake and enhances the flavor.
- 1/2 teaspoon vanilla extract: Adds aroma and makes the cake taste freshly made, even if store-bought.
For the Cheesecake Mousse:
- 1/2 cup heavy whipping cream, cold: Whips into a fluffy texture to lighten the filling.
- 1/4 cup powdered sugar: Sweetens and stabilizes the cream.
- 1/2 package (3.4 oz) cheesecake pudding mix: Instant pudding gives the filling a cheesecake flavor and creamy texture.
- 1/2 cup cold milk: Use cold whole milk to activate the pudding and keep it smooth and thick.
Variations for Peach Cobbler Stuffed Cones
- Fruit Swap: Substitute the canned peaches with fresh peaches (peeled and chopped) or other fruits like cherries, strawberries, or apples for seasonal variety.
- Crumble Topping: Add a spoonful of pre-baked streusel or crisp topping for even more cobbler texture.
- Drizzle Options: Finish with a light drizzle of caramel, honey, or cinnamon glaze for extra sweetness.
- Nut-Free Version: Omit the pecans if needed—no major flavor loss.
- Add Ice Cream: Serve with a small scoop of vanilla ice cream or whipped topping on the side (just before eating) for a cold twist.
How to Make Peach Cobbler Stuffed Cones: Step-by-Step Instructions
1. Prepare the Cones
Melt and dip:
- In a microwave-safe bowl, melt 1 cup white chocolate chips with 2 tablespoons coconut oil in 20-second intervals, stirring until smooth.
- Dip the rim of each waffle cone into the melted chocolate, coating about 1 inch of the top edge.
- Immediately roll or sprinkle the dipped edge in crushed cinnamon graham crackers.
- Place dipped cones upright (inside cups or a cone stand) or lay them gently on a parchment-lined tray.
- Let them set at room temperature or refrigerate for 10–15 minutes until firm.
2. Make the Peach Cobbler Filling
Cook the fruit:
- In a small saucepan, melt 2 tablespoons butter over medium heat.
- Add chopped canned peaches, 1/3 cup brown sugar, 1/2 teaspoon cinnamon, and 1/4 teaspoon nutmeg.
- Cook for 6–8 minutes, stirring occasionally, until the mixture thickens slightly and smells fragrant.
- Stir in 1/4 cup chopped pecans (if using), then remove from heat. Let the mixture cool to room temperature.
3. Toast the Cake Cubes
Lightly brown:
- In a nonstick skillet, melt 1 tablespoon butter over medium heat.
- Add cubed pound or butter cake and toast for 4–5 minutes, stirring occasionally, until the sides are lightly golden.
- Remove from heat and toss with 1/2 teaspoon vanilla extract. Let cool.
Tip: Toasting the cake is optional, but it adds a subtle crunch and brings out the flavor.
4. Make the Cheesecake Mousse
Whip and fold:
- In a chilled bowl, whip 1/2 cup cold heavy cream with 1/4 cup powdered sugar using a hand mixer until soft peaks form.
- In a separate bowl, whisk together 1/2 package (about 1.7 oz) cheesecake pudding mix and 1/2 cup cold milk until thick and smooth.
- Gently fold the whipped cream into the pudding base until fully combined. Refrigerate for at least 15 minutes to firm up.
5. Assemble the Cones
Layer and fill:
- Start by spooning a few toasted cake cubes into the bottom of each cone.
- Add a layer of peach cobbler filling, then a layer of cheesecake mousse.
- Repeat the layers until the cone is full, finishing with a swirl of mousse or peaches on top.
- Sprinkle extra graham cracker crumbs or pecans on top if desired.
How to Serve Peach Cobbler Stuffed Cones
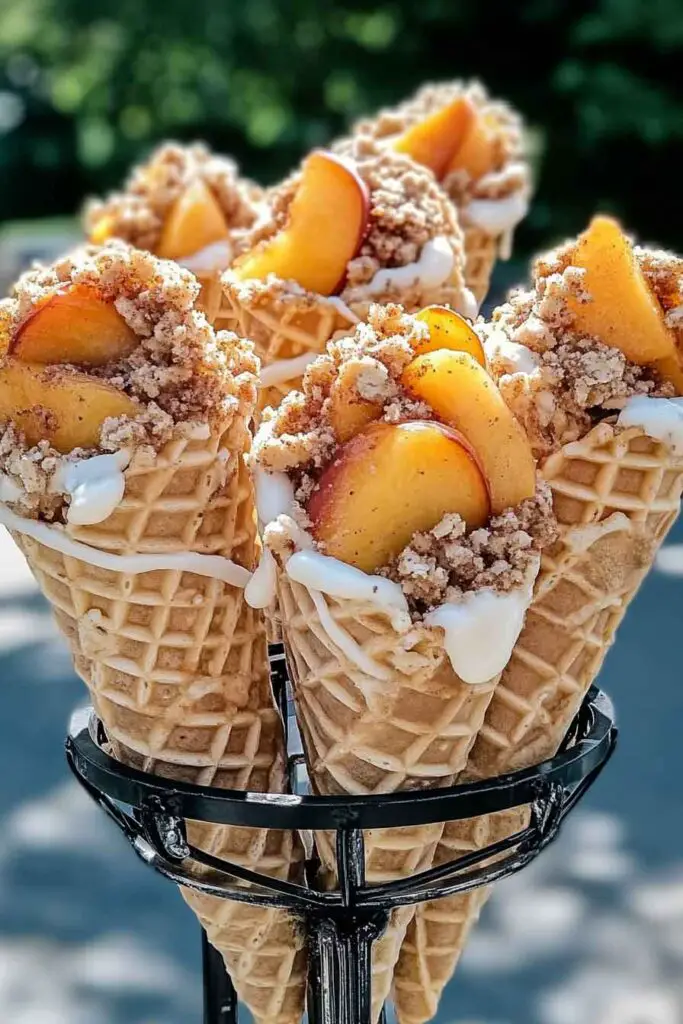
These cones are best served shortly after assembly, once the mousse has chilled and the cones are set. Here are some ideas for serving:
- Party Platter: Stand them in a cone holder or arrange upright in short drinking glasses.
- Picnic Friendly: Wrap the bottom half in parchment or wax paper for easy handling.
- Make-Ahead Tip: Prepare all the components in advance and assemble the cones just before serving to keep them crisp.
Storing Peach Cobbler Stuffed Cones
Because these cones are filled with moist ingredients and whipped cream, they’re best enjoyed the same day they’re assembled. However, here’s how to manage leftovers or prep in advance:
- Unfilled cones: Store dipped, set cones in an airtight container at room temperature for up to 3 days.
- Peach filling: Refrigerate in a sealed container for up to 4 days. Reheat slightly before layering if desired.
- Cheesecake mousse: Can be stored in the fridge for 2–3 days. Stir gently before using.
- Assembled cones: If you must store them, keep them in the fridge for up to 6 hours. Wrap bottoms in foil or place upright to prevent sogginess.
Tips and Tricks for Success
- Choose thick cones: Waffle cones hold fillings better than sugar cones and are less likely to crack or leak.
- Don’t overfill early layers: Start with small spoonfuls to keep layering neat and prevent overflow.
- Let everything cool: Ensure cake cubes and peach filling are fully cooled before assembling to keep mousse firm.
- Chill after assembly (if possible): A quick 10–15 minute chill firms up the layers and gives the cones a creamy, slice-of-cobbler feel.
- Use cold tools for mousse: Cold bowls and beaters help the whipped cream hold its structure longer.
Nutrition
| Serving Size | 1 cone |
|---|---|
| Calories | 390 |
| Total Fat | 20g |
| Saturated Fat | 10g |
| Carbohydrates | 48g |
| Sugar | 34g |
| Protein | 3g |
| Fiber | 1g |
| Sodium | 140mg |
Note: Nutrition values are estimates based on standard ingredients and portion sizes.

Peach Cobbler Stuffed Cones
Course: Uncategorized8
cones25
minutes15
minutes300
kcal30
miniutesIngredients
For the Cones:
8 waffle cones
1 cup white chocolate chips
2 tbsp coconut oil
6 cinnamon graham crackers, crushedFor the Peach Filling:
1 can (15 oz) peaches in juice, drained and chopped
2 tbsp unsalted butter
1/3 cup light brown sugar
1/2 tsp ground cinnamon
1/4 tsp ground nutmeg
1/4 cup chopped pecans (optional)For the Cake Layer:
2 cups cubed pound cake
1 tbsp unsalted butter
1/2 tsp vanilla extractFor the Cheesecake Mousse:
1/2 cup heavy whipping cream
1/4 cup powdered sugar
1/2 package (3.4 oz) cheesecake instant pudding mix
1/2 cup cold milk
Directions
- Dip the Cones: Melt white chocolate chips with coconut oil until smooth. Dip cone rims and roll in crushed graham crackers. Let set.
- Make Peach Filling: In a saucepan, sauté chopped peaches with butter, brown sugar, cinnamon, and nutmeg until syrupy. Stir in pecans. Cool completely.
- Toast Cake Cubes: Lightly brown cake cubes in butter, then toss with vanilla. Let cool.
- Mix Mousse: Whip cold cream with powdered sugar to soft peaks. In another bowl, combine pudding mix with milk until thick. Fold together. Chill.
- Assemble: Layer cones with cake, peaches, and mousse. Repeat. Top with extra mousse or peaches. Chill if desired before serving.
FAQs
Can I use fresh peaches instead of canned?
Yes. You can use 2–3 fresh, ripe peaches. Peel and dice them, then follow the same steps for the peach filling. You may need to add a tablespoon of water or juice while cooking.
What can I use instead of cheesecake pudding mix?
If you don’t have pudding mix, you can mix softened cream cheese (about 4 oz) with whipped cream and a touch of powdered sugar and vanilla for a similar creamy layer.
Will the cones get soggy?
Eventually, yes. To prevent sogginess, assemble close to serving time and make sure your cake and peach mixture are fully cooled before layering.
Can I make this gluten-free?
Yes. Use gluten-free cones, cake, and graham crackers. The rest of the ingredients are typically gluten-free—just check labels to be sure.
Is this recipe good for kids?
Absolutely. It’s sweet, easy to hold, and fun to eat. Just be cautious with very young children if using nuts.
Conclusion
Peach Cobbler Stuffed Cones combine nostalgic comfort with a playful presentation. They’re simple enough for a weeknight treat yet special enough for a celebration. The mix of juicy peaches, spiced crumble, fluffy mousse, and crispy cone makes each bite taste like summer wrapped in a cone.
Make them once, and they just might become your new favorite way to serve cobbler—no plates required.