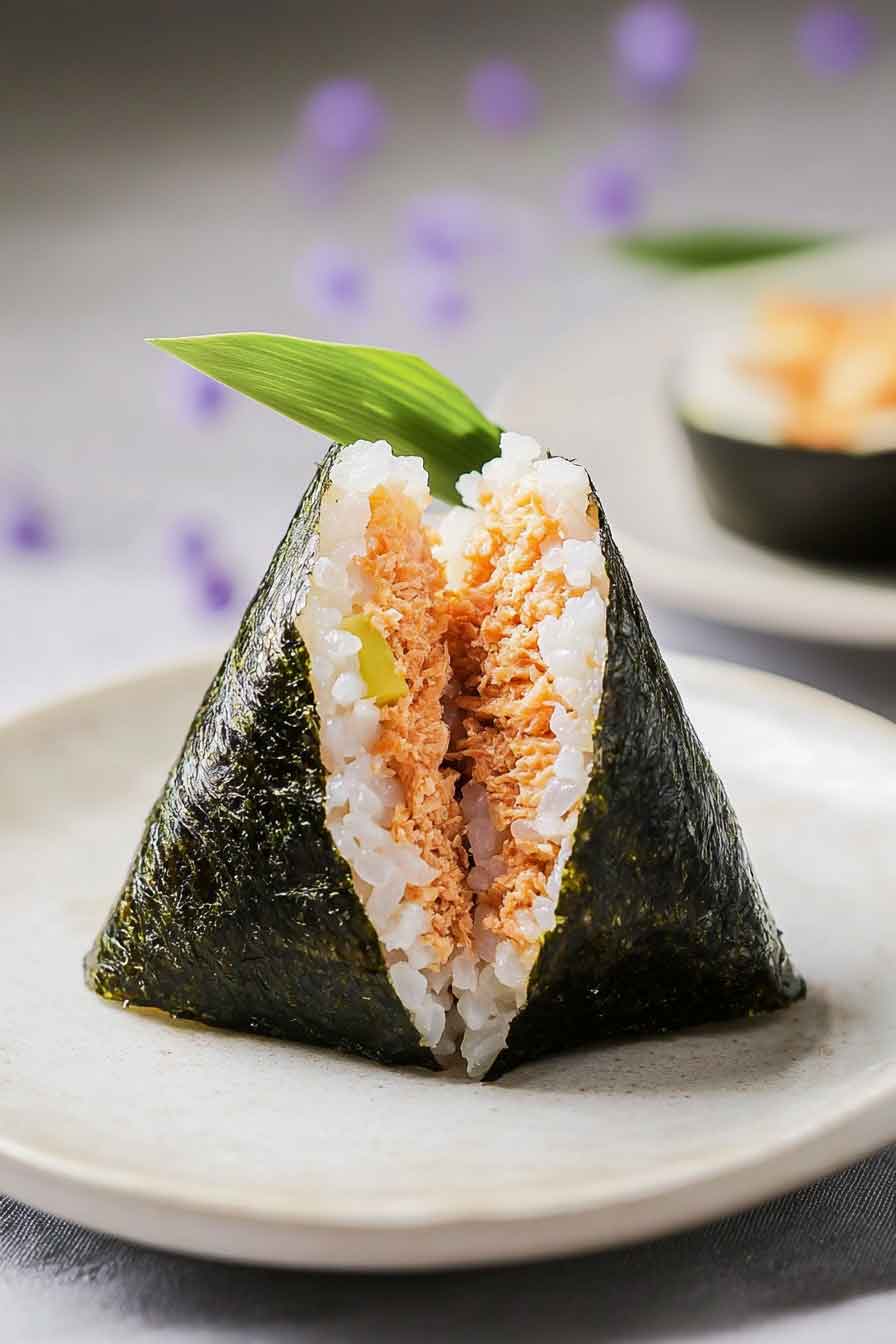
Spicy Tuna Onigiri Bliss
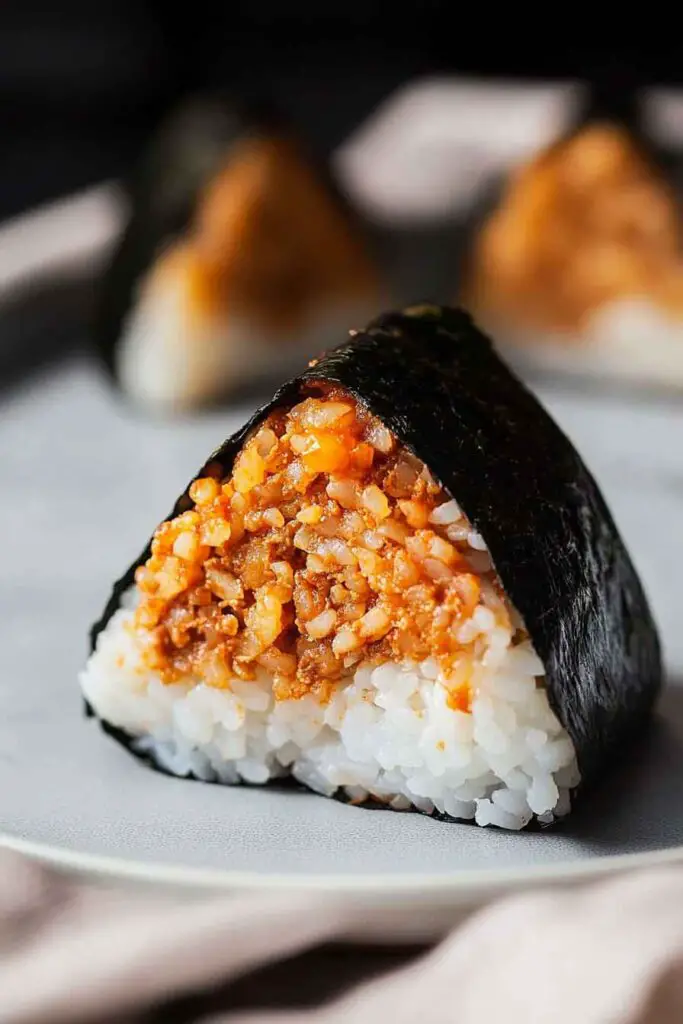
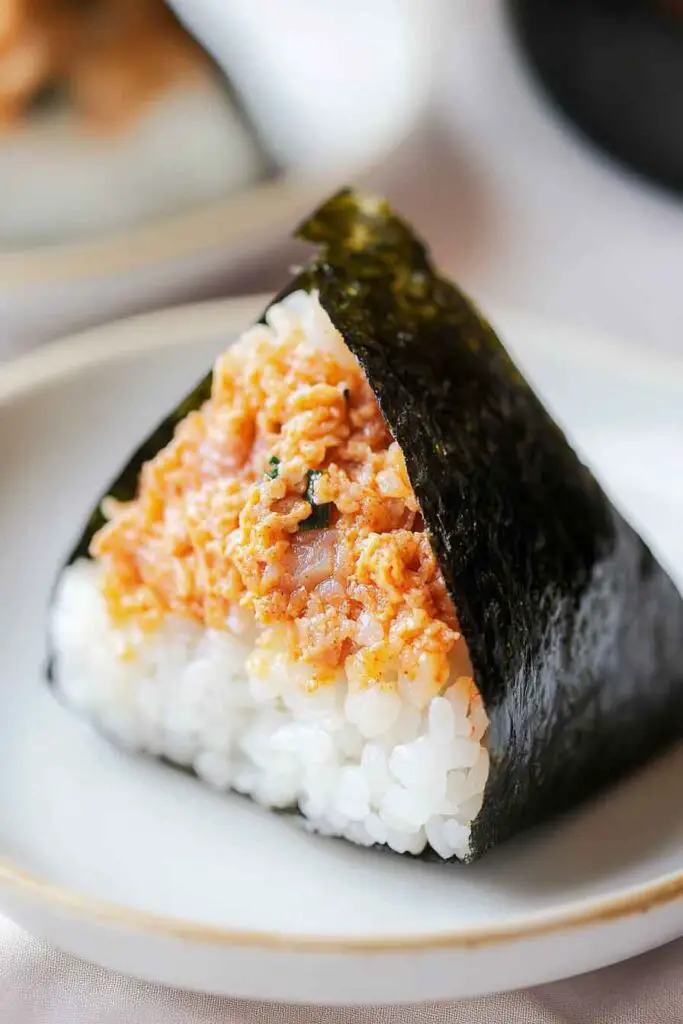
Alright, this Spicy Tuna Onigiri Bliss? It’s bold, flavorful, and wrapped up in the cutest rice triangle ever. Soft rice, spicy tuna filling, and a crispy nori wrap—it’s the perfect little bite.
I made them for lunch one day, and they were so satisfying. That mix of creamy, spicy tuna and tender rice? Total comfort with a kick.
They’re super easy to put together. Just mix, shape, and wrap. Let’s make a batch—you’re gonna love every spicy, savory bite!

Why You’ll Love This Recipe
- Layered Texture & Taste: The warm, slightly salted rice is soft and chewy, the spicy tuna is creamy and bold, and the crisp nori wrap adds a pop of texture and ocean flavor.
- Perfect for All Occasions: These are ideal for lunchboxes, road trips, post-gym snacks, or quick dinners. They’re portable, neat, and don’t require utensils.
- Beginner-Friendly: No sushi mat, rolling technique, or cooking skills needed. Just shape the rice and add the filling—done.
- Meal Prep Approved: You can make a batch ahead and refrigerate them. They hold their shape well and taste just as good cold or at room temperature.
- Adaptable to Taste: Adjust the spice level, change the filling, or swap out ingredients based on what you have.
What You Need to Know Before You Start
Prep Time: 20 minutes
Cook Time: 25 minutes (includes rice cooking time)
Total Time: About 45 minutes
Servings: Makes 6 medium-size onigiri (2 per person for a meal, or 1 per person as a snack)
Difficulty: Easy. The only skill needed is gently shaping rice around filling, which gets easier with practice. A little patience goes a long way.
Required Kitchen Tools
You’ll need a few simple tools for this recipe:
- Rice Cooker or Pot with Lid: Short-grain rice needs proper moisture to become sticky. A rice cooker ensures consistency, but stovetop works well too.
- Mixing Bowl: To prepare the tuna filling.
- Small Bowl of Water with Salt: For wetting your hands while shaping onigiri. Prevents rice from sticking.
- Rice Paddle or Spoon: For fluffing and scooping rice.
- Plastic Wrap or Damp Cloth: Optional but helpful for shaping clean, compact triangles.
- Sharp Knife (for Nori): To slice nori into neat strips or rectangles.
Ingredients for Spicy Tuna Onigiri
For the Rice:
- 1½ cups uncooked short-grain white rice (yields about 3 cups cooked)
Short-grain rice is essential—it’s sticky and holds its shape. Do not substitute with long grain rice. - ½ tsp salt
Mixed into the cooked rice to lightly season. - 6 half-sheets of nori
Cut standard nori sheets in half crosswise. Wrap one piece per onigiri. - ½ tsp black sesame seeds or toasted white sesame seeds (optional)
Sprinkle for extra nutty flavor and contrast.
For the Spicy Tuna Filling:
- 1 can (5.3 oz) tuna in oil or water
Oil-packed is richer, but water-packed works fine—just drain well. - 2 tablespoons Japanese mayonnaise (or regular mayo)
Japanese mayo like Kewpie is preferred for its tang and umami, but any mayo will work. - 1 tablespoon sriracha or hot sauce of choice
Adjust to taste. You can use sambal, gochujang, or even a pinch of chili flakes if desired.
Optional add-ins:
- A dash of soy sauce (for umami)
- 1 tsp chopped scallions (for freshness)
- ¼ tsp rice vinegar (for brightness)
Variations for Spicy Tuna Onigiri
- Tuna Avocado Onigiri: Mash half an avocado into the tuna mix for a creamier texture.
- Extra Crunch: Stir in finely diced cucumber, pickled daikon (takuan), or even crushed wasabi peas for texture contrast.
- Less Heat, More Sweet: Swap sriracha with sweet chili sauce for a milder version.
- Double-Stuffed: Add a sliver of pickled ginger or a piece of cheese inside along with the tuna.
- Make It a Meal: Serve with miso soup, pickled vegetables, and a small salad for a complete Japanese-style bento.
How to Make Spicy Tuna Onigiri: Step-by-Step Instructions
Making onigiri might look tricky at first, but once you understand the flow—cook, fill, shape—it becomes second nature. Follow these simple steps:
1. Cook the Rice
Start with properly cooked short-grain rice—this is key.
Stovetop Method:
- Rinse 1½ cups of short-grain rice in cold water until the water runs clear (about 3 rinses). This removes excess starch for the perfect texture.
- Add the rinsed rice to a pot with 1¾ cups of water. Let it soak for 20 minutes (optional but recommended).
- Cover with a tight-fitting lid, bring to a boil, then reduce to low heat and simmer for 15 minutes.
- Remove from heat and let it steam, covered, for another 10 minutes.
Rice Cooker Method:
- Rinse as above.
- Add rice and water (as per your rice cooker’s instructions) and start the cooking cycle.
- Let it sit for 10 minutes after the cycle finishes before fluffing.
Pro Tip: Do not skip the steaming step. It ensures fluffy yet sticky rice.
2. Make the Spicy Tuna Filling
- Drain the tuna well, especially if using water-packed tuna.
- In a small bowl, combine:
- 1 can tuna
- 2 tablespoons mayonnaise
- 1 tablespoon sriracha
- Mix thoroughly until smooth. Taste and adjust the heat by adding more sriracha if desired.
Optional: Stir in soy sauce or chopped scallions if using.
3. Prepare to Shape the Onigiri
Before handling the rice:
- Fill a small bowl with cold water and dissolve a pinch of salt. Dip your hands into this before each onigiri to prevent rice from sticking and to lightly season the surface.
- Set out your nori sheets, spicy tuna filling, and rice.
- Optionally, lay a small square of plastic wrap on your palm for easier shaping (especially helpful for beginners).
4. Shape the Onigiri
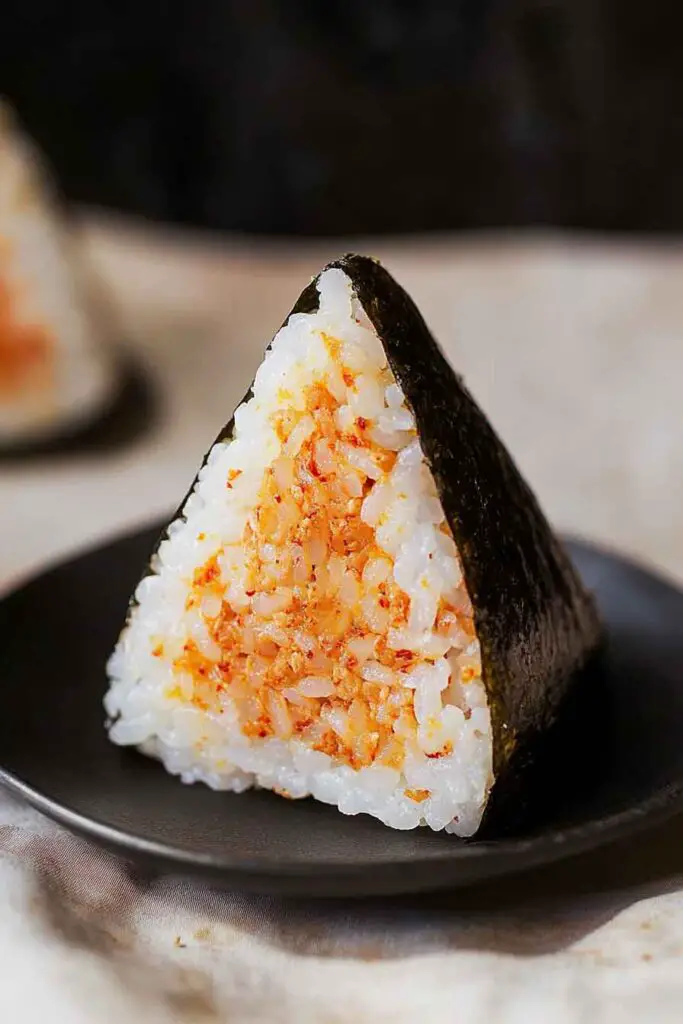
Classic Triangle Shape (by hand):
- Wet your hands or use plastic wrap.
- Scoop about ⅓ to ½ cup of warm rice into your palm.
- Create a shallow well in the center and spoon in about 1 to 1½ teaspoons of spicy tuna.
- Add a bit more rice on top to cover the filling.
- Use both hands to gently press and form into a triangle. Don’t squeeze too hard or it will become dense.
- Flatten the top slightly.
- Press the corners for a defined triangle.
- Wrap the bottom or sides with a strip of nori, shiny side out.
Other Shape Options:
- Round (easy for beginners)
- Cylindrical (great for bento)
Tip: Keep a clean, damp towel nearby to wipe your hands if they get too sticky.
5. Finish and Decorate
- Sprinkle sesame seeds on the outside if desired.
- Press a small piece of pickled plum or wasabi on the center for a garnish.
- Serve warm or at room temperature.
How to Serve Spicy Tuna Onigiri
These spicy tuna onigiri are best served fresh and slightly warm or room temperature—perfect for picnics, lunchboxes, or mid-afternoon snacks. Here are some ways to enjoy them:
- Bento Box Star: Pair with tamagoyaki (Japanese rolled omelet), edamame, sliced fruit, or cucumber salad.
- Quick Lunch or Snack: Serve 2 onigiri with miso soup and green tea.
- Party Platter: Arrange different fillings (like umeboshi, salmon, and spicy tuna) on a tray for a fun mix-and-match.
- With Dips: Enjoy with extra sriracha mayo, wasabi mayo, or soy sauce for dipping.
Optional Touch: Garnish with thinly sliced scallions or shichimi togarashi (Japanese chili pepper mix) for extra heat and flavor.
Storing Spicy Tuna Onigiri
- At Room Temperature: Best eaten within 4 hours if not refrigerated.
- In the Refrigerator: Wrap each onigiri tightly in plastic wrap and place in an airtight container. Store up to 2 days.
- Note: The rice may firm up in the fridge. To soften, wrap in a damp paper towel and microwave for 20–30 seconds (remove nori first).
- Avoid Freezing: Freezing alters the texture of the rice and mayo-based filling.
Tips and Tricks for Success
- Use Warm Rice: It’s easier to shape and sticks together better.
- Don’t Overfill: Too much filling makes shaping harder and can cause the onigiri to fall apart.
- Keep Hands Damp and Salted: Prevents rice from sticking and adds flavor.
- Serve Quickly After Wrapping in Nori: Nori will soften after sitting against warm rice—wrap just before eating for maximum crispness.
- Shape with Plastic Wrap if New to Onigiri: It’s more forgiving and cleaner.
Nutrition
Here’s an approximate breakdown per onigiri (based on 6 servings):
| Nutrient | Amount per Onigiri |
|---|---|
| Calories | 190 kcal |
| Carbohydrates | 26 g |
| Protein | 9 g |
| Fat | 6 g |
| Saturated Fat | 1 g |
| Sodium | 240 mg |
| Fiber | 1 g |
| Sugar | <1 g |
Note: Values may vary based on the brand of mayo and tuna used
Spicy Tuna Onigiri Bliss
Course: Breakfast u0026amp; Brunch6
rice balls20
minutes25
minutes190
kcalIngredients
For the Rice:
1½ cups uncooked short grain rice (yields ~3 cups cooked)
½ teaspoon salt
6 half-sheets of nori
½ teaspoon sesame seeds (optional)For the Spicy Tuna Filling:
1 (5.3 oz) can tuna (in oil or water), drained well
2 tablespoons mayonnaise (preferably Japanese-style)
1 tablespoon sriracha, or to taste
Optional: 1 teaspoon chopped scallions or a dash of soy sauce
Directions
- Cook the Rice:
Rinse rice in cold water 2–3 times until clear. Cook with 1¾ cups water until fluffy. Let steam for 10 minutes. - Make the Filling:
In a bowl, combine tuna, mayo, and sriracha. Stir well. Add optional ingredients if using. - Prep for Shaping:
Set up a small bowl of salted water. Wet hands before handling rice. Lay out nori strips and have filling ready. - Assemble Onigiri:
Take ~½ cup of warm rice, flatten it slightly in your palm, and place 1–1½ tsp of tuna filling in the center.
Add more rice to cover the filling and gently press into a triangle.
Wrap with a strip of nori and sprinkle sesame seeds if using. - Serve or Store:
Enjoy fresh or wrap and refrigerate for up to 2 days.
Spicy Tuna Onigiri FAQs
Q: Can I use brown rice instead of white rice?
A: Technically yes, but it won’t be as sticky. White short-grain rice is preferred for the traditional texture and shape retention.
Q: What if I don’t have nori?
A: You can skip it or use lettuce, soy wrappers, or just serve the rice balls plain.
Q: Can I make this vegetarian?
A: Absolutely. Try mashed chickpeas or seasoned tofu with vegan mayo and hot sauce.
Q: Is it safe to pack onigiri in a lunchbox?
A: Yes—if eaten within 4 hours. For longer storage, refrigerate and include an ice pack.
Conclusion
Spicy Tuna Onigiri is a compact, flavor-packed rice ball that blends convenience with comfort. With its creamy, spicy center and soft rice coating, it’s a crowd-pleaser that’s just as good at home as it is on-the-go. This version offers just the right amount of heat and is easy to tweak to your preferences.
Whether you’re new to Japanese cuisine or a long-time fan, this recipe is a great entry point into making homemade onigiri from scratch.