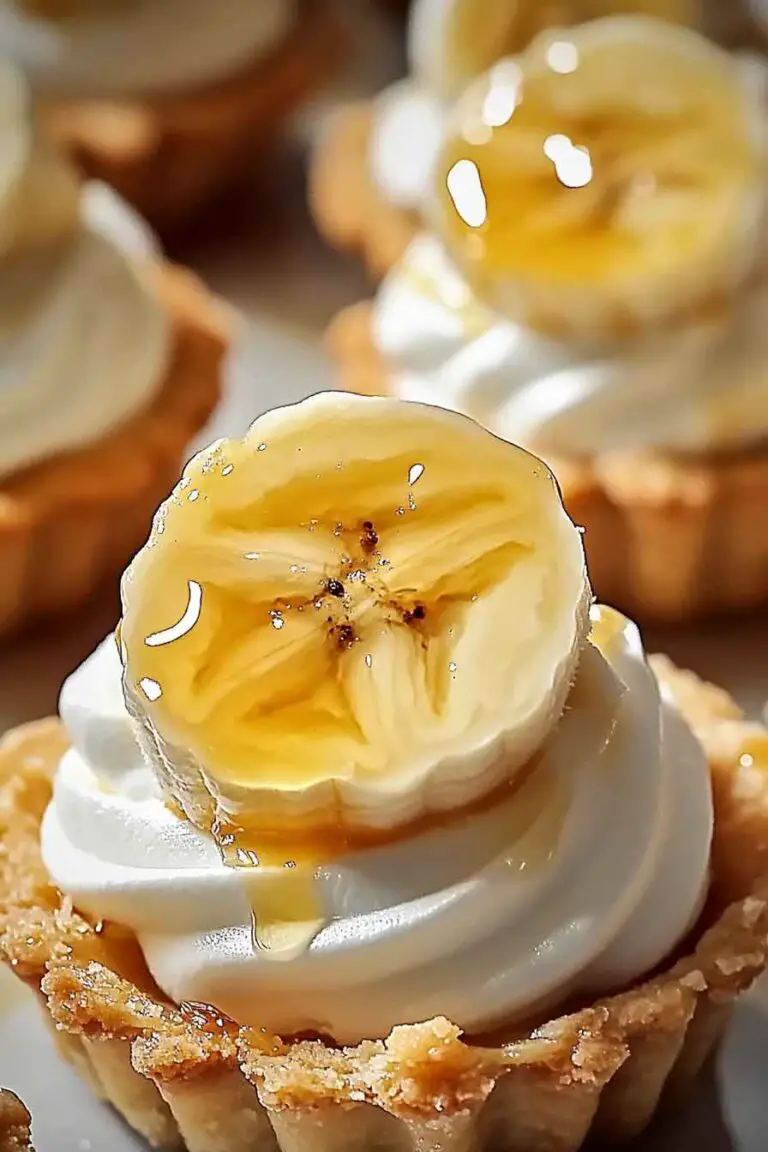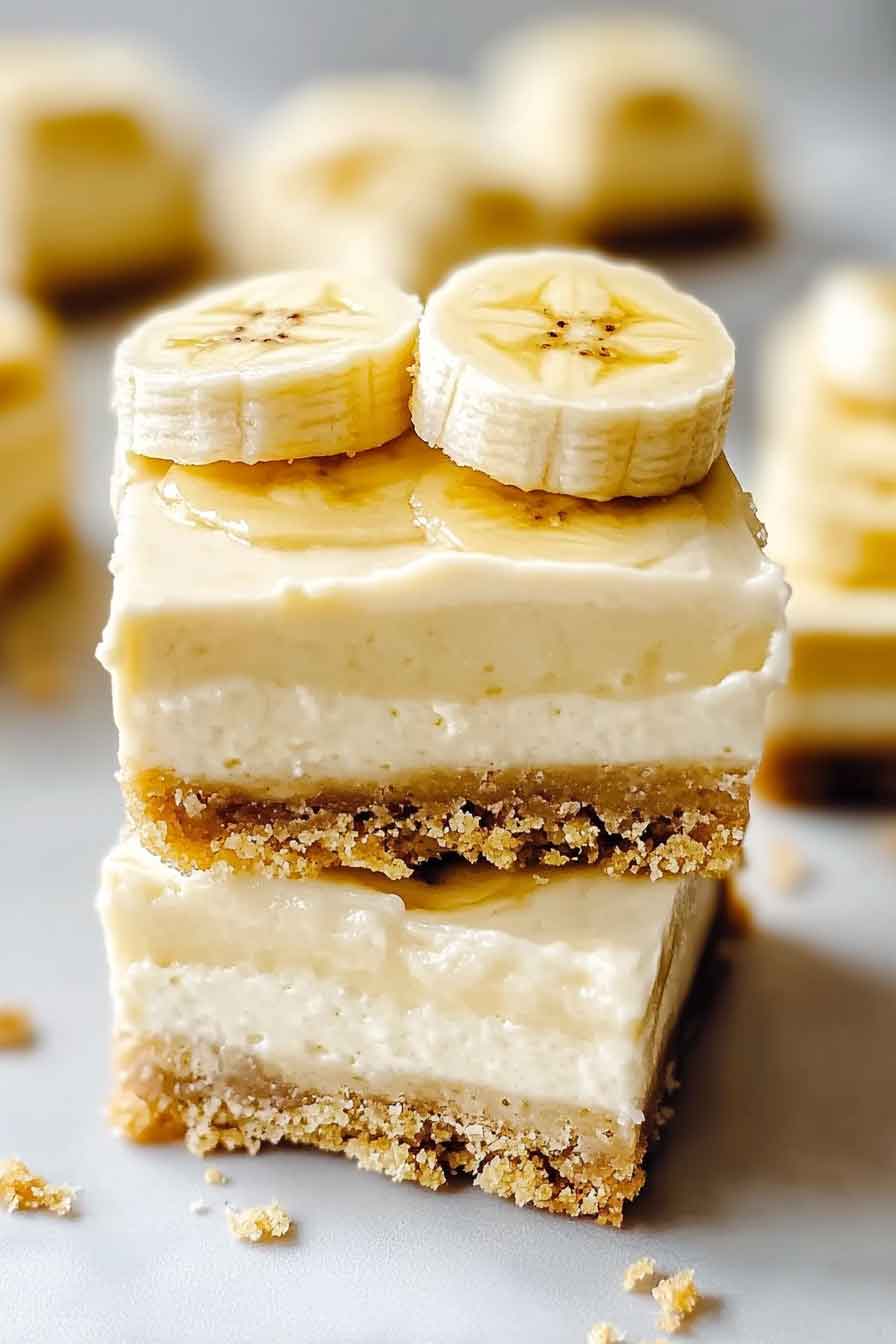
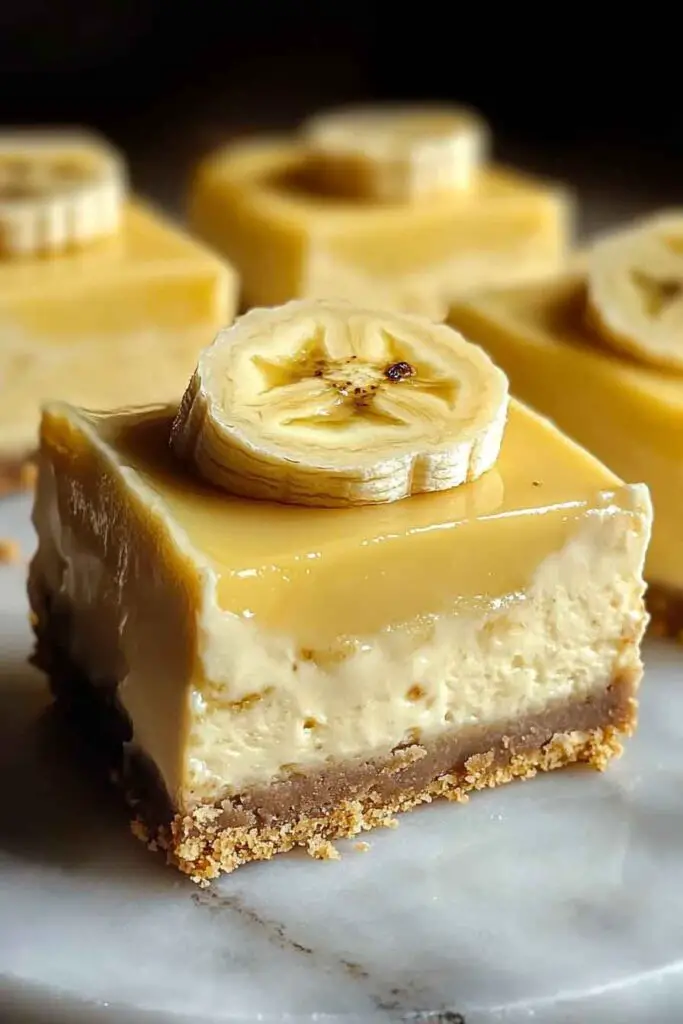
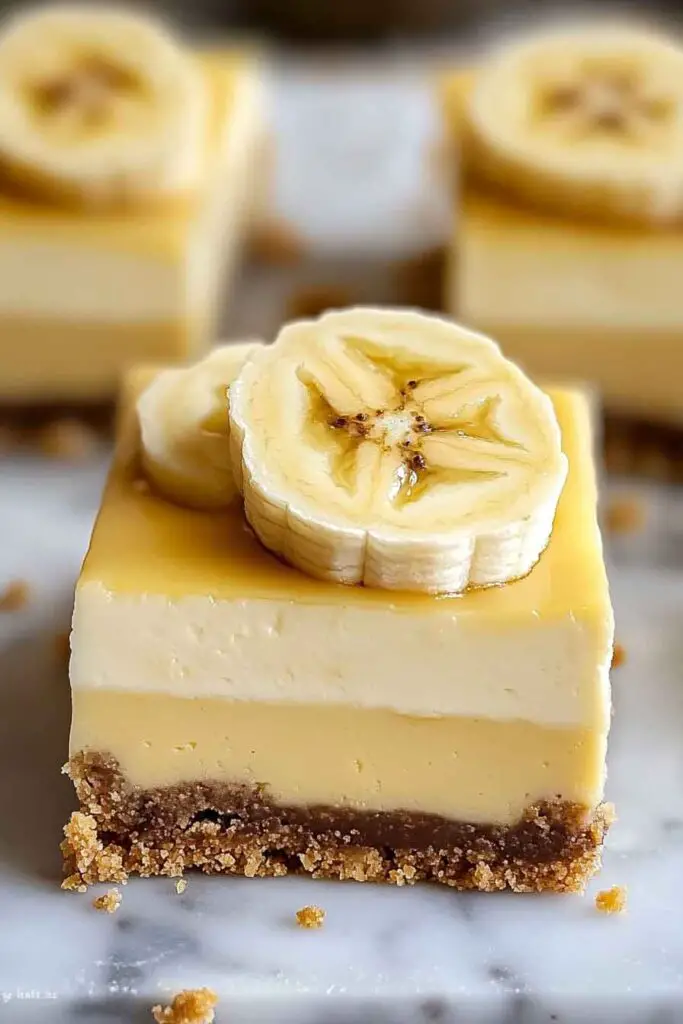
Creamy Banana Pudding Cheesecake Bars
Okay, these Creamy Banana Pudding Cheesecake Bars? Total game-changer. They’ve got all the flavor of classic banana pudding—but in rich, creamy cheesecake bar form.
I made them for a family get-together, and wow… not a crumb was left. The vanilla wafers, the fresh bananas, that silky cheesecake? So good and so easy.
No fancy steps here. Just layer, bake, and chill. Let’s make a batch together—you’re gonna want to keep these in the fridge all the time!

Why You’ll Love This Recipe
- Comfort Food Classic: This dessert blends two favorites—banana pudding and cheesecake—into one crowd-pleasing treat.
- No Water Bath Needed: You get all the creaminess of cheesecake without the fuss of baking it in a water bath.
- Kid-Approved: The banana flavor is subtle and smooth, making it enjoyable for even picky eaters.
- Layered Texture: A crunchy base, a creamy filling, and a light whipped topping make these bars feel complete with every bite.
- Perfect Make-Ahead Dessert: These bars firm up as they chill, which means they’re even better the next day.
What You Need to Know Before You Start
Prep Time: 20 minutes
Cook Time: 45 minutes
Chill Time: Minimum of 4 hours (overnight is best)
Total Time: About 5 hours and 5 minutes
This may sound long, but most of the time is hands-off. You’ll just need a bit of patience during the chill phase to get those neat slices and the best texture.
Servings:
This recipe makes about 12 bars. If you’re serving them at a party, you can cut them smaller into 16 pieces.
Difficulty Level:
Easy to moderate. There’s no baking expertise needed, but you’ll want to follow each layer step closely. No fancy skills required—just a mixer and a little patience for chilling time.
Required Kitchen Tools
To make this recipe go smoothly, you’ll want to have the following tools ready:
- 9×9-inch baking pan – Line it with parchment paper so the bars lift out easily.
- Parchment paper – Prevents sticking and helps with clean edges.
- Mixing bowls (at least 2) – One for the crust, one for the filling.
- Electric hand mixer or stand mixer – Makes whipping the cheesecake and pudding layers smooth and lump-free.
- Spatula – For spreading the layers evenly.
- Measuring cups and spoons – Accurate measurements help maintain the structure and texture.
- Microwave-safe bowl or small saucepan – For melting butter.
Optional but helpful:
- Offset spatula – For leveling the filling.
- Food processor or rolling pin – To crush Nilla wafers finely.
Ingredients for Creamy Banana Pudding Cheesecake Bars
For the Crust:
A sweet, firm base made from crushed vanilla wafers that holds the creamy layers.
- 2 1/4 cups Nilla Wafers, crushed – This is about 60–70 wafers. Crush them finely for a uniform crust.
- 1/4 cup brown sugar – Adds a soft sweetness and helps hold the crust together.
- 1/2 cup unsalted butter, melted – Binds the crust and gives it a rich, toasty flavor.
For the Cheesecake-Pudding Layer:
This is the heart of the dessert—creamy, cool, and banana-kissed.
- 16 ounces (2 blocks) cream cheese, softened – Make sure it’s room temperature so it mixes smoothly. Use full-fat for best results.
- 1/4 cup granulated sugar – Keeps the cheesecake layer subtly sweet without overpowering the banana.
- 1 package (3 oz) banana cream instant pudding mix – Brings the banana flavor without needing fresh bananas.
- 1 1/2 cups Cool Whip (thawed) – Adds airiness to the pudding layer and helps it set.
- 1 1/4 cups cold milk – Used to dissolve the pudding and keep the filling creamy but sliceable.
How to Make Creamy Banana Pudding Cheesecake Bars – Step-by-Step
Step 1: Prepare the Crust
- Crush the Nilla Wafers:
Place the wafers in a food processor and pulse until they’re fine crumbs. No food processor? No problem. You can place the wafers in a zip-top bag and crush them with a rolling pin. You should end up with 2¼ cups of fine crumbs. - Mix with Sugar and Butter:
In a mixing bowl, stir together the crushed wafers and brown sugar. Pour in the melted butter and mix until all crumbs are evenly coated. The texture should be like damp sand—able to clump when pressed. - Press into Pan:
Line your 9×9-inch baking pan with parchment paper, leaving a slight overhang on two sides for easy lifting later. Press the crumb mixture firmly and evenly into the bottom of the pan. Use the bottom of a measuring cup or glass to smooth and compact the crust. - Pre-bake the Crust:
Bake the crust at 325°F (163°C) for 10 minutes. This helps firm it up so it doesn’t get soggy from the filling. Let it cool slightly while you prepare the next layer.

Step 2: Make the Cheesecake-Pudding Filling
- Beat the Cream Cheese:
In a large bowl, use a hand mixer or stand mixer to beat the softened cream cheese and sugar together on medium speed until completely smooth. No lumps! - Add the Pudding Mix and Milk:
Sprinkle in the dry banana pudding mix and gradually pour in the cold milk. Beat on medium speed for about 1–2 minutes, until the mixture thickens slightly. - Fold in Cool Whip:
Use a rubber spatula to gently fold in the thawed Cool Whip. Don’t overmix—just until everything is combined and the mixture looks smooth and fluffy.
Step 3: Assemble the Bars
- Spread the Filling:
Pour the cheesecake-pudding mixture over the slightly cooled crust. Use an offset spatula or back of a spoon to smooth the top evenly. - Chill to Set:
Cover the pan loosely with plastic wrap or foil and refrigerate for at least 4 hours, preferably overnight. This is key for clean slicing and the best texture.
Step 4: Serve and Enjoy
Slice the Bars:
Once chilled and firm, lift the bars out of the pan using the parchment overhang. Place on a cutting board and slice into 12 even squares using a sharp knife. Wipe the blade between cuts for clean edges.
- Optional Toppings:
Garnish each bar with a mini vanilla wafer, banana slice (just before serving to avoid browning), or whipped cream swirl for an extra pretty presentation.
Variations for Banana Pudding Cheesecake Bars
- Fresh Banana Boost:
Layer thin banana slices between the crust and the cheesecake filling for more banana flavor. Best served same day if using fresh fruit. - Use a Graham Cracker Crust:
Swap Nilla Wafers with crushed graham crackers if that’s what you have on hand. - Chocolate Twist:
Add a thin layer of melted chocolate over the crust before adding the filling for a chocolate-banana flavor combo. - Mini Servings:
Pour the filling into a lined mini muffin tin for bite-size banana pudding cheesecake cups—great for parties. - Whipped Cream Top Layer:
Spread extra Cool Whip on top before chilling. Dust with crushed wafers for a soft, cake-like topping.
Serving and Decoration
Creamy Banana Pudding Cheesecake Bars are best served chilled and firm. Here are a few simple ways to make your dessert extra special:
- Garnish Each Slice: Just before serving, add a small dollop of whipped cream, a banana slice, or a whole mini Nilla wafer on top of each bar.
- Drizzle Options: Lightly drizzle with caramel sauce or melted white chocolate for extra flair.
- Banana Crunch Layer: For texture, sprinkle a few crushed wafers over the top before chilling the bars.
These bars are rich but light in texture, so they pair well with black coffee or a glass of cold milk.
How to Store Banana Pudding Cheesecake Bars
- Refrigerator:
Store leftover bars in an airtight container or tightly covered with plastic wrap in the fridge for up to 4 days. If you’ve added fresh bananas on top, consume within 1–2 days. - Freezer:
You can freeze the bars before adding any toppings. Wrap the whole slab or individual slices in plastic wrap, then in foil, and freeze for up to 1 month. Thaw overnight in the refrigerator before serving.
Tips and Tricks for Success
- Room Temperature Cream Cheese: Always use softened cream cheese to prevent lumps in the filling. Cold cream cheese won’t mix smoothly.
- Crush Wafers Finely: This helps the crust hold together without falling apart when sliced.
- Chill Long Enough: Don’t skip the full chill time—this ensures the bars are firm and easy to cut.
- Cut with a Warm Knife: Dip your knife in hot water and wipe dry before each slice. This gives you clean, bakery-style cuts.
- Don’t Overmix Pudding Layer: Once you add milk and Cool Whip, fold gently to keep the texture airy.
Nutrition
Here’s an approximate nutritional breakdown per bar (based on 12 bars):
| Nutrient | Amount per Serving |
|---|---|
| Calories | 290 |
| Total Fat | 19g |
| Saturated Fat | 11g |
| Cholesterol | 50mg |
| Sodium | 190mg |
| Carbohydrates | 27g |
| Sugars | 17g |
| Protein | 4g |
| Fiber | <1g |
| Calcium | 6% DV |
Note: Values are estimates and may vary based on specific brands used.
Creamy Banana Pudding Cheesecake Bars
Course: No-Bake Desserts121
bars20
minutes10
minutes290
kcal4
hourIngredients
For the Crust:
2 1/4 cups Nilla Wafers, finely crushed
1/4 cup packed brown sugar
1/2 cup unsalted butter, meltedFor the Cheesecake-Pudding Filling:
16 oz (2 blocks) cream cheese, softened
1/4 cup granulated sugar
1 (3 oz) package banana cream instant pudding mix
1 1/2 cups Cool Whip (thawed)
1 1/4 cups cold milk
Directions
- Make the Crust:
Preheat oven to 325°F (163°C). Mix crushed wafers, brown sugar, and melted butter until combined. Press firmly into a parchment-lined 9×9-inch pan. Bake for 10 minutes. Let cool. - Prepare the Filling:
In a bowl, beat cream cheese and sugar until smooth. Add banana pudding mix and milk; beat until creamy. Fold in Cool Whip gently until fully combined. - Assemble:
Spread the filling over the cooled crust in an even layer. Smooth the top with a spatula. - Chill:
Cover and refrigerate for at least 4 hours (preferably overnight) until firm. - Slice and Serve:
Lift the bars using the parchment overhang, slice into squares, and serve chilled. Garnish with optional banana slices or whipped topping just before serving.
Chili Lime Chicken FAQs (customized for Banana Pudding Cheesecake Bars)
Can I use fresh bananas instead of pudding mix?
Yes, you can mash 2 ripe bananas and add them to the cream cheese layer. However, the texture may be slightly looser, and the shelf life will be shorter.
What if I don’t have Nilla Wafers?
You can substitute with graham cracker crumbs or crushed digestive biscuits.
Can I freeze these bars?
Yes. Freeze the bars without toppings. Wrap tightly in plastic and foil. Thaw in the fridge before serving.
Is it okay to use homemade whipped cream instead of Cool Whip?
Yes, but make sure your whipped cream is stabilized (add a little powdered sugar or cornstarch) so the bars don’t deflate.
How long can I keep these in the fridge?
They last 3–4 days, but they’re best eaten within the first 2 days if topped with fresh bananas.
Conclusion
Creamy Banana Pudding Cheesecake Bars bring together the best parts of two iconic desserts: the smooth richness of cheesecake and the cozy flavor of banana pudding. With a crunchy vanilla wafer base, a velvety filling, and a simple method, they’re easy enough for new bakers but impressive enough for special occasions. Make them once, and you’ll want to keep them in your dessert rotation.