Halloween Dirt Cups
The first time I made these Halloween Dirt Cups, the smell of chocolate pudding and crushed cookies made everyone peek into the kitchen.
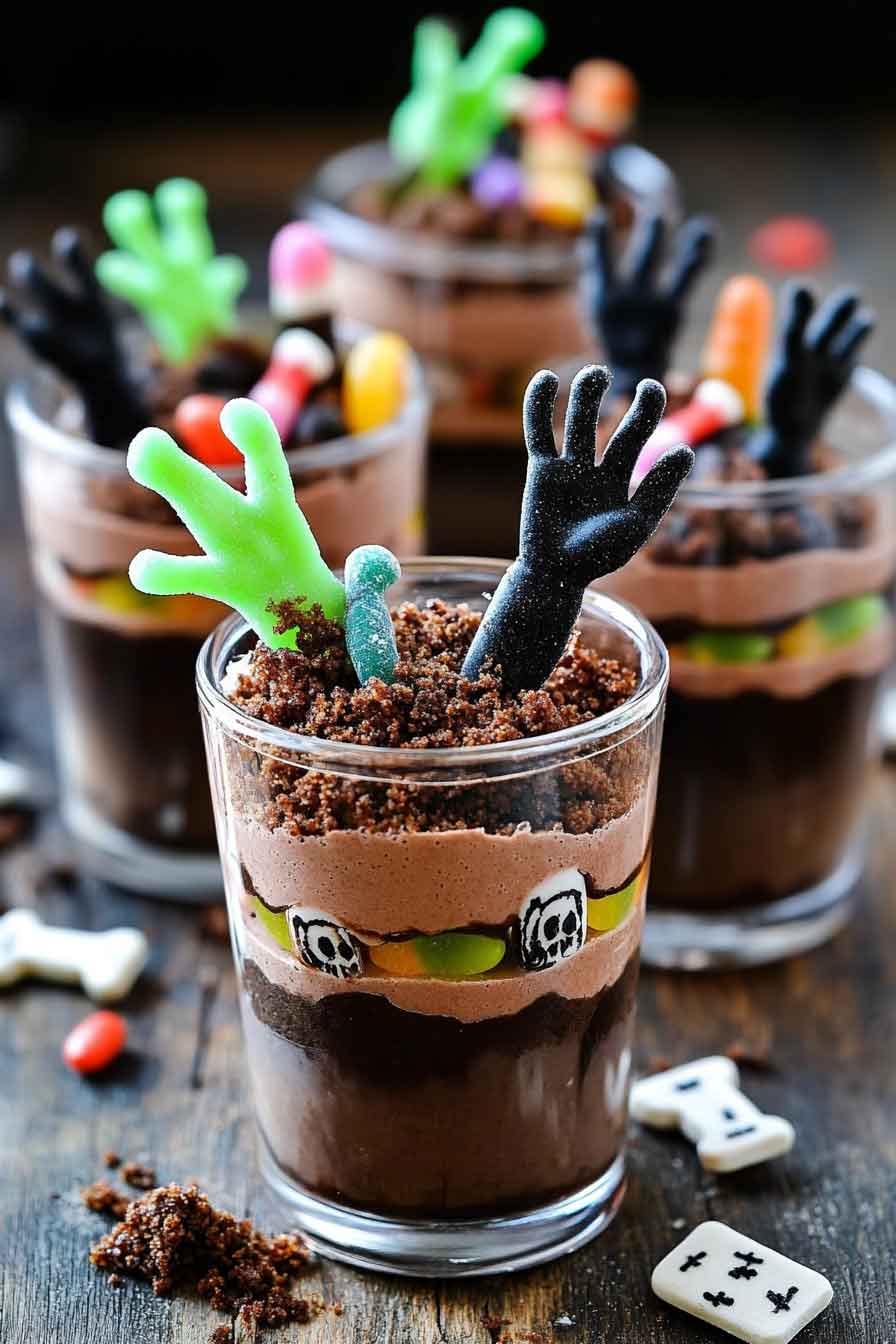
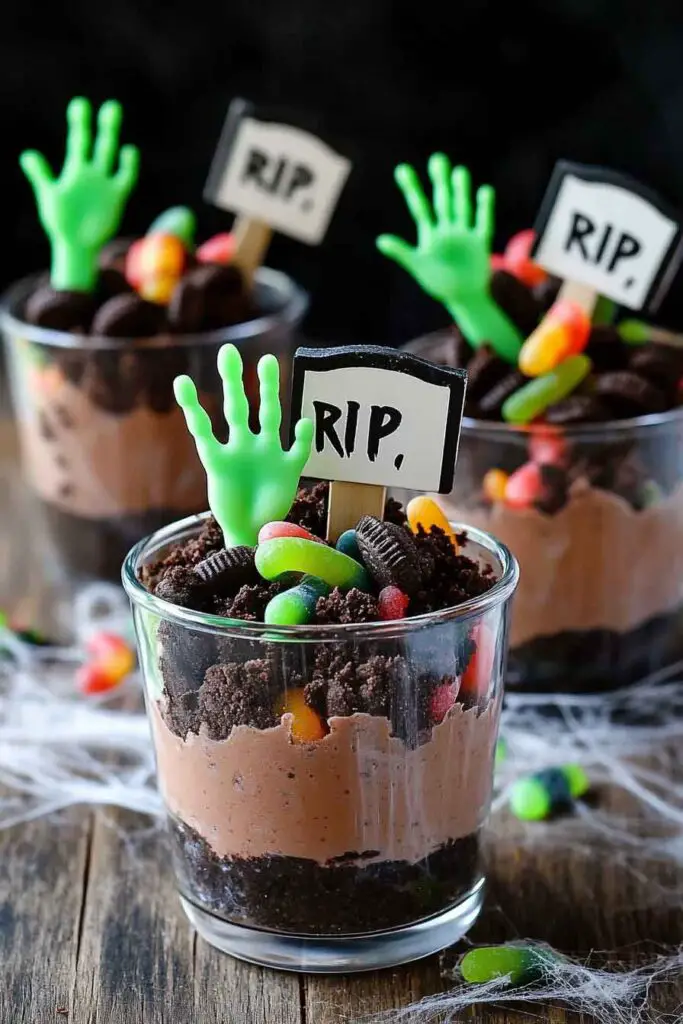
They looked creepy and cute with little gummy worms crawling on top.
I remember laughing as we built each layer—it felt like making edible mud pies.
These dirt cups are creamy, crunchy, and full of Halloween fun.
They’re easy to make, kid-approved, and perfect for parties or movie nights.
Let’s dig in—these spooky little treats are as fun to make as they are to eat.

Why You’ll Love This Recipe
- Fun for All Ages: Dirt cups are playful and silly, but they taste amazing — like a creamy chocolate trifle in disguise.
- Perfect for Parties: The individual cups make serving easy and mess-free, especially at busy Halloween events.
- No Oven Required: All the magic happens with cold ingredients, so it’s great for quick prep or hot weather.
- Layered Flavor and Texture: Creamy pudding, airy whipped topping, and crunchy cookie crumbs make each bite interesting.
- Endlessly Customizable: You can switch up the decorations, use flavored cookies, or even change the pudding type. These are meant to be personalized.

What You Need to Know Before You Start
Prep Time & Chill Time:
- Prep Time: About 20 minutes from start to finish
- Chill Time: 1 hour minimum, or up to 24 hours in advance for best results
- Total Time: ~1 hour 20 minutes
This is a very forgiving dessert that benefits from chilling. The pudding firms up, the cookie crumbs soften just slightly for a more soil-like texture, and the flavors meld into that perfect creamy-crunchy balance.
Servings:
This recipe yields 8 individual dirt cups, depending on the size of your containers (ideally 5–9 oz plastic cups or small jars). You can easily double or triple this for larger groups or school parties.
Difficulty:
This one is truly beginner-friendly. You won’t need any cooking skills beyond basic whisking, layering, and spooning. It’s a great “first recipe” for kids with adult supervision, especially during Halloween week.
Required Kitchen Tools
You’ll only need a few basic tools for this recipe — no fancy equipment or machines:
- Mixing bowl: For whisking the pudding
- Whisk or electric hand mixer: Either works for mixing the pudding
- Measuring cups & spoons: Accuracy helps the texture come out right
- Rubber spatula: To fold in the whipped topping
- Food processor or zip-top bag + rolling pin: For crushing the cookies (you want small chunks, not dust)
- 8 small clear cups or jars: Transparent containers help showcase the layers and keep things portable
- Spoon or piping bag (optional): Makes layering neater and more controlled
Ingredients for Halloween Dirt Cups
These are classic pantry and store-bought staples, which means you can pick them up easily at any grocery store — no specialty baking aisles required.
Here’s a breakdown of what you’ll need:
- 1 (5.9-ounce) box of instant chocolate pudding mix
Go for a rich chocolate flavor — not sugar-free — for the best creamy texture. Instant pudding sets up quickly and creates that silky base layer. - 3 cups of whole milk, very cold
Cold milk is key to activating the pudding mix. Whole milk makes it creamier, but 2% works in a pinch. - 3 cups of whipped topping (like Cool Whip), thawed
You’ll gently fold this into the pudding after it sets. It lightens the texture and adds that mousse-like fluffiness. - 30 chocolate wafer cookies or chocolate sandwich cookies (like Oreos)
These get crushed into chunky bits that mimic real dirt. You’ll layer some and save a generous sprinkle for the top. Use Halloween-themed Oreos if you want a fun twist. - Gummy worms (at least 1 per cup)
Wriggling out of the “dirt,” these bring the visual fun. They’re chewy, sweet, and perfect for little hands. - Candy bones, skulls, or mummy hands (optional)
Add a spooky touch. You can find Halloween candy decorations online or in the seasonal baking aisle. Candy eyeballs are great too. - Optional: Chocolate chips or sprinkles
If you want even more texture or decoration variety, a small sprinkle of mini chips or Halloween-colored sprinkles adds some pop.
Variations for Halloween Dirt Cups
You can have fun with this recipe by changing up the flavors or decorations. These ideas are great if you want to make the dirt cups your own or match them to a party theme:
- Different Pudding Flavors: Try vanilla or butterscotch pudding for a twist. Add food coloring (like green for slime or orange for pumpkins) to match Halloween vibes.
- Use Flavored Cookies: Chocolate graham crackers or Halloween-themed Oreos work well. You can also mix in crushed pretzels for a salty crunch.
- Make It Dairy-Free: Use a plant-based pudding mix, dairy-free milk (like oat or almond), and a whipped topping made for vegans.
- Add Layers: For more texture, add a spoonful of chocolate chips, crushed candy bars, or sprinkles between pudding layers.
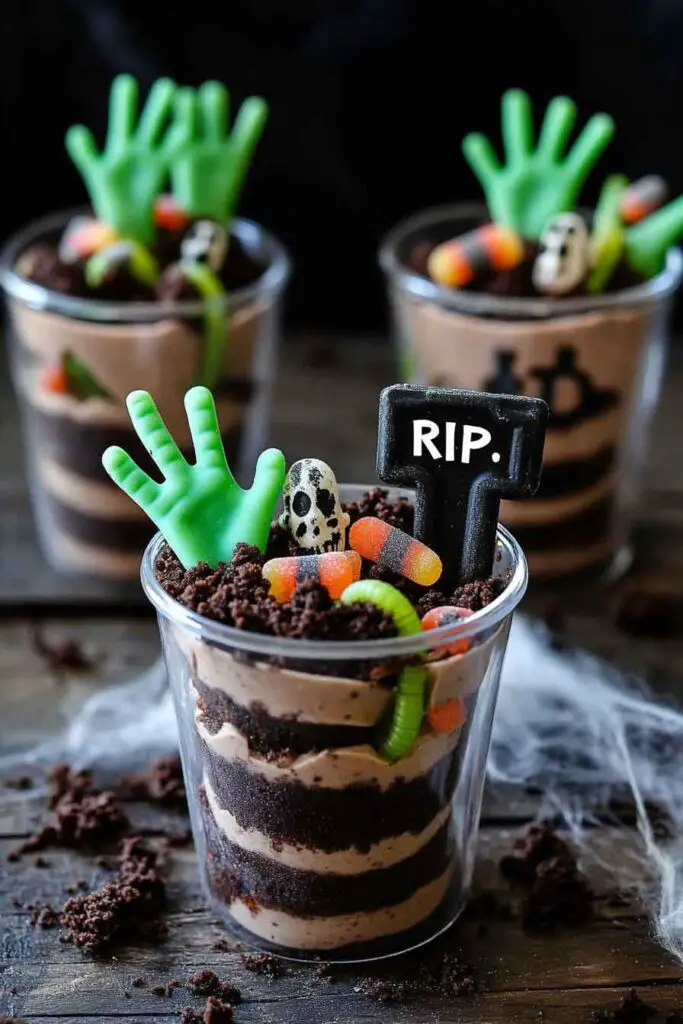
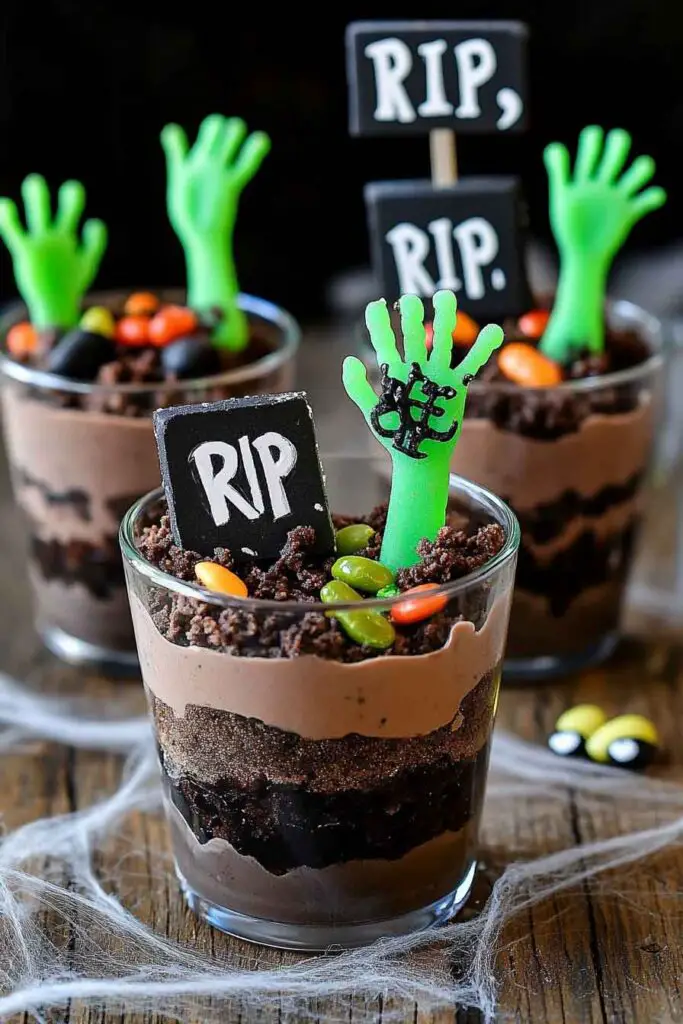
- Decorate Differently: Use candy pumpkins, eyeballs, bats, or marshmallow ghosts. Let kids make their own “graveyards” with cookie tombstones and candy hands.
- Serve in Bigger Cups or a Trifle Dish: If you want to make one big batch instead of individual cups, layer everything in a large glass bowl or trifle dish.
How to Make Halloween Dirt Cups
Step-by-Step Instructions
This is a no-bake recipe, so everything comes together with just a few simple steps.
1. Prepare the Pudding
In a large mixing bowl, combine the instant chocolate pudding mix and cold milk. Whisk vigorously for 2 to 3 minutes until smooth and slightly thickened. Let it rest for 5 minutes to fully set.
Pro Tip: Use very cold milk so the pudding thickens properly. If it’s too warm, the pudding will stay runny.
2. Fold in the Whipped Topping
Once the pudding is set, gently fold in the thawed whipped topping using a rubber spatula. Don’t stir too hard — you want to keep it light and fluffy.
This creates a mousse-like texture that’s soft, creamy, and not too dense.
3. Crush the Cookies
Place the chocolate cookies in a food processor and pulse until you get small, crumbly pieces — about the size of coarse soil. If you don’t have a processor, add them to a zip-top bag and crush with a rolling pin.
Avoid grinding them into powder — a bit of chunk adds great texture.
4. Layer the Cups
Set out your clear cups or jars. Now it’s time to build your spooky layers:
- Bottom layer: Add 1 to 2 tablespoons of crushed cookies.
- Middle layer: Spoon or pipe in about ¼ cup of the pudding mixture.
- Top layer: Sprinkle more crushed cookies to fully cover the pudding.
Repeat if your cups are taller and you want extra layers.
5. Decorate the Dirt Cups
Press gummy worms halfway into the top layer so they look like they’re crawling out of the “dirt.” Add candy bones, mummy hands, pumpkins, or whatever Halloween candy you love. You can make each cup look different.
This is a great step for kids to help with. Let them decorate their own cup!
6. Chill Before Serving
Place the dirt cups in the fridge for at least 1 hour before serving. This helps the pudding firm up and the flavors come together.
If making ahead, cover each cup with plastic wrap. They stay fresh for up to 2 days in the fridge.
How to Serve Halloween Dirt Cups
These dirt cups shine best when chilled and fully decorated. Here are some fun ways to serve them:
- At Halloween Parties: Arrange them on a tray with fake cobwebs, plastic spiders, or dry ice fog for an eerie vibe.
- For Kids’ Events: Use small plastic cups with lids and a spoon tucked in — easy to hand out and mess-free.
- Make-Your-Own Bar: Set out plain dirt cups with bowls of gummy worms, bones, and candy toppers so guests can customize their own.
- Classroom Treats: These are safe for nut-free schools if your cookies and toppings are allergy-conscious.
Storing Halloween Dirt Cups
- Fridge: Store assembled cups (covered) in the refrigerator for up to 2 days.
- Make Ahead: You can prep the pudding and crushed cookies 1 day in advance, then assemble right before serving.
- Freezing Not Recommended: The texture of whipped topping and pudding changes when frozen and thawed, so these are best enjoyed fresh.
Tips and Tricks for Success
- Crush Cookies in Batches: This helps you control texture — you want small crumbs with some chunk, not dust.
- Don’t Overmix the Whipped Topping: Folding gently keeps the mousse airy and smooth.
- Layer Neatly: Use a piping bag or zip-top bag with the tip snipped off for cleaner pudding layers.
- Decorate Just Before Serving: If your toppings are prone to melting or bleeding color (like candy eyeballs), add them after chilling.
Nutrition
| Nutrient | Per Cup (1 of 8) |
|---|---|
| Calories | 270 |
| Carbohydrates | 36g |
| Sugar | 25g |
| Protein | 4g |
| Fat | 11g |
| Saturated Fat | 6g |
| Fiber | 2g |
| Sodium | 210mg |
Note: Nutrition values are estimates and may vary based on ingredients used.

Halloween Dirt Cups
8
servings20
minutes270
kcal1
hourIngredients
1 (5.9 oz) box instant chocolate pudding mix
3 cups cold whole milk
3 cups whipped topping (thawed)
Gummy worms
30 chocolate wafer or sandwich cookies, crushed
Candy bones, mummy hands, or other Halloween candy for decorating
Directions
- Make Pudding: In a mixing bowl, whisk pudding mix and cold milk for 2–3 minutes. Let set for 5 minutes.
- Fold in Topping: Gently fold in whipped topping until fully combined and smooth.
- Crush Cookies: Use a food processor or zip-top bag and rolling pin to crush cookies into small crumbs.
- Layer: In each cup, add crushed cookies (bottom), then pudding, then more cookies on top.
- Decorate: Add gummy worms and Halloween candy to the top.
- Chill: Refrigerate at least 1 hour before serving.
Halloween Dirt Cups FAQs
Can I use homemade pudding instead of instant?
Yes, but let it fully cool and thicken before layering. It may take longer to set than instant.
What if I don’t like whipped topping?
You can use homemade whipped cream, but it won’t hold up as long in the fridge. Use it if serving the same day.
Are there gluten-free options?
Yes. Choose gluten-free pudding mix and cookies, and double-check that decorations are certified gluten-free.
Can kids help make this?
Absolutely. Kids love crushing cookies, layering pudding, and decorating with candy. It’s a perfect family activity.
Can I make it the night before?
Yes — just keep them covered in the fridge. Add candy decorations right before serving to keep them fresh-looking.
Conclusion
Halloween Dirt Cups are more than just a dessert — they’re an experience. From the smooth pudding to the crumbly chocolate “dirt” and the playful toppings, every cup brings a smile. Whether you’re making them for a party, a family gathering, or a treat-yourself moment, they’re simple, festive, and fun.