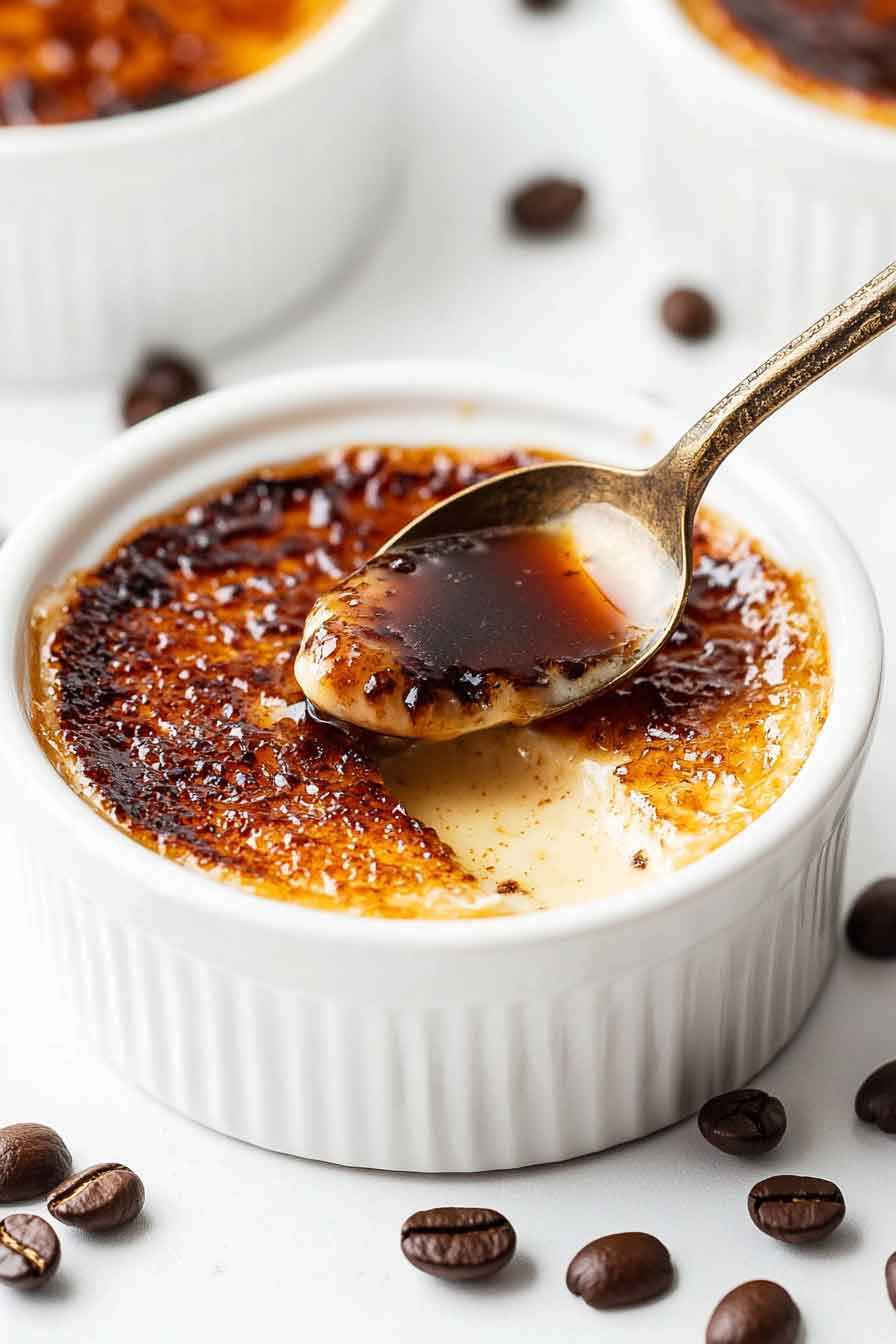
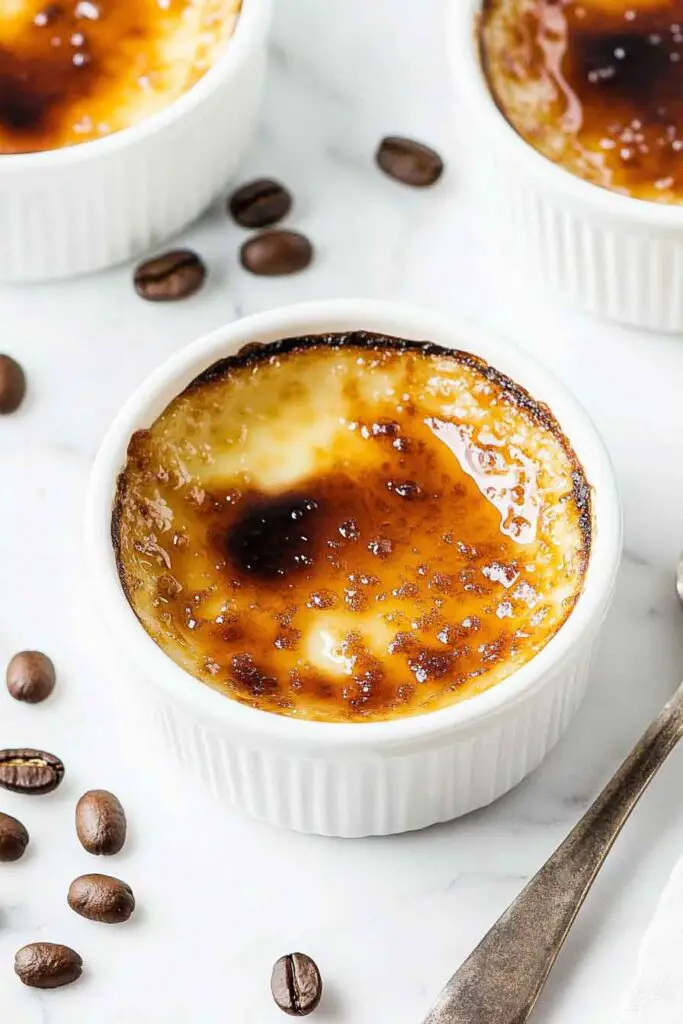
Coffee Crème Brûlée
You know, I absolutely love making fancy desserts, and I’ve got to tell you something—I discovered this incredible recipe for coffee creme brulee that’s totally changed how I think about desserts. This creamy treat is like, seriously the most delicious thing I’ve ever made in my kitchen. It’s smooth, it’s rich, it has that amazing coffee flavor, and it has this crispy caramelized sugar top that cracks when you tap it with your spoon.
So here’s the thing—I used to think that creme brulee was way too fancy and complicated for me to make at home. But then I tried making coffee creme brulee, and honestly, it was easier than I thought it would be. I realized that, like, anyone can make it, even if you think fancy French desserts are too hard like I did.
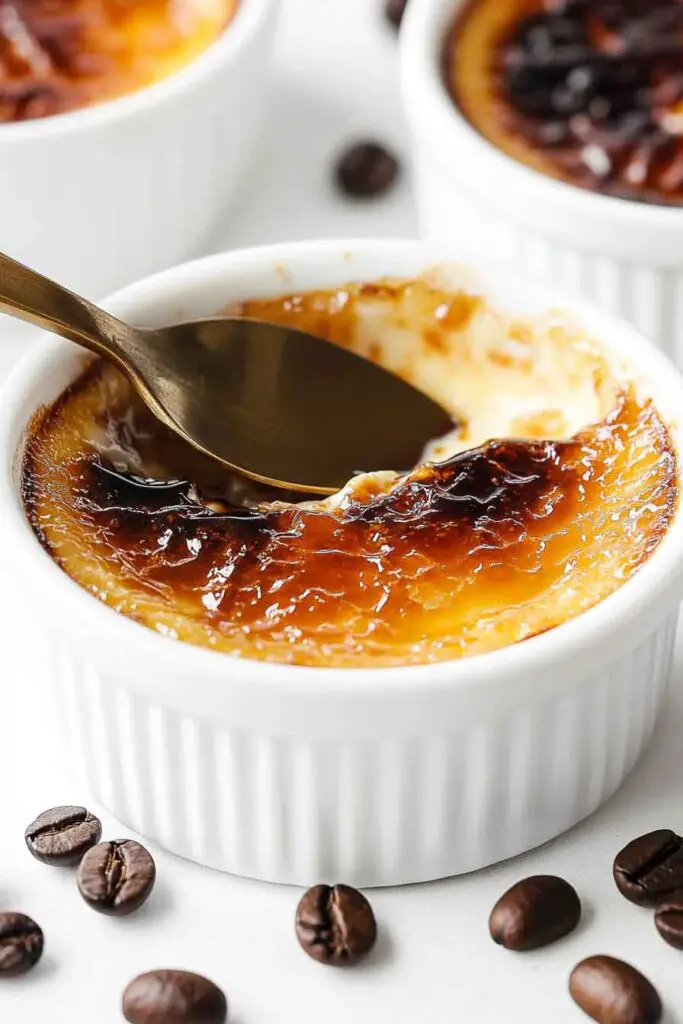
I mean, when I cracked through that golden sugar crust and took my first bite, it was so, um, creamy and coffee-flavored that I felt like I was in a fancy restaurant. This dessert is basically like little cups of pure happiness, you know? It’s perfect for special dinners, or honestly, anytime you want to treat yourself to something really elegant and tasty.

So, like, I really think you should try making coffee creme brulee for yourself. I’m gonna share exactly how I make it, step by step. Trust me, you’re totally gonna love it as much as I do!
Why You’ll Love This Recipe
- Restaurant-Quality: This elegant dessert rivals any upscale bistro offering, yet you’ll make it at home with confidence.
- Silky and Rich: The balance of strong espresso flavor with creamy custard creates a luxurious, mouthwatering experience.
- Impressive Presentation: The dramatic moment when guests crack through the caramelized sugar top makes this dessert unforgettable.
- Make-Ahead Friendly: Prepare custards up to 2 days in advance and caramelize the sugar topping just before serving.
- Perfect for Entertaining: Serve four individual portions for an elegant finale to any meal.
What You Need to Know Before You Start
Prep Time & Cook Time:
- Prep Time: 15 minutes
- Cook Time: 25 minutes
- Chilling Time: At least 4 hours (or overnight)
- Total Time: About 4.5 hours
Servings: This recipe makes 4 individual crème brûlée servings. Need more? Double or triple the recipe using additional ramekins.
Difficulty: Moderate difficulty. The technique requires careful attention to temperature and patience during chilling, but the steps are straightforward for home cooks with basic kitchen skills.
Required Kitchen Tools
To make perfect coffee crème brûlée, gather these essential tools:
- Four 6-ounce ramekins (shallow ceramic or glass custard cups)
- A medium saucepan
- A whisk
- A fine-mesh sieve or strainer
- A roasting pan (large enough to fit all four ramekins)
- A kitchen thermometer (instant-read preferred)
- A torch for caramelizing sugar (kitchen torch or culinary blowtorch)
- Measuring spoons and measuring cups
- A small bowl for whisking eggs
Ingredients for Coffee Crème Brûlée
Here’s everything you’ll need to create this sophisticated dessert. Exact measurements appear in the recipe card below:
- Heavy Cream: Use full-fat heavy whipping cream for the richest texture and best results. The fat content creates that signature silky mouthfeel.
- Egg Yolks: Fresh, room-temperature egg yolks act as the binding agent, creating the custard’s luxurious consistency.
- Granulated Sugar: You’ll need sugar both in the custard mixture and for the caramelized topping.
- Espresso Powder: High-quality instant espresso powder delivers concentrated coffee flavor without adding excess liquid to the custard.
- Vanilla Extract: Pure vanilla extract adds depth and complements the coffee notes beautifully.
- Hot Water: Used to dissolve the espresso powder and create a water bath for gentle cooking.
Variations for Coffee Crème Brûlée
- Mocha Style: Add 1 tablespoon of unsweetened cocoa powder to the custard mixture for chocolate undertones.
- Almond Coffee: Stir 1/2 teaspoon almond extract alongside vanilla for a nutty dimension.
- Maple Coffee: Replace regular sugar with maple sugar for the caramelized topping.
- Spiced Coffee: Add a pinch of cinnamon or nutmeg to deepen the coffee flavor.
- Irish Coffee Style: Add 1/2 teaspoon Irish whiskey or Kahlúa liqueur to each serving before torching.
- Cold Brew Version: Brew strong cold brew coffee and use 1/4 cup in place of espresso powder dissolved in water.
How to Make Coffee Crème Brûlée: Step-by-Step Instructions
1. Prepare the Espresso Base
In a small bowl, combine 2 tablespoons of hot water with 1 tablespoon of espresso powder. Stir until the powder dissolves completely into a smooth paste. Set aside to cool slightly.
2. Heat the Heavy Cream
Pour 1.5 cups of heavy cream into a medium saucepan. Heat over medium heat until the cream just begins to steam and small bubbles form around the edges. Do not boil. Remove from heat.
3. Prepare the Egg Yolks
In a separate bowl, whisk together 5 egg yolks and 1/3 cup of granulated sugar. Whisk continuously for about 2 minutes until the mixture becomes pale and slightly thickened. Add 1 teaspoon of vanilla extract and the dissolved espresso mixture. Whisk until combined.
4. Temper the Eggs
Slowly pour the warm cream into the egg mixture while whisking constantly. This slow addition prevents the eggs from scrambling. Continue whisking until fully incorporated and smooth.
5. Strain the Custard
Pour the custard through a fine-mesh sieve into a clean bowl. This removes any cooked egg bits and creates a silky texture. Set aside.
6. Set Up the Water Bath
Preheat your oven to 325°F (160°C). Arrange four ramekins in a roasting pan. Pour the custard mixture evenly among the four ramekins.
7. Create the Water Bath
Pour hot (not boiling) water into the roasting pan until it reaches halfway up the sides of the ramekins. This gentle heat environment ensures even, slow cooking.
8. Bake the Custards
Bake for 20-25 minutes. The custards are done when the edges are set but the centers still jiggle slightly when gently shaken. Do not overbake. If using a thermometer, the internal temperature should reach 170°F at the edges while the center remains slightly cooler.
9. Cool and Chill
Remove the ramekins from the water bath and let cool to room temperature. Once cooled, cover with plastic wrap and refrigerate for at least 4 hours, preferably overnight. This chilling time is essential for proper texture development.
10. Caramelize the Sugar Topping
When ready to serve, remove custards from the refrigerator. Sprinkle 1 teaspoon of granulated sugar evenly over the top of each custard. Using a kitchen torch, hold the flame about 2 inches above the sugar surface and move it in circular motions until the sugar melts and turns golden amber. Be careful not to burn the sugar.
11. Rest and Serve
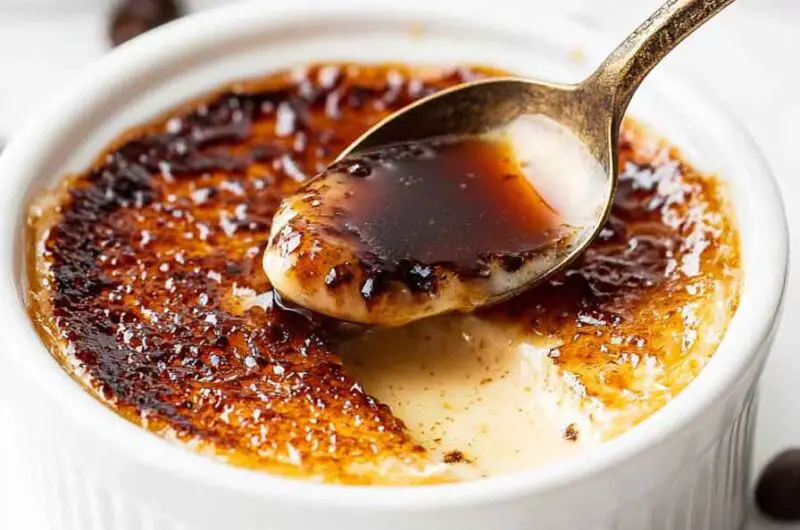
Allow the caramelized topping to cool for 2-3 minutes until it hardens into a crispy shell. Serve immediately while the contrast between the cold custard and warm, crackling top is at its best.
Serving and Decoration
How to Serve Coffee Crème Brûlée
This elegant dessert pairs beautifully with complementary accompaniments:
- With Biscotti: Serve alongside Italian almond biscotti for dipping.
- Fresh Berries: Top with fresh raspberries or blackberries for color and tartness.
- Whipped Cream: Add a small dollop of unsweetened whipped cream on the side.
- Coffee Liqueur: Serve with a small glass of Kahlúa or coffee liqueur alongside.
- Chocolate Shavings: Garnish with dark chocolate shavings for a mocha variation.
- Fresh Mint: A small sprig of mint adds visual appeal and freshness.
- Espresso Shot: Serve with a small cup of hot espresso as an accompaniment.
Tips and Tricks for Success
- Temperature Control: Use a kitchen thermometer to ensure custards reach the proper temperature without overcooking. Overcooked custards become grainy and lose their silky texture.
- Quality Ingredients: Use real vanilla extract and high-quality espresso powder. These ingredients make a noticeable difference in the final flavor.
- Torch Technique: Practice your torch technique on the first ramekin if you’re new to caramelizing. Move steadily and keep the flame at a consistent distance.
- Sugar Timing: Caramelize the sugar topping just before serving. If done too far in advance, the sugar will absorb moisture from the custard and soften.
- No Torch Option: If you don’t have a kitchen torch, preheat your oven’s broiler, top custards with sugar, and place under the broiler for 1-2 minutes, watching carefully.
- Batch Cooking: Make these up to 2 days in advance. Store covered in the refrigerator and torch the sugar just before serving.
- Espresso Strength: Adjust the espresso powder amount based on how strong you prefer the coffee flavor. Use 1 tablespoon for moderate flavor or up to 1.5 tablespoons for intense coffee lovers.
Storing Coffee Crème Brûlée
- Custards Only: Store prepared (but not torched) custards in an airtight container in the refrigerator for up to 2 days. Caramelize the sugar topping just before serving.
- After Torching: Once the sugar has been caramelized, serve immediately. The topping will soften if stored.
- Freezing: You can freeze the prepared custards (before adding the sugar topping) for up to 1 month. Thaw overnight in the refrigerator before torching and serving.
Nutrition Information
| Nutrient | Per Serving |
|---|---|
| Calories | 485 |
| Total Fat | 38g |
| Saturated Fat | 23g |
| Cholesterol | 285mg |
| Sodium | 65mg |
| Total Carbohydrates | 32g |
| Dietary Fiber | 0g |
| Sugars | 29g |
| Protein | 5g |
Nutritional values are approximate and calculated per serving (yields 4 servings).
Coffee Crème Brûlée
Course: Easy Homemade Desserts4
servings15
minutes25
minutes485
kcal4+
hourIngredients
1.5 cups heavy whipping cream
5 large egg yolks
1/3 cup granulated sugar (for custard)
4 teaspoons granulated sugar (for topping, 1 teaspoon per ramekin)
1 tablespoon instant espresso powder
2 tablespoons hot water
1 teaspoon pure vanilla extract
Directions
- Dissolve Espresso: Combine hot water and espresso powder in a small bowl. Stir until smooth and set aside.
- Heat Cream: Pour heavy cream into a saucepan and heat over medium heat until steaming (do not boil). Remove from heat.
- Mix Egg Yolks: In a bowl, whisk egg yolks with 1/3 cup sugar for 2 minutes until pale. Add vanilla and espresso mixture. Whisk until combined.
- Temper Eggs: Slowly pour warm cream into egg mixture while whisking constantly until fully incorporated.
- Strain: Pass custard through a fine-mesh sieve into a clean bowl.
- Set Up Water Bath: Preheat oven to 325°F (160°C). Place four ramekins in a roasting pan. Divide custard among ramekins. Pour hot water into pan until it reaches halfway up ramekin sides.
- Bake: Bake for 20-25 minutes until edges are set but centers jiggle slightly. Internal temperature at edges should be 170°F.
- Cool: Remove from water bath and cool to room temperature. Cover and refrigerate at least 4 hours (overnight is best).
- Caramelize: Sprinkle 1 teaspoon sugar on each custard. Use a kitchen torch to melt sugar until golden amber, moving the flame in circular motions.
- Serve: Cool topping for 2-3 minutes until hard, then serve immediately.
Coffee Crème Brûlée FAQs
Q: Can I make this recipe without a kitchen torch? A: Yes. Preheat your oven broiler, top custards with sugar, and place under the broiler for 1-2 minutes, watching constantly to prevent burning. The results won’t be quite as dramatic, but the flavor remains excellent.
Q: How long can I store the custards? A: Prepared (but not torched) custards keep in the refrigerator for up to 2 days. You can also freeze them for up to 1 month before torching and serving.
Q: What if my custard looks curdled or grainy? A: This usually means the eggs were overcooked. Always whisk constantly when adding cream to eggs, and don’t let the oven temperature exceed 325°F. A water bath ensures gentle, even cooking.
Q: Can I use instant coffee instead of espresso powder? A: Instant espresso powder is preferred because it’s more concentrated and delivers stronger coffee flavor. Regular instant coffee works but may require an extra 1/4 teaspoon for adequate flavor.
Q: Is it safe to use raw or undercooked eggs in this recipe? A: The eggs are heated to 170°F in the water bath, which pasteurizes them and makes this safe. Always use fresh, high-quality eggs from a reliable source.
Q: How can I intensify the coffee flavor? A: Increase the espresso powder to 1.5 tablespoons, or add 2 tablespoons of strong brewed coffee in place of part of the hot water. You may need to adjust other liquid proportions slightly.
Q: What’s the difference between crème brûlée and flan? A: Crème brûlée has a caramelized sugar topping and a custardy, creamy texture. Flan includes caramel in the cooking vessel itself and has a firmer, more gel-like consistency. Both are custard-based but differ in preparation and texture.
Q: Can I make individual ramekins ahead for a dinner party? A: Absolutely. Prepare and chill custards for up to 2 days. Shortly before serving, torch the sugar topping on each ramekin. This makes for easy entertaining with minimal last-minute work.
Conclusion
Coffee Crème Brûlée is a timeless French dessert that proves elegant sophistication doesn’t require complicated techniques. With just a handful of quality ingredients—heavy cream, egg yolks, granulated sugar, espresso powder, vanilla extract, and hot water—you’ll create a restaurant-worthy dessert that impresses every time.
The magic lies in balancing deep coffee flavor with silky custard texture, all topped with a dramatic caramelized sugar shell. Whether you’re hosting a dinner party, celebrating an anniversary, or simply treating yourself to something special, this coffee crème brûlée delivers on both flavor and presentation.
Follow our step-by-step instructions for reliable success, and don’t hesitate to experiment with the variations we’ve suggested. Once you master this classic, you’ll find yourself making it again and again.