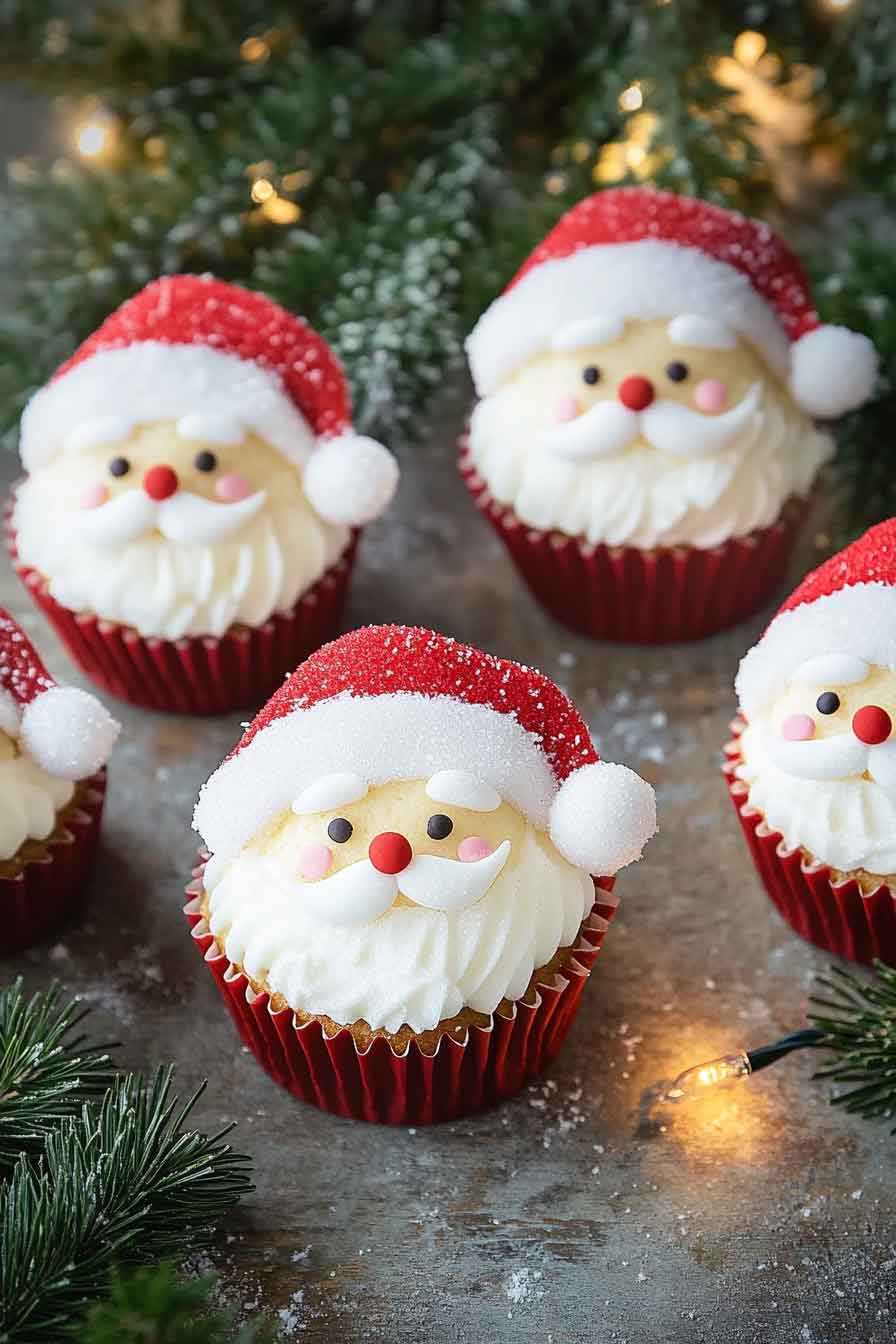
Christmas Santa Face Cupcakes
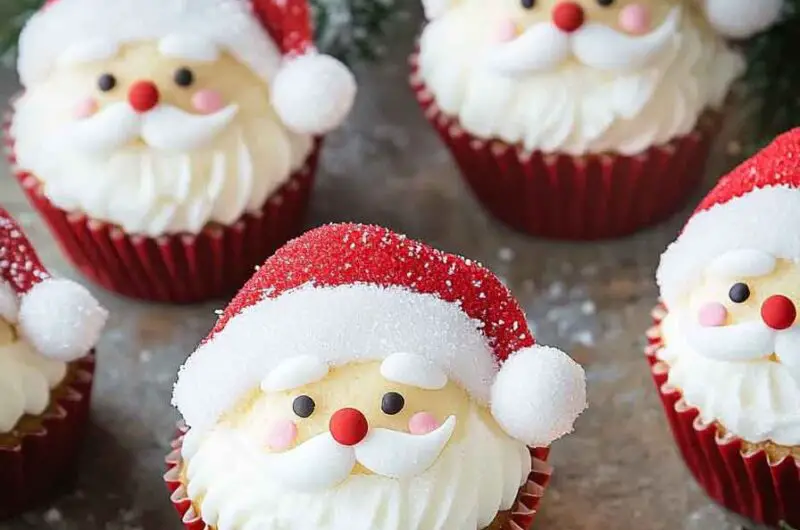
Okay, these Christmas Santa Face Cupcakes? They’re festive, fun, and almost too cute to eat—almost. Each one is a little edible Santa, complete with a fluffy frosting beard, red hat, and a jolly smile. Perfect for holiday parties, baking with kids, or just spreading some sweet cheer.
I made them for a Christmas cookie exchange last year, and everyone was obsessed. The soft vanilla cupcake base paired with creamy buttercream frosting? So good. And decorating them? Honestly, half the fun!
No need to be a pro baker—just bake, frost, and add a few simple details like mini marshmallows or candy eyes. Let’s make a batch together—you’ll love how these little Santas bring big smiles!

Why You’ll Love This Recipe
- Perfect for the Holidays: These cupcakes capture the spirit of Christmas with their playful Santa design. They’re great for holiday parties, cookie swaps, or simply adding fun to your family dinner.
- Flavor and Texture: The cupcake base is rich and chocolatey thanks to a combination of cocoa powder, hot coffee, and buttermilk. The result is a cupcake that’s soft, tender, and not overly sweet—ideal for pairing with the buttery frosting.
- Interactive and Creative: Decorating each cupcake like Santa is half the fun. It’s an engaging kitchen activity for children and adults alike. You don’t need professional tools—just some basic piping tips and candies.
- Customizable: Change the cake base, play with frosting colors, or swap out decorations. These cupcakes are a blank canvas for festive creativity.
- Make-Ahead Friendly: Bake the cupcakes a day in advance and refrigerate them. The frosting can be stored, too, making it easier to decorate when you’re ready.

What You Need to Know Before You Start
Prep Time & Cook Time Breakdown:
- Cupcake Prep Time: 20–25 minutes
- Baking Time: 18–20 minutes
- Cooling Time: 30 minutes (before frosting)
- Decorating Time: 20–30 minutes depending on detail
- Total Time: About 1 hour 15 minutes, start to finish
Yield:
This recipe makes 12 standard-size cupcakes. You can easily double the batch if you’re baking for a crowd.
Skill Level:
Easy to Moderate. The cupcake batter is simple to prepare, and the decorating is very forgiving—even if you’re not a skilled baker. A steady hand and a bit of creativity go a long way.
Required Kitchen Tools
To bake and decorate these Santa cupcakes, you’ll want to gather the following tools:
- Standard Muffin Tin: A 12-cup muffin pan is ideal for even baking.
- Cupcake Liners: Use festive liners for extra holiday flair.
- Mixing Bowls: You’ll need one large and one medium bowl.
- Whisk or Electric Mixer: A stand or hand mixer helps ensure a smooth batter and fluffy frosting.
- Spatula: For folding and scraping the bowl clean.
- Cooling Rack: Essential for bringing cupcakes to room temperature before decorating.
- Piping Bags: Disposable or reusable—used for applying buttercream.
- Piping Tips: A small round tip for facial features and a star tip for Santa’s hat and beard.
- Toothpicks or Paintbrush: Optional, for applying tiny decorations or food coloring.
Ingredients
For the Chocolate Cupcakes
These ingredients make soft, moist chocolate cupcakes with a deep cocoa flavor and a delicate crumb:
- ¼ cup (57g) sour cream – Adds richness and moisture.
- ½ cup (118mL) buttermilk – Helps make the cupcakes light and tender.
- 2 large eggs – Provide structure and moisture.
- ¼ cup (60mL) hot coffee – Enhances the cocoa flavor (you won’t taste the coffee).
- ⅓ cup (79mL) vegetable oil – Gives the cupcakes a moist texture.
- 2 tsp (10mL) vanilla extract – For aromatic depth.
- 1 ½ cups (180g) all-purpose flour – The main dry ingredient; gives structure.
- 1 ⅓ cups (265g) granulated sugar – Sweetens and tenderizes.
- ¼ cup (20g) unsweetened cocoa powder – Choose a good-quality cocoa for best flavor.
- 1 tsp (6g) baking soda – Reacts with the acid (buttermilk) to help the cupcakes rise.
- ½ tsp (2.5g) kosher salt – Balances sweetness and enhances flavor.
For the Vanilla Buttercream
This buttercream is smooth, creamy, and perfect for detailed decorating.
- 1 2/3 lbs (700–900g) confectioners’ sugar – Use more if you want a stiffer consistency for piping.
- 1 lb (450g) unsalted butter, softened – The base of the frosting; must be at room temperature for smooth blending.
- 1 tsp (5mL) vanilla extract – Gives the frosting classic flavor.
- 1 tbsp (15mL) whole milk – Thins the frosting slightly to make it pipeable.
- ½ tsp (2g) kosher salt – Cuts the sweetness slightly and deepens the taste.
- Food coloring – Red for the hat, black for eyes, optional pink for cheeks.
Decorations
The fun part—these simple toppings bring Santa to life on each cupcake.
- Mini marshmallows – Cut or whole, used for Santa’s beard and the trim of his hat.
- Red M&Ms or candy-coated chocolate – Make the perfect little nose.
- Candy eyes – Found at most grocery stores or craft shops, or you can pipe small dots of black icing.
- Optional add-ons – Edible glitter, snowflake sprinkles, or sanding sugar for extra sparkle.
How to Make Christmas Santa Face Cupcakes: Step-by-Step Instructions
1. Make the Chocolate Cupcake Batter
a. Preheat & Prep:
- Preheat your oven to 350°F (175°C).
- Line a 12-cup muffin tin with festive paper cupcake liners.
b. Mix Wet Ingredients:
- In a large bowl, whisk together the sour cream, buttermilk, eggs, hot coffee, vegetable oil, and vanilla extract. Make sure everything is well-blended. The mixture should look creamy and smooth.
c. Combine Dry Ingredients:
- In another bowl, sift together the flour, sugar, cocoa powder, baking soda, and salt.
- Stir until evenly mixed and free of lumps.
d. Bring Batter Together:
- Add the dry ingredients to the wet mixture in two or three additions.
- Use a spatula or mixer on low speed to blend just until combined. The batter should be thick and glossy. Don’t overmix—stop as soon as no dry spots remain.
e. Fill and Bake:
- Divide the batter evenly among the prepared cupcake liners, filling each about 2/3 full.
- Bake for 18–20 minutes, or until a toothpick inserted into the center comes out clean.
- Remove from the oven and let cupcakes cool in the pan for 5 minutes, then transfer them to a wire rack to cool completely (about 30 minutes).
2. Make the Vanilla Buttercream
a. Cream the Butter:
- In a large mixing bowl, beat the softened butter on medium-high speed until smooth and pale (about 2–3 minutes).
b. Add Sugar and Flavorings:
- Gradually add the confectioners’ sugar, 1 cup at a time, mixing well after each addition.
- Pour in the vanilla extract, salt, and milk. Beat on medium speed until the frosting is fluffy and holds its shape (about 3–4 minutes).
- If the buttercream is too stiff, add a bit more milk (a teaspoon at a time). If too soft, add more sugar.
c. Color the Frosting:
- Divide the frosting into three small bowls.
- Color most of the frosting red (for Santa’s hat) and leave the rest white (for beard and face). If you want to add rosy cheeks, tint a tiny bit pink.
- Place the different colored frostings into piping bags: red with a star tip, white with a round or star tip, and pink/black (if used) with a very small round tip.
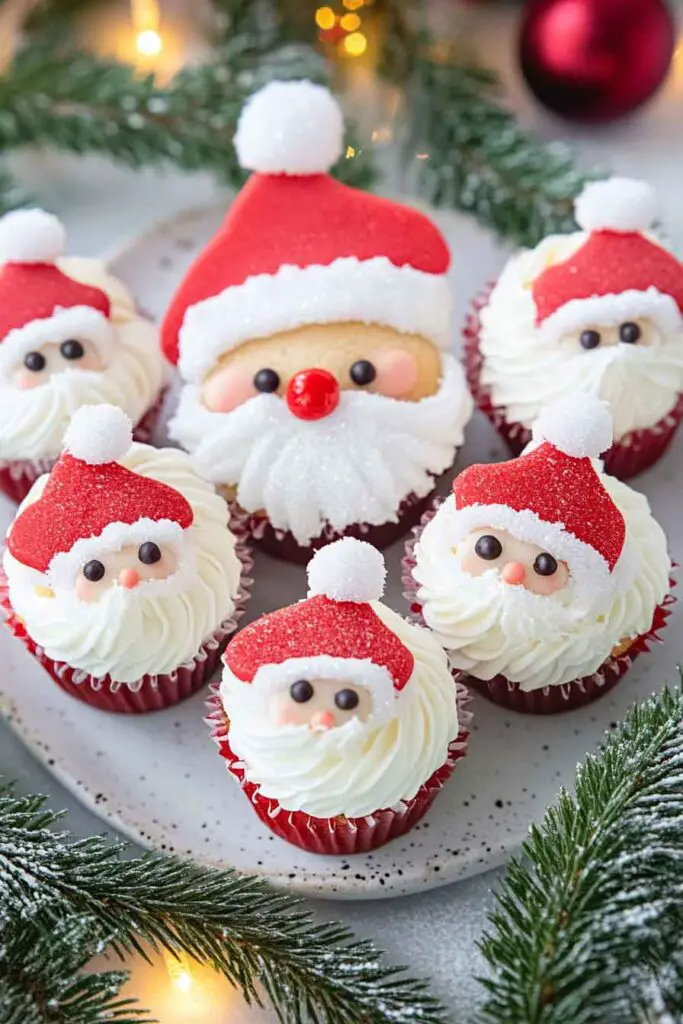
3. Decorate the Cupcakes: Creating Santa’s Face
a. Frost the Cupcakes:
- Using an offset spatula or a piping bag, spread or pipe a smooth layer of white buttercream on each cooled cupcake to create the base for Santa’s face.
b. Pipe the Hat:
- With the red frosting and a star tip, pipe a half-moon shape on the upper third of each cupcake—this is Santa’s hat.
- Pipe a little red “pom-pom” on one side of the hat.
c. Make the Beard:
- Use the white frosting with a star tip to pipe little “stars” or swirls along the lower half of the cupcake for Santa’s beard and mustache.
d. Add the Hat Trim:
- Arrange mini marshmallows or pipe small white dots along the bottom edge of Santa’s hat for the brim.
e. Place the Eyes and Nose:
- Add candy eyes just below the hat brim.
- Press a red M&M or candy nose in the center, above the mustache.
- For rosy cheeks, pipe two small pink dots, or gently dab on a little pink food coloring with a clean brush.
f. Finishing Touches:
- Optional: Add a sprinkle of edible glitter or white sanding sugar for a snowy effect.
- Chill the cupcakes for about 10 minutes to help the decorations set.
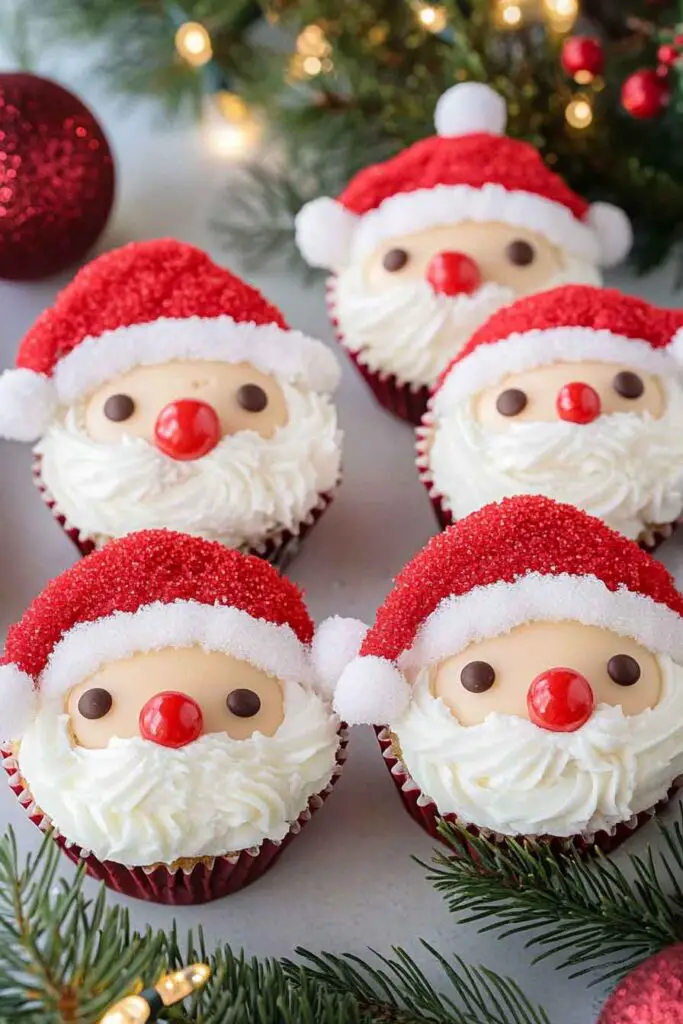
Serving and Decoration
These Santa Face Cupcakes are best served at room temperature, so the cake is soft and the buttercream creamy. They make a festive addition to holiday dessert tables, classroom parties, or family movie nights. For extra fun, set up a decorating station with sprinkles, extra candies, and colored frosting so everyone can personalize their own Santa.
Serving Ideas:
- Place cupcakes in decorative liners and arrange on a platter with other holiday treats.
- Wrap each cupcake in clear cellophane with a ribbon for a sweet homemade gift.
- Pair with mugs of hot cocoa or spiced cider for a cozy holiday treat.
Storing Santa Face Cupcakes
- Room Temperature: Store cupcakes in an airtight container at room temperature for up to 2 days, away from direct heat or sunlight.
- Refrigerator: If your kitchen is warm, refrigerate the cupcakes for up to 4 days. Let them sit at room temperature for 30 minutes before serving for the best texture.
- Freezer: Freeze undecorated cupcakes (tightly wrapped) for up to 2 months. Thaw at room temperature, then frost and decorate when ready to serve.
Tips and Tricks for Success
- Cool Cupcakes Completely: Always make sure cupcakes are fully cooled before decorating. Warm cupcakes can cause buttercream to melt and decorations to slide off.
- Use Room Temperature Ingredients: For both the batter and the buttercream, using room temperature eggs, butter, and dairy helps everything mix smoothly.
- Easy Decorating: If you don’t have piping bags, you can use a plastic zipper bag with the corner snipped off.
- Keep It Simple: Younger kids can just use a spatula to spread the base, then add marshmallows, candies, and sprinkles for the face—no piping tips needed.
- Freshness: If making ahead, add candy eyes and nose right before serving to keep them looking bright and fresh.
Nutrition
Here’s an approximate nutrition breakdown for each cupcake, including frosting and basic decorations:
| Serving Size | Calories | Total Fat | Saturated Fat | Carbohydrates | Sugar | Protein |
|---|---|---|---|---|---|---|
| 1 cupcake | 365 | 16g | 10g | 53g | 38g | 3g |
Values are estimates and will vary based on exact brands and decoration choices.
Christmas Santa Face Cupcakes
Course: Uncategorized1
cupcakes25
minutes18
minutes300
kcal25
miniutesIngredients
For the Cupcakes:
¼ cup (57g) sour cream, room temperature
½ cup (118mL) buttermilk, room temperature
2 large eggs
¼ cup (60mL) hot coffee
⅓ cup (79mL) vegetable oil
2 tsp (10mL) vanilla extract
1 ½ cups (180g) all-purpose flour
1 ⅓ cups (265g) granulated sugar
¼ cup (20g) unsweetened cocoa powder
1 tsp (6g) baking soda
½ tsp (2.5g) kosher saltFor the Vanilla Buttercream:
1 2/3 lbs (700–900g) confectioners’ sugar
1 lb (450g) unsalted butter, room temperature
1 tsp (5mL) vanilla extract
1 tbsp (15mL) whole milk
½ tsp (2g) kosher salt
Food coloring (red, black, pink)For Decoration:
Mini marshmallows
Red M&Ms or candy-coated chocolate
Candy eyes
Directions
- Preheat oven to 350°F (175°C). Line a muffin tin with paper liners.
- Make the batter: Whisk sour cream, buttermilk, eggs, hot coffee, oil, and vanilla until smooth. In another bowl, sift flour, sugar, cocoa, baking soda, and salt. Add dry ingredients to wet in batches, mixing just until combined.
- Bake: Fill cupcake liners 2/3 full. Bake 18–20 minutes, until a toothpick comes out clean. Cool completely on a rack.
- Buttercream: Beat softened butter until pale and fluffy. Add confectioners’ sugar in batches, then vanilla, salt, and milk. Mix until smooth. Color as needed for decorating.
- Decorate: Spread or pipe a layer of white buttercream on each cupcake. Pipe red frosting for the hat, white stars for the beard and hat trim. Add marshmallows, candy eyes, and a red nose to create Santa’s face.
- Serve: Arrange cupcakes on a platter and enjoy. Store leftovers as directed above.
Christmas Santa Face Cupcakes FAQs
Q: Can I use a different cupcake flavor as the base?
A: Absolutely. Vanilla, red velvet, or even spice cupcakes work well with the same decorating method. Just follow your favorite basic cupcake recipe and decorate as described.
Q: How far in advance can I make these cupcakes?
A: You can bake the cupcakes a day ahead and store them covered at room temperature. Decorate the same day you plan to serve for best appearance, especially if using candy decorations.
Q: What if I don’t have piping tips or bags?
A: No problem. Use a plastic sandwich bag with the corner snipped off, or spread the frosting with a small spatula or butter knife. The design will still be charming and festive.
Q: Are there allergy-friendly options?
A: For dairy-free, use plant-based butter and milk. For egg-free, try a commercial egg replacer or applesauce in the cupcake batter. Double-check candy decorations for allergens.
Q: How do I keep marshmallows and candy eyes from getting sticky?
A: Add them close to serving time and store the decorated cupcakes in a cool, dry place. Avoid humid environments, which can make candies sticky.
Conclusion
Christmas Santa Face Cupcakes are more than just a treat—they’re an activity, a centerpiece, and a way to bring people together during the holidays. Their chocolatey base and creamy frosting make them delicious, while the playful Santa decorations bring out smiles in kids and adults. Whether you’re baking with family, preparing for a party, or sharing with neighbors, these cupcakes spread holiday cheer in every bite.