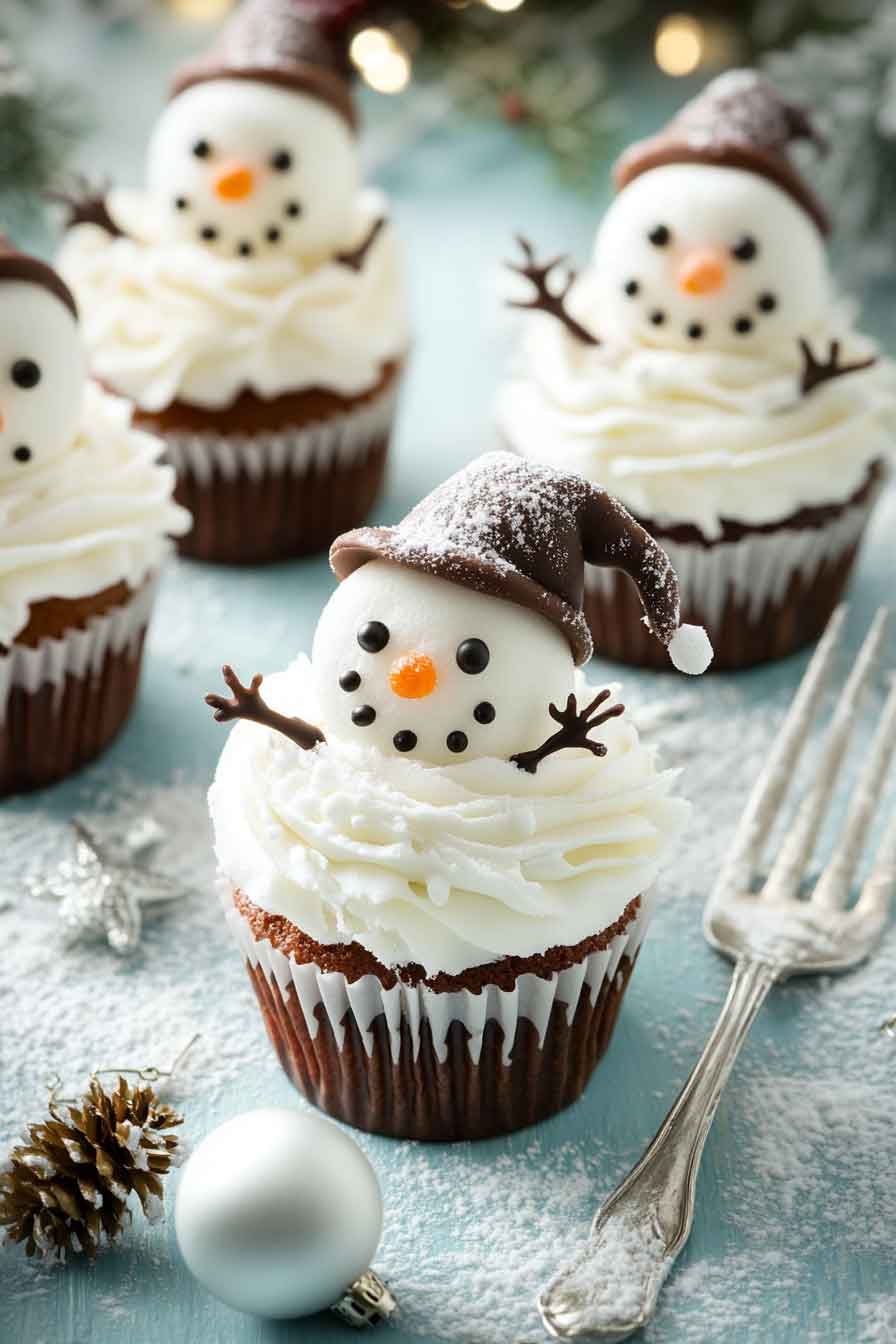
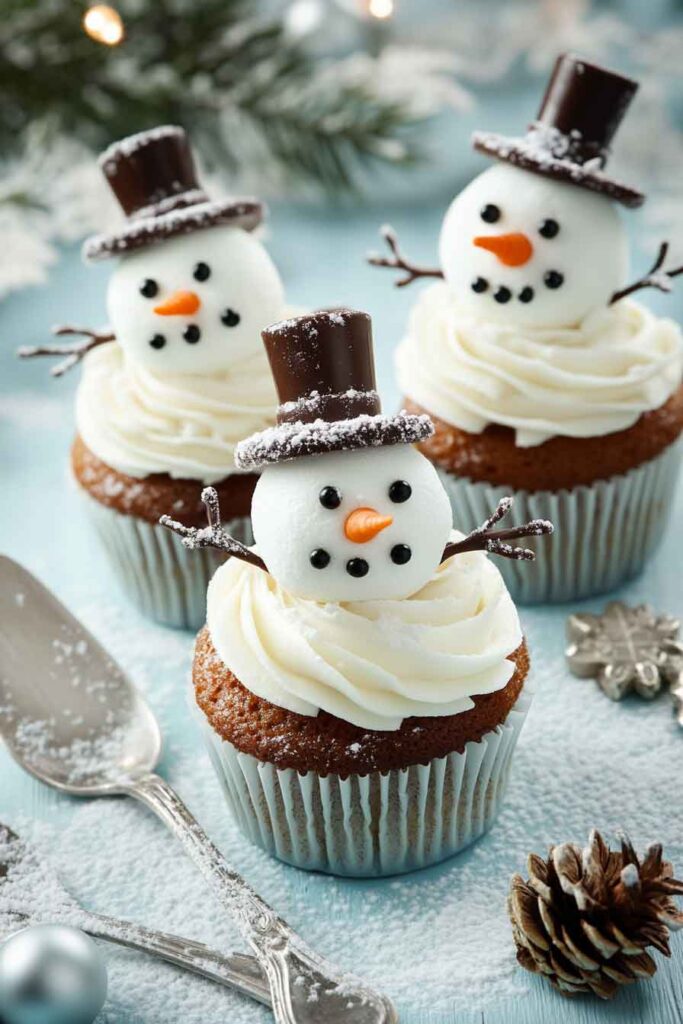
Melting Snowman Cupcakes
I love making Melting Snowman Cupcakes. They look so silly and fun. Wanna see how I do it?
I find them super easy to bake, oh my gosh! I use sweet frosting and tiny candies. They make a goofy little snowman face that melts right on top.
I really want you to try them too. They taste so yummy, like a sweet winter treat. I feel so happy when I see their melty smiles.
So, let’s bake them together! Grab some cupcakes, frosting, and candies. Join me now and let’s make Melting Snowman Cupcakes!

Why You’ll Love This Recipe
- Kid-Friendly & Fun: These cupcakes are a hit with kids and make a great holiday baking activity.
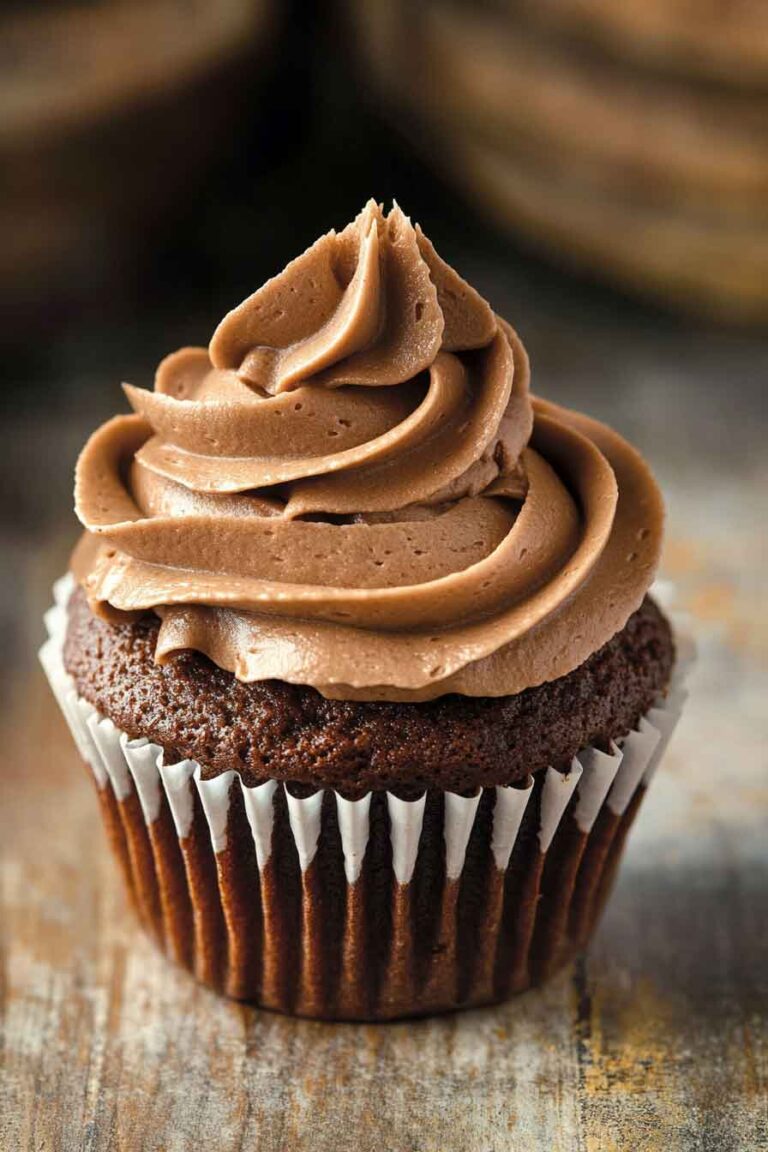
- Rich & Moist Chocolate Base: The cupcake is soft, tender, and full of chocolate flavor.
- Easy to Decorate: No professional piping skills needed—just have fun with the design.
- Perfect for Winter Celebrations: Great for Christmas, snow days, or any winter-themed party.
- Customizable: You can change decorations to add your own creative touch.
What You Need to Know Before You Start
Prep Time & Cook Time:
- Prep Time: 20 minutes
- Bake Time: 18-22 minutes
- Decoration Time: 15 minutes
- Total Time: About 1 hour
Servings:
This recipe makes 12 cupcakes—perfect for sharing!
Difficulty:
Easy enough for beginners, but fun for experienced bakers to get creative.
Required Kitchen Tools
- Muffin tin
- Cupcake liners
- Mixing bowls
- Whisk or electric mixer
- Piping bag or plastic sandwich bag
- Offset spatula or butter knife
- Toothpick (for decorating details)
Ingredients for the Cupcake Base
These chocolate cupcakes serve as the perfect foundation for your snowman decorations.
- 1 cup (125g) all-purpose flour – Provides structure.
- ¼ cup (25g) cocoa powder – Gives the cupcakes a rich chocolate flavor.
- 1 teaspoon baking powder – Helps the cupcakes rise.
- ¼ teaspoon salt – Enhances the flavor.
- ½ cup (100g) granulated sugar – Adds sweetness.
- ¼ cup (60ml) vegetable oil – Keeps the cupcakes moist.
- 1 large egg – Binds the ingredients together.
- ½ cup (120ml) milk – Adds moisture.
- 1 teaspoon vanilla extract – Enhances the flavor.
How to Make Melting Snowman Cupcakes (Step-by-Step Instructions)
Now that we have all the ingredients ready, let’s start making the cupcakes.
Step 1: Prepare the Cupcake Batter
- Preheat the Oven – Set your oven to 350°F (175°C) and line a 12-cup muffin tin with cupcake liners.
- Mix the Dry Ingredients – In a medium bowl, whisk together the flour, cocoa powder, baking powder, and salt. Set aside.
- Combine the Wet Ingredients – In a separate large bowl, whisk together the sugar, vegetable oil, egg, milk, and vanilla extract until smooth.
- Combine Wet and Dry Mixtures – Gradually add the dry ingredients into the wet mixture, stirring until just combined. Do not overmix, as this can make the cupcakes dense.
Step 2: Bake the Cupcakes
- Fill the Liners – Divide the batter evenly among the cupcake liners, filling each about 2/3 full.
- Bake – Place in the oven and bake for 18-22 minutes, or until a toothpick inserted in the center comes out clean.
- Cool the Cupcakes – Let the cupcakes sit in the muffin tin for about 5 minutes, then transfer them to a wire rack to cool completely.
Step 3: Prepare the Vanilla Frosting
The frosting serves as the “melting snow” base for our snowman decoration.
Ingredients for Vanilla Frosting:
- 1 cup (226g) unsalted butter, softened
- 3 cups (360g) powdered sugar
- 2 tablespoons milk
- 1 teaspoon vanilla extract
How to Make the Frosting:
- Beat the Butter – In a large bowl, use an electric mixer to beat the butter on medium speed until smooth and creamy (about 2 minutes).
- Add Powdered Sugar – Gradually add the powdered sugar, beating on low speed at first, then increasing to medium until fully incorporated.
- Add Milk and Vanilla – Pour in the vanilla extract and 1 tablespoon of milk. Continue mixing until the frosting is light and fluffy. If needed, add another tablespoon of milk to reach a spreadable consistency.

Step 4: Assemble the Melting Snowman Cupcakes
Now that the cupcakes are cooled and the frosting is ready, it’s time to decorate them!
Step 1: Frost the Cupcakes
- Use a spoon or offset spatula to spread a generous layer of vanilla frosting over each cupcake.
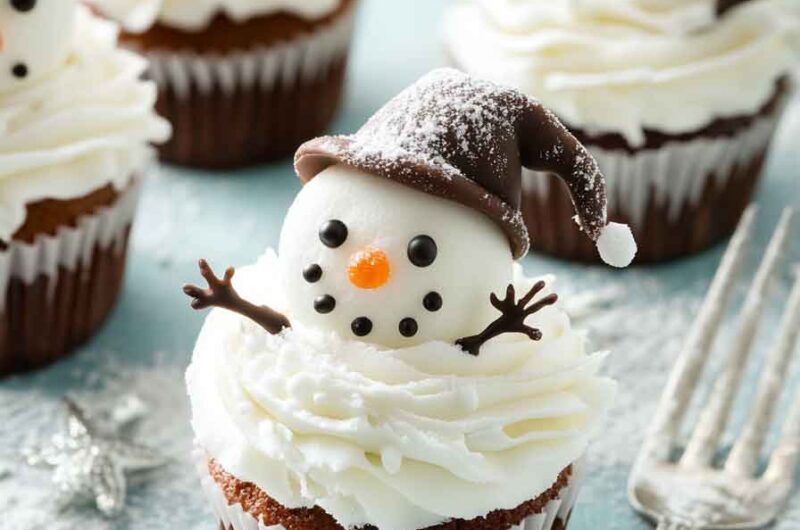
- Make sure the frosting looks slightly uneven and spread out—it should resemble a puddle of melting snow.
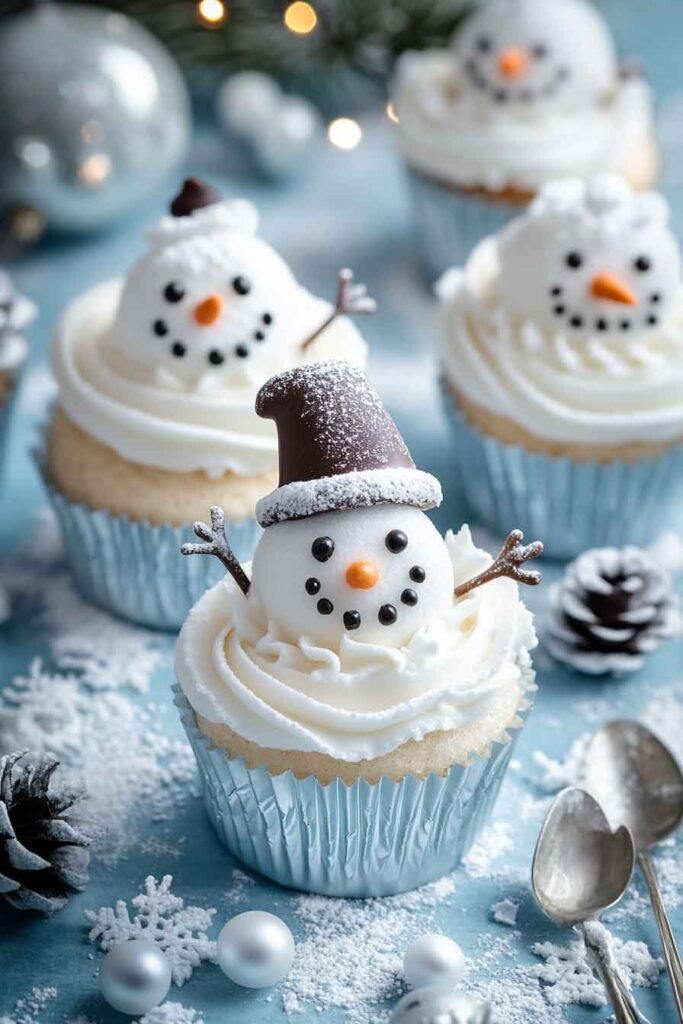
Step 2: Create the Melting Snowman Face
Ingredients for Decoration:
- 12 large marshmallows (for snowman heads)
- Black gel icing or edible marker (for eyes and mouth)
- Orange sprinkle, small candy, or colored icing (for the carrot nose)
How to Decorate:
- Make the Snowman Face – Take a marshmallow and use a black edible marker or gel icing to draw two dots for eyes and a dotted line for a smiling mouth.
- Add a Nose – Use an orange sprinkle or a small dab of orange icing to create the carrot nose.
Step 3: Place the Snowman on the Cupcake
- Gently press the decorated marshmallow onto the frosted cupcake so it sticks. Position it slightly off-center to give it a “melting” effect.
- Use black icing or a food marker to draw stick arms coming out from the frosting puddle.
- Sprinkle with funfetti or sugar pearls to resemble buttons or snowflakes.
Step 5: Add the Final Snowman Details
Now that the marshmallow heads are in place, it’s time to bring the melting snowmen to life with extra decorations.
Step 1: Create the Melting Effect
- Use extra vanilla frosting and a small spoon to drizzle a little more “melting snow” around the base of the marshmallow.
- Let some of it flow down the sides for a realistic melted look.
Step 2: Add Arms and Accessories
- Stick Arms:
- Use black icing or a toothpick dipped in chocolate to draw stick arms on the frosting.
- You can make the arms look like they’re reaching out for help or sinking into the snow.
- Buttons & Scarf:
- Add mini chocolate chips, round sprinkles, or sugar pearls for buttons on the snowman’s body.
- If you want to make a scarf, use thin strips of red licorice and place them at the base of the marshmallow.
Step 3: Let Everything Set
- Allow the cupcakes to sit for 15 minutes so the frosting and decorations can set.
- Once everything is stable, they’re ready to serve!
How to Store Melting Snowman Cupcakes
- Room Temperature: If you’re serving them the same day, keep them in an airtight container at room temperature for up to 8 hours.
- Refrigerator: Store in an airtight container in the fridge for 2-3 days. Allow them to come to room temperature before serving.
- Freezer: If you want to prepare in advance, freeze undecorated cupcakes for up to 3 months. Frost and decorate them after thawing.
Fun Variations
- Different Cupcake Base: Instead of chocolate, use vanilla, red velvet, or even spiced gingerbread cupcakes.
- Flavored Frosting: Try peppermint, cinnamon, or caramel frosting for a festive twist.
- Marshmallow Alternative: If you don’t have large marshmallows, use white chocolate truffles or meringues for the snowman heads.
- Edible Hat: Add a small chocolate candy cup or mini Oreo on top of the marshmallow to make a cute hat.
Nutrition Information
| Nutrient | Per Cupcake |
|---|---|
| Calories | 280 |
| Total Fat | 12g |
| Saturated Fat | 6g |
| Carbohydrates | 40g |
| Sugar | 28g |
| Protein | 3g |
(Nutritional values are estimates based on standard ingredients.)
Melting Snowman Cupcakes
12 cupcakes
servings20
minutes18
minutes280
kcalIngredients
- Cupcake Base:
1 cup (125g) all-purpose flour
¼ cup (25g) cocoa powder
1 teaspoon baking powder
¼ teaspoon salt
½ cup (100g) granulated sugar
¼ cup (60ml) vegetable oil
1 large egg
½ cup (120ml) milk
1 teaspoon vanilla extract
- Vanilla Frosting:
1 cup (226g) unsalted butter, softened
3 cups (360g) powdered sugar
2 tablespoons milk
1 teaspoon vanilla extract
- Decorations:
12 large marshmallows (for heads)
Black icing or edible marker (for eyes & mouth)
Orange sprinkle or colored icing (for the nose)
Black icing (for arms)
Mini chocolate chips or sprinkles (for buttons)
Red licorice strings (for scarves)
Directions
- Preheat & Prepare: Preheat oven to 350°F (175°C). Line a 12-cup muffin tin with cupcake liners.
- Make the Batter: Whisk together flour, cocoa powder, baking powder, and salt. In a separate bowl, mix sugar, oil, egg, milk, and vanilla. Combine the wet and dry ingredients, stirring until smooth.
- Bake: Fill cupcake liners 2/3 full. Bake for 18-22 minutes or until a toothpick inserted in the center comes out clean. Let cool.
- Make the Frosting: Beat butter until creamy, then add powdered sugar, vanilla, and milk. Mix until fluffy.
- Decorate: Spread frosting on each cupcake in a “melting” pattern. Draw faces on marshmallows and press them onto the cupcakes. Use black icing for arms, sprinkles for buttons, and licorice for scarves.
- Serve & Enjoy!
Melting Snowman Cupcake FAQs
Q: Can I make these cupcakes ahead of time?
A: Yes! Bake the cupcakes a day in advance and decorate them before serving for the best look.
Q: What if I don’t have black icing?
A: Use melted chocolate or an edible marker to draw the snowman’s face.
Q: Can I use store-bought frosting?
A: Absolutely! If you’re short on time, a tub of vanilla frosting will work just fine.
Conclusion
Melting Snowman Cupcakes are a fun and festive winter treat that’s easy to make and decorate. Whether for a holiday party or a cozy baking day, these cupcakes bring warmth and joy with every bite. Try different variations to make them your own, and enjoy sharing them with family and friends!